Building a 3D Printed NAS with ModCase MASS and UnRAID
A spare RAM purchase becomes a 3D printed NAS, revealing the trade-offs of AliExpress hardware, modular case design, and UnRAID.

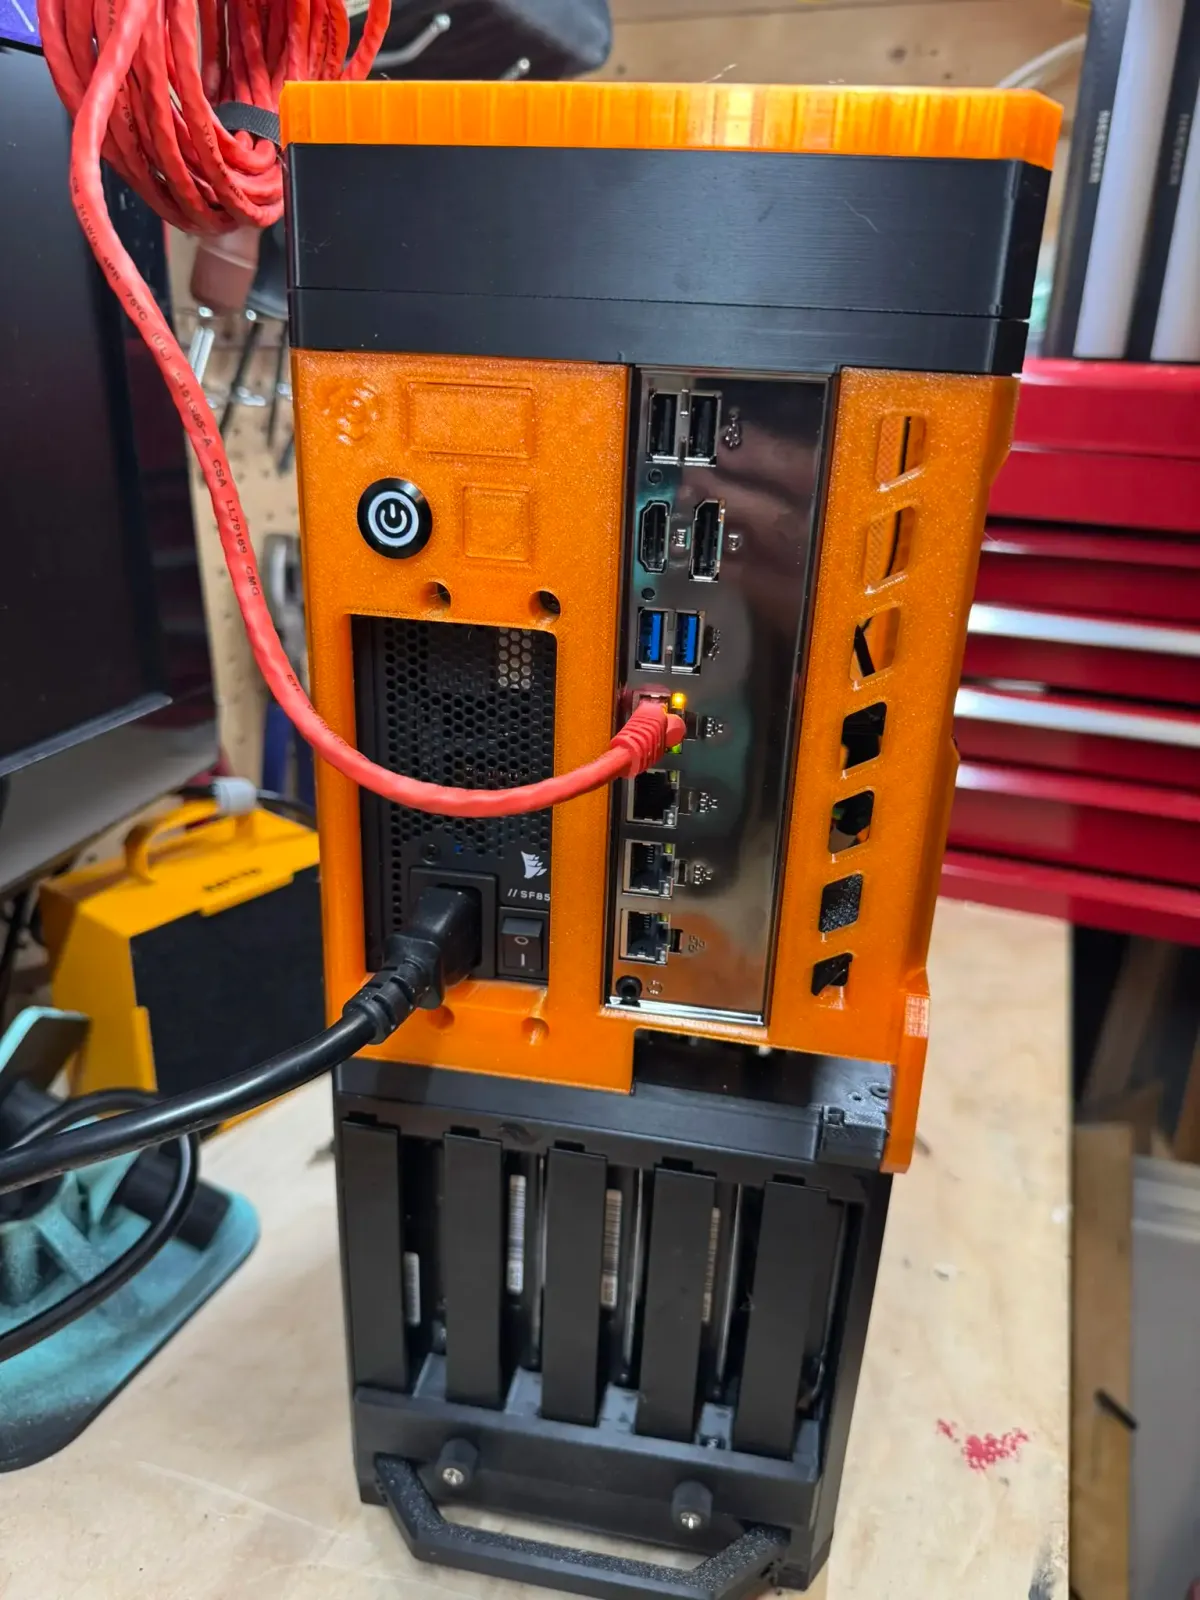
Building a NAS can be as simple as choosing a case, adding drives, and installing an operating system. This project took a less direct route. It started with spare SODIMM memory, moved through an unusual AliExpress motherboard, and eventually became a 3D printed storage server built around the ModCase MASS enclosure and UnRAID.
This article follows that process through three main lessons: what unusual AliExpress hardware can offer and what it gives up, why printing a NAS case is more about flexibility than cost, and where UnRAID fits between appliance-style simplicity and full storage administration.
From Spare RAM to a NAS Motherboard
This project started with spare parts looking for a home. Earlier this year, two 8 GB DDR4 SODIMM sticks turned up for about 30 CAD each, which felt like pre-RAM-apocalypse pricing. They were originally meant for a Framework motherboard project, but that plan did not work out. What remained was a pair of perfectly usable laptop memory sticks and no obvious machine to put them in.
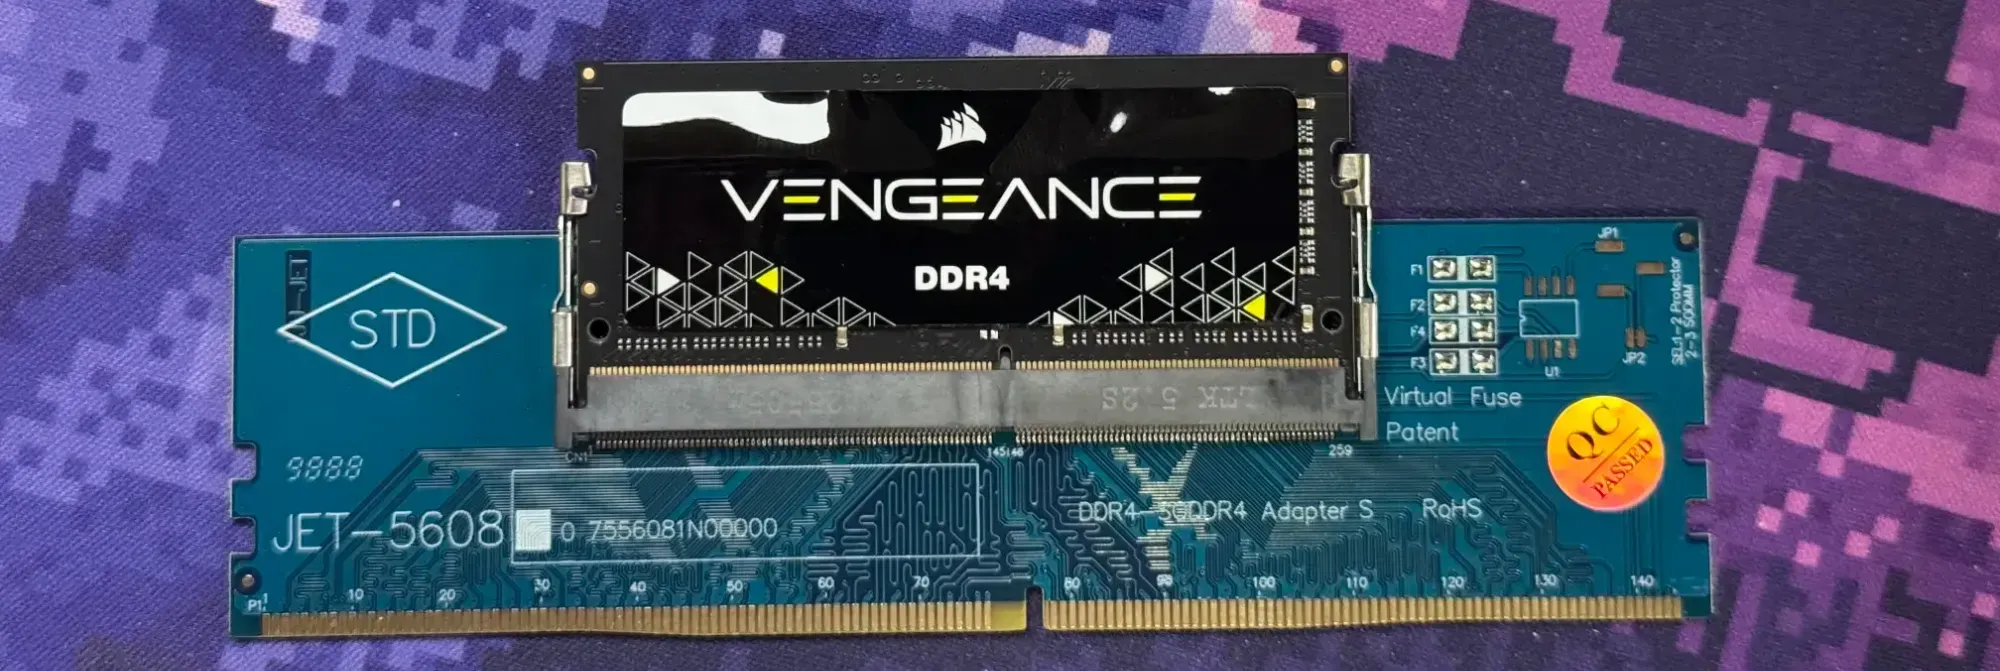
Laptops are typically not covered on Technodabbler, so the search shifted to other systems that could use SODIMM memory. Mini PCs were the obvious answer, and NUC-style systems would have been the easiest path, but lacked the expandability needed for some of the more interesting projects, like a DYI NAS or network appliances.
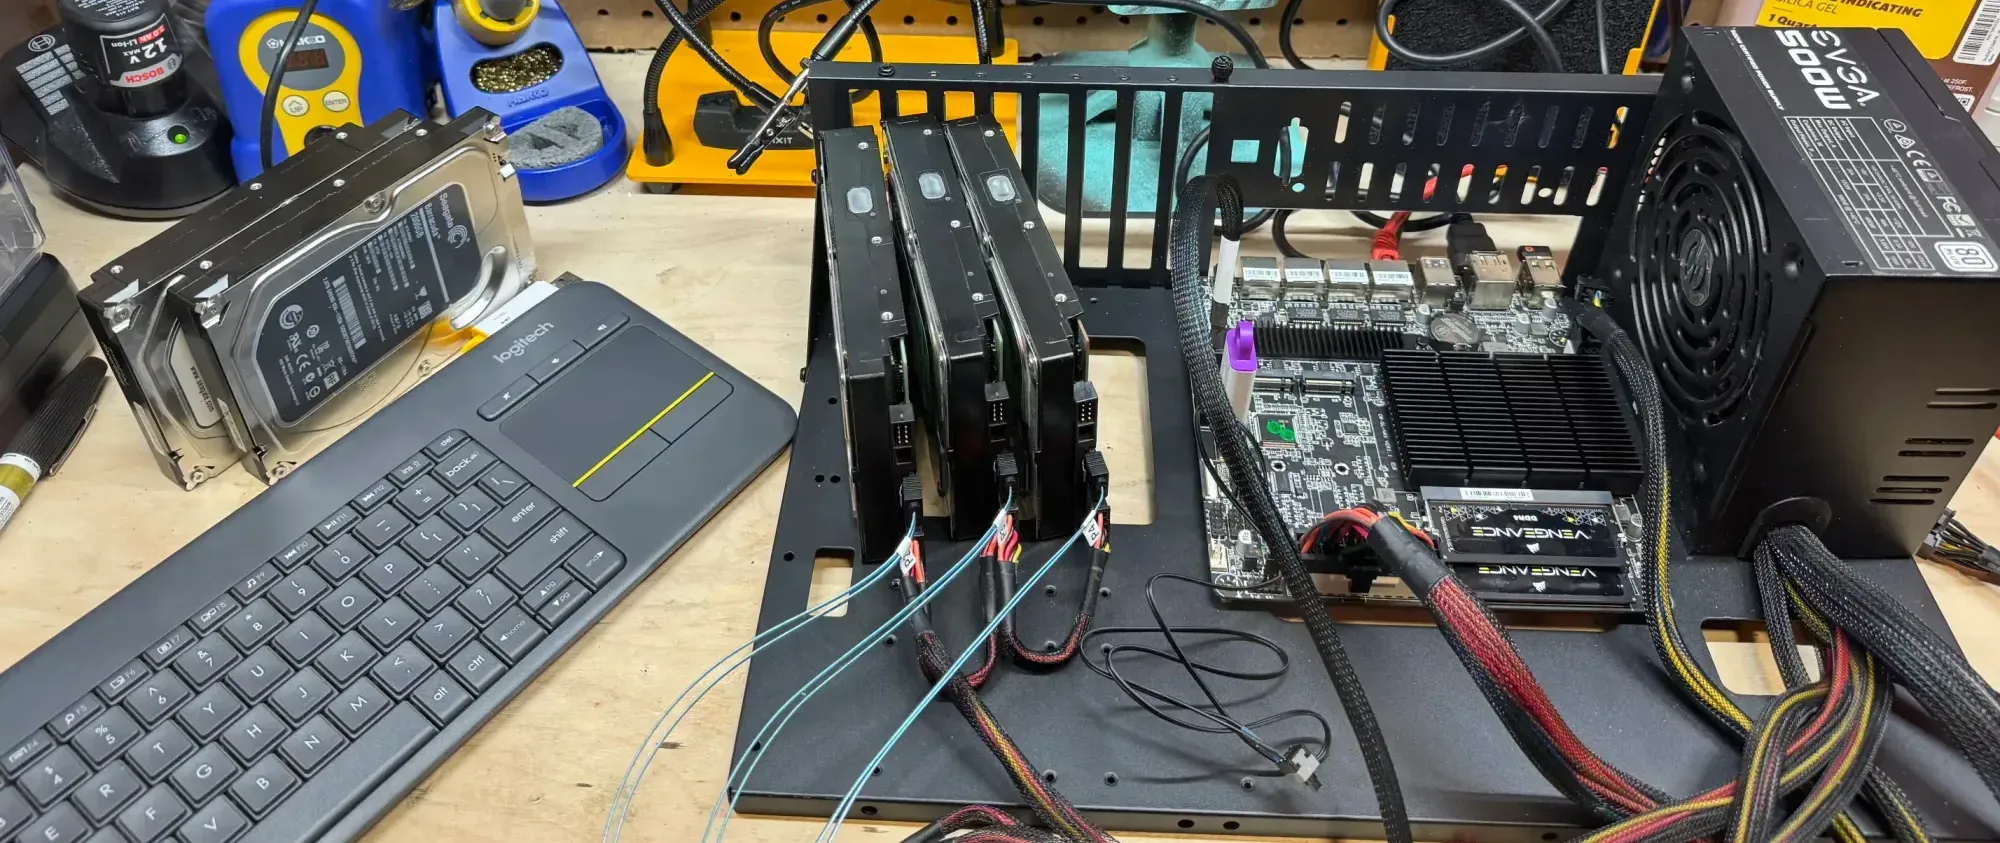
That constraint led toward a more unusual class of Mini-ITX boards built around laptop-style memory, found on marketplaces like AliExpress. These boards are often aimed at embedded systems: small servers, firewalls, routers, or NAS builds rather than ordinary desktop PCs. The board that best fit our goals used Intel’s Celeron J4125, a modest low-power processor commonly found in PC appliances (NAS, firewalls, etc). It differentiated itself from more common ITX board through its I/O: six SATA ports, two M.2 slots, four 2.5 GbE network ports, and DDR4 SODIMM, all on a compact motherboard. With the hardware decided, the project was set: this is going to be a NAS.
 Alex Denault
Check out this ultimate guide on Network Attached Storage (NAS)
Why AliExpress Hardware Offers Different Choices
Boards like this exist in a different part of the hardware market than normal retail motherboards. A mainstream board usually needs a clear customer base, enough expected volume to justify production, packaging, support, distribution, and inventory sitting in stores or warehouses. That process tends to favor familiar categories: gaming boards, workstation boards, compact office systems, and a few server-oriented options from established brands.
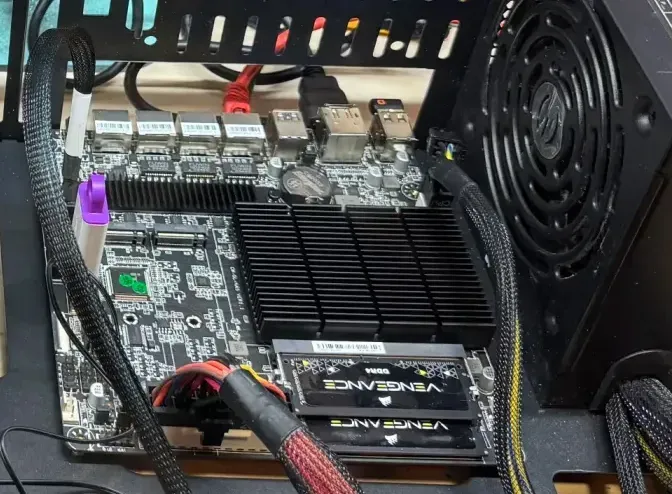
AliExpress exposes a different layer of the supply chain. Some products appear to come from smaller production runs, regional suppliers, or sellers closer to the factories making the hardware. That makes it easier for unusual configurations to reach buyers directly, even when the product would be too niche for a normal North American retail channel. Many of these boards also seem to be designed first for practical appliance roles, such as routers, firewalls, and small NAS systems. Once those designs exist, extra production or closely related variants can end up on AliExpress, where home lab builders find them under seller names rather than familiar manufacturer brands. The board used in this build fits that category, with similar hardware found in several firewall appliances.
The Price of Unusual Hardware
The drawback is that the product manufacturer can be difficult to pin down. Boards like this are often described by the seller name, the CPU model, or a loose combination of features, rather than by a stable manufacturer and model number.
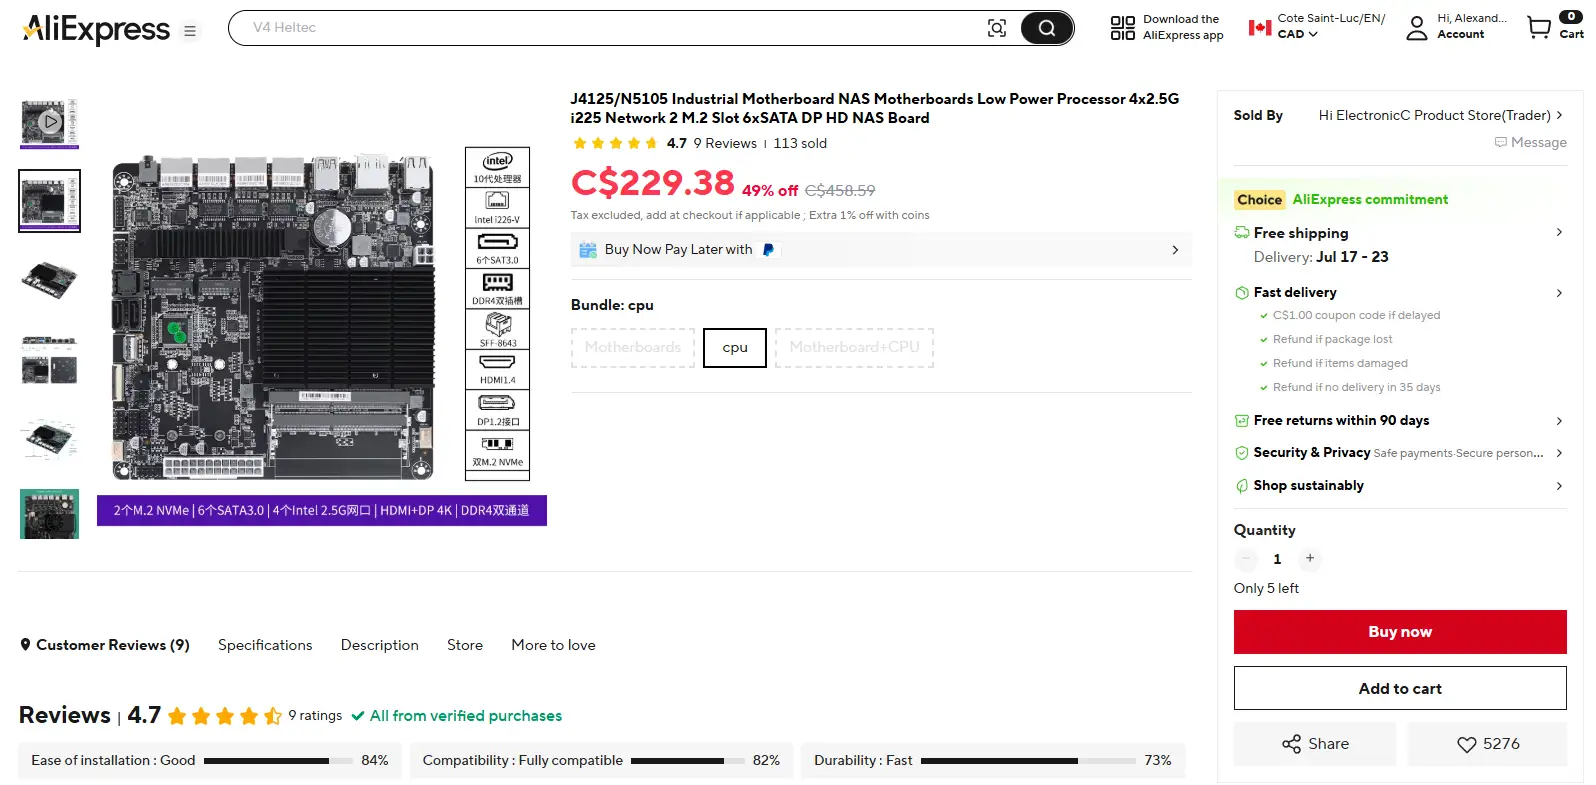
That feels unusual from a North American hardware perspective, where the motherboard market is dominated by established brands such as ASUS, MSI, Gigabyte, and ASRock. These brands provide manuals, BIOS updates, warranty expectations, and have public accountability. No-name or seller-branded hardware gives up much of that structure. There may be a real manufacturer behind the board, but the buyer may never know who it is, what changed between revisions, or whether a future update exists.
That trade-off means giving up a lot of the support and compatibility testing expected from mainstream hardware. There may be no clear BIOS update path, no maintained support page, and no easy way to confirm whether a problem is a defect, a firmware limitation, or simply how that board revision was designed. In this build, that showed up in a practical way: the last network port and the second M.2 slot cannot be enabled at the same time, as they share PCIe lanes.
Choosing to Print the NAS Case
Once we established we were building a NAS, the project needed an enclosure. The practical answer would have been a commercial NAS case, something like the Jonsbo N4. Its a compact case which is relatively inexpensive, and already designed around the basic problem of fitting Mini-ITX hardware, hard drives, cooling, and a power supply into a small storage box. But Technodabbler rarely choses the easy path.
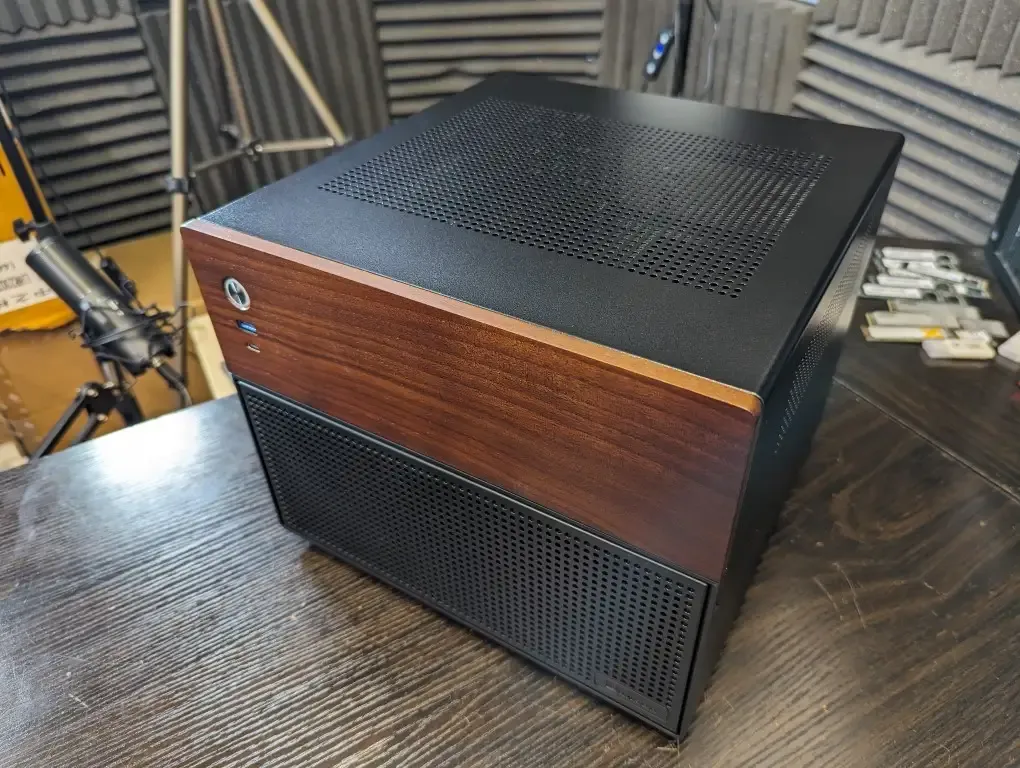
The Mini-ITX format made printing more tempting. Earlier 3D-printed computer case projects had already shown that printed enclosures provided customizability. This project was an opportunity to test this idea in a more demanding context.
 Alex Denault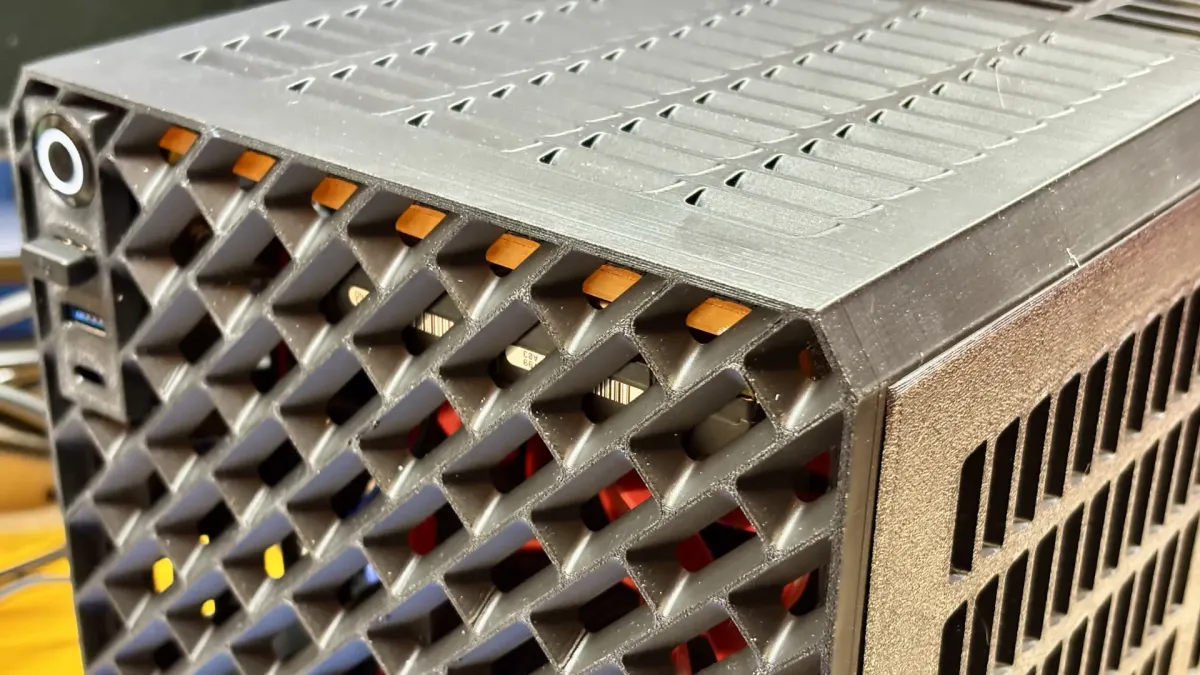
Technodabbler previously printed a full desktop case.
A NAS case has more requirements than a small desktop enclosure: hard drives need secure mounting and the additional hardware requires both steady airflow and more cable clearance. For this build, the requirements were even more demanding: the case had to stay as compact as possible, take advantage of the Mini-ITX motherboard and SFX power supply already on hand, hold at least four 3.5-inch drives, and leave room to keep experimenting with translucent filament.
ModCase MASS and the Value of Flexibility
The ModCase MASS was an ideal choice with its modular design and iconic vertical esthetics. The MASS can be built as a small ITX case, with the drives bay subsequently added. As with all PC cases, structural components and walls are printed in PETG, to better handle heat generated by the computer's component.
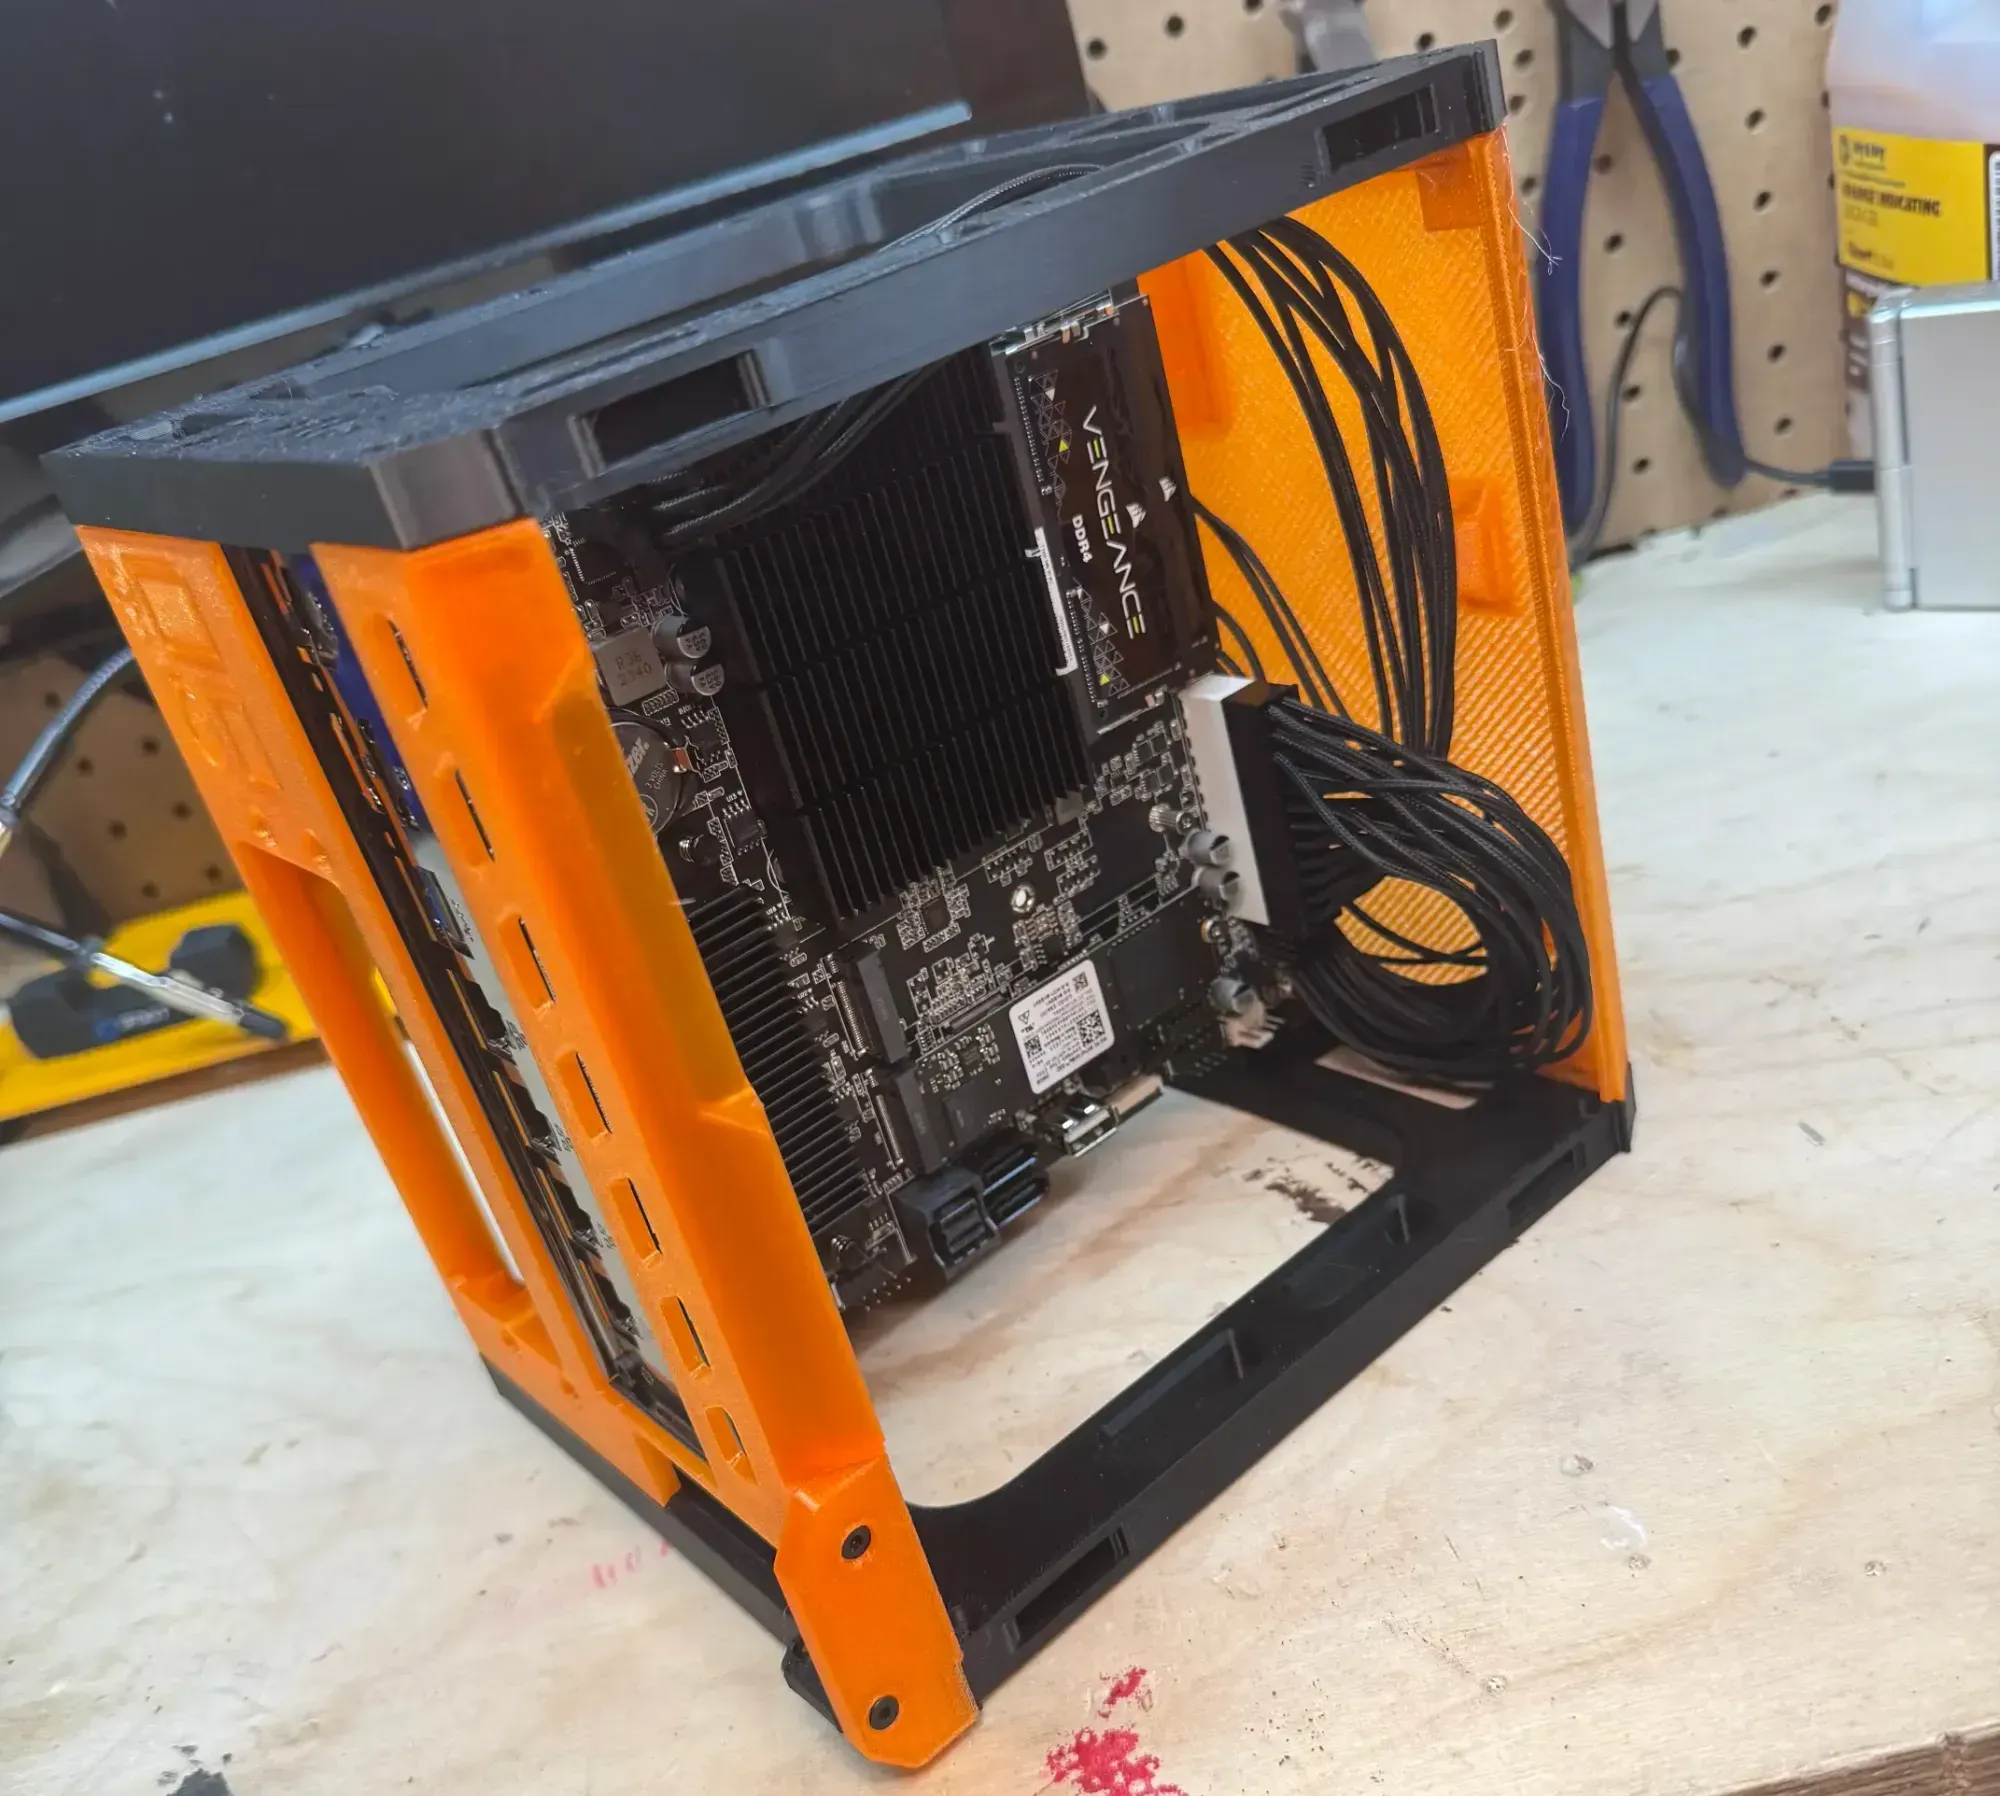
That modular design also made the build more practical. Parts could be printed, checked, and assembled as the project moved forward, instead of printing the entire case before discovering a tolerance or orientation problem. That lesson came from earlier printed projects, where printing too many parts before test-fitting made the project an expensive failure, wasting both time and filament.
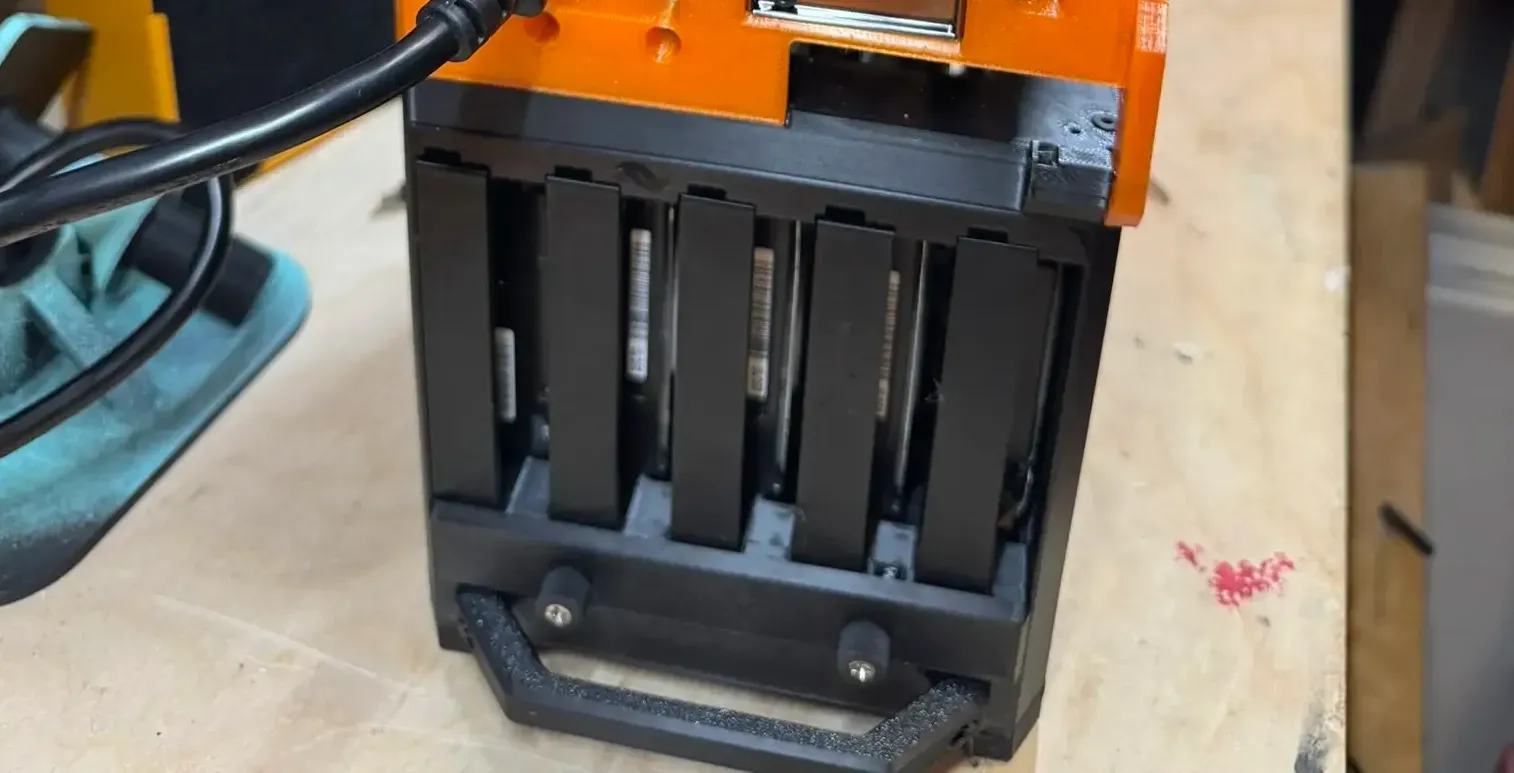
The modular nature of the MASS design made assembly tricky: some pieces could be installed out of order, and a few could be installed in the wrong direction if the assembly was rushed. The drive trays were printed in TPU, which felt like an excellent material choice for parts that need some flexibility around hard drives, and the tower layout with large 140mm fan support gave the case plenty of ventilation.
Printing Lessons
The first failed prints had nothing to do with the case design. One of the printer’s cable clips had come loose, leaving a cable low enough to snag on the print head during the print. When that happened, the build plate was shifted by a few millimeters, creating an offset halfway through. Once the loose cable was clipped back into place, the problem disappeared and the top section of the NAS printed successfully.
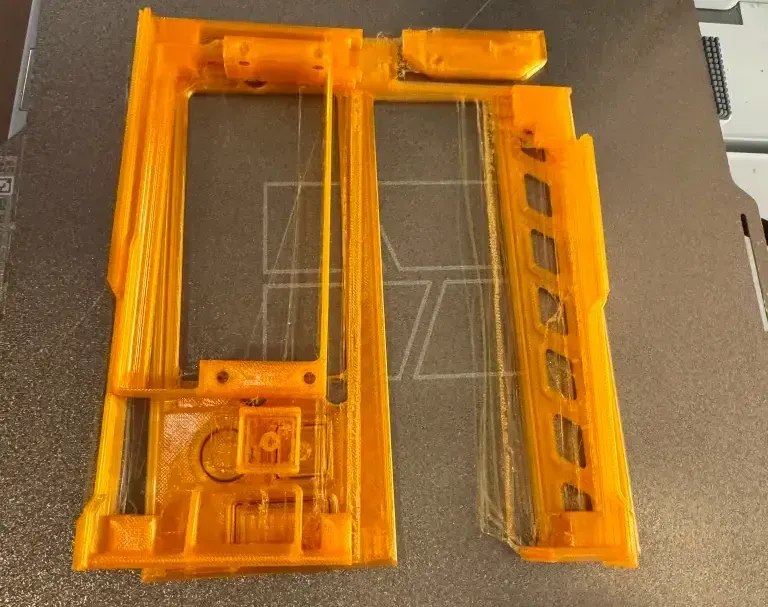
The mesh panels were one of the more interesting printing lessons. In a normal 3D print, a solid shape is usually not filled completely with plastic. That would waste material, add print time, and rarely add useful strength. Instead, the slicer prints the inside as infill: a repeating internal structure that supports the outer walls, top layers, and bottom layers.
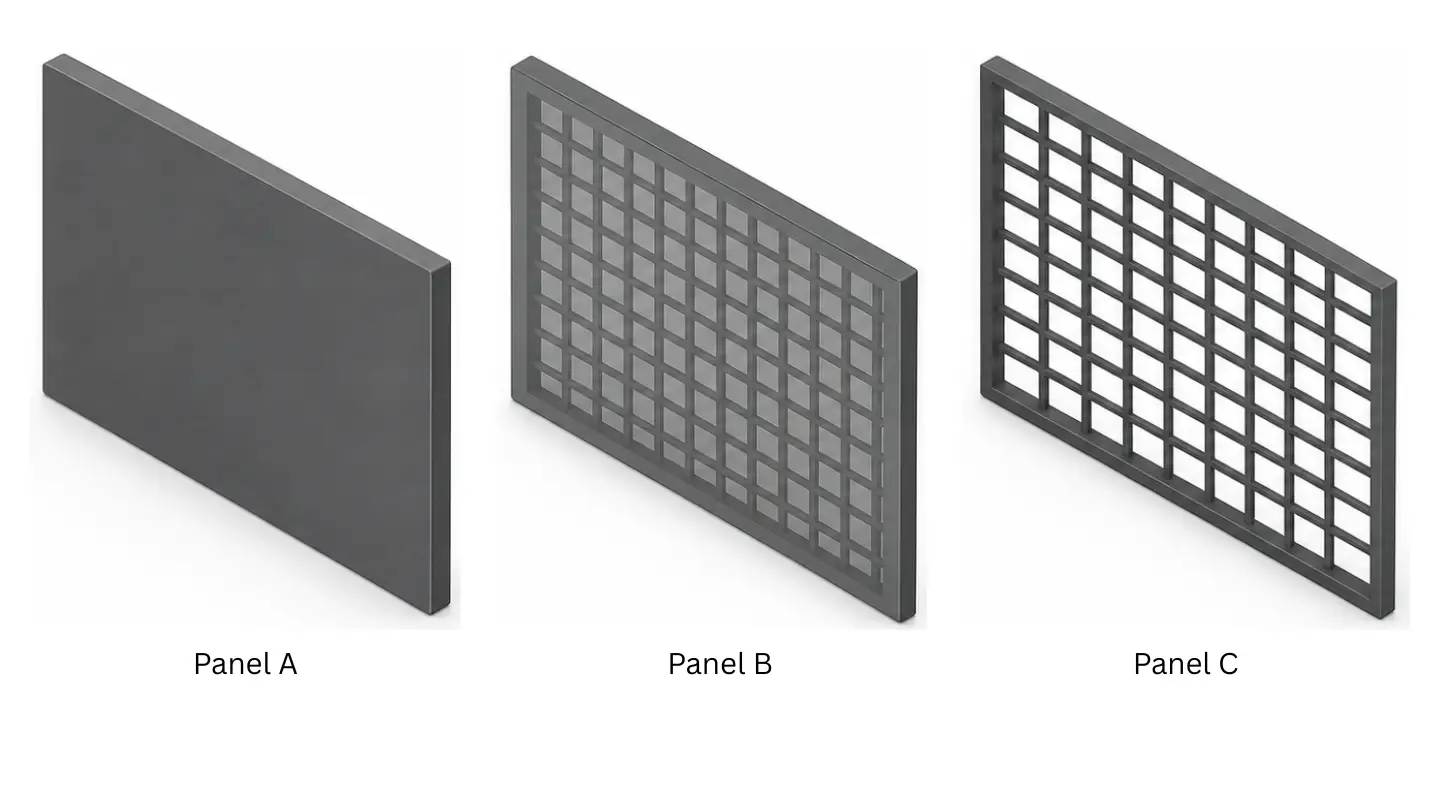
MASS uses that normal optimization as a design feature. For the vented sections, the mesh area is treated as a separate body in the slicer and printed with no top layers, no bottom layers, and no outside perimeters. With the outer skin removed, the infill pattern becomes the visible surface. The result is a ventilation mesh generated from slicer settings, rather than a panel where every opening had to be modeled by hand.
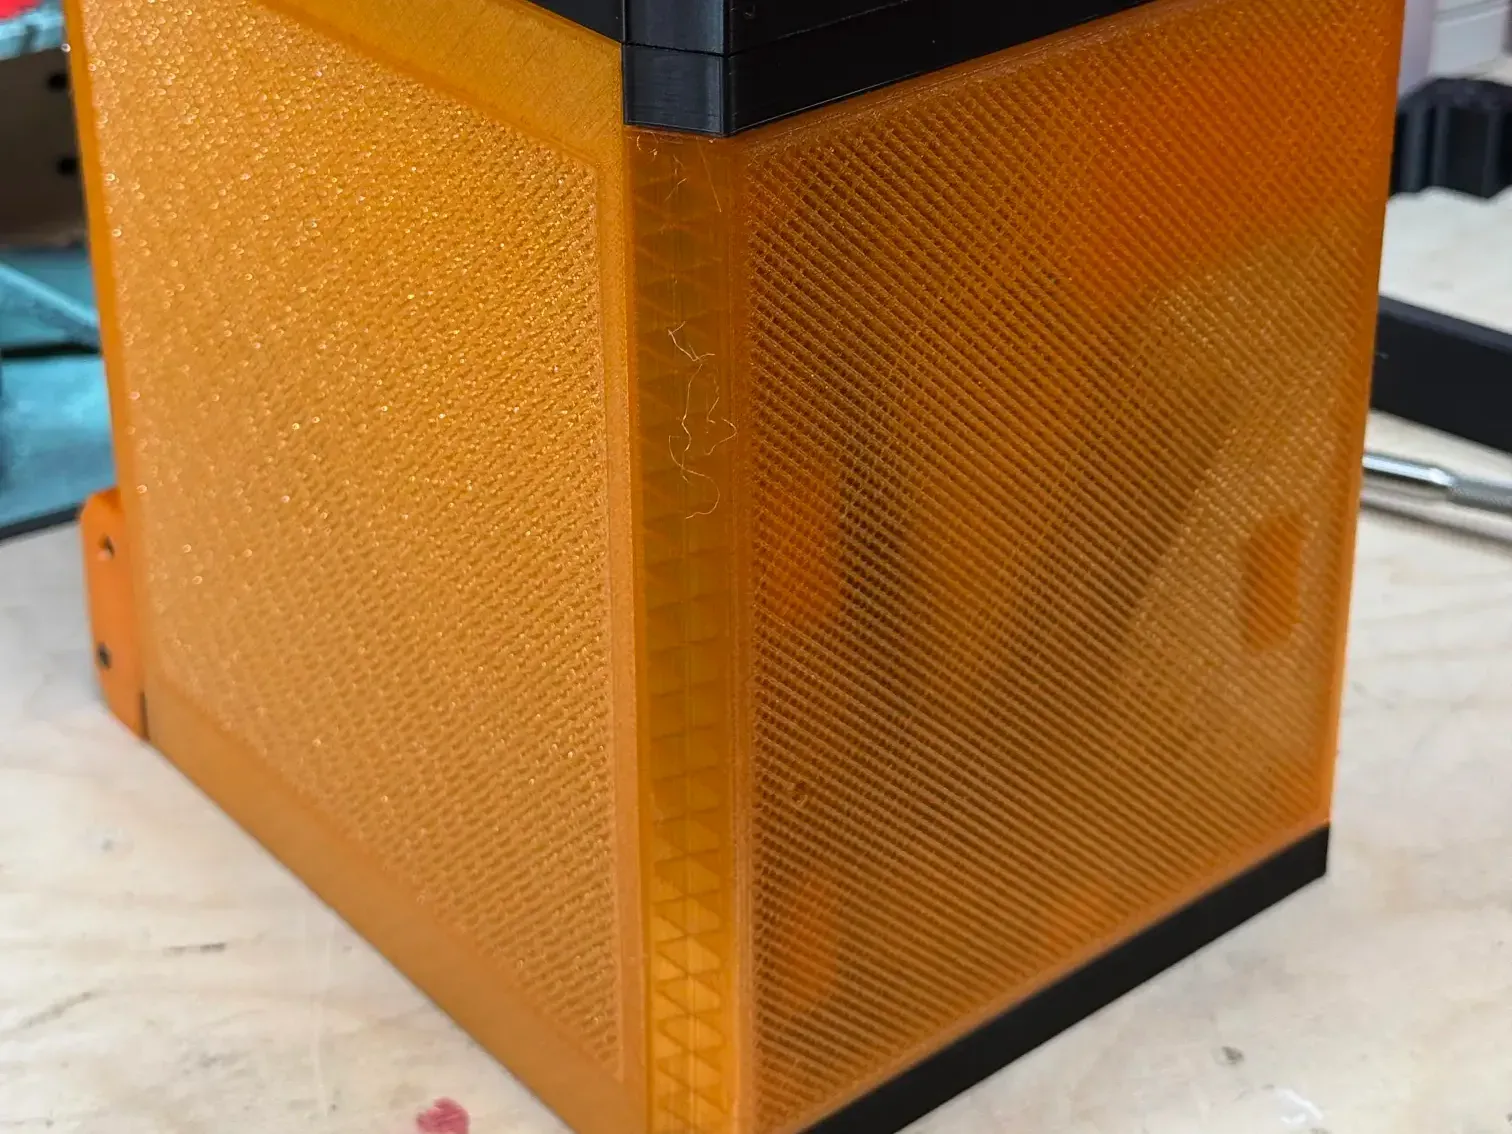
That approach explains why the mesh needs its own slicer settings. The solid body still needs strength, walls, and normal surfaces. The mesh body needs the opposite: enough infill density to create a usable grille, but no top or bottom skin to cover it. In the MASS instructions, the mesh is set to 40 percent grid infill with zero perimeters, zero top layers, and zero bottom layers. It is a clever use of ordinary slicer controls, but it also means the model has to be assembled carefully.
UnRAID as the Software Choice
Once the hardware and case were coming together, the software choice became the next experiment. HexOS and TrueNAS were both reasonable options, but they make stronger assumptions about what the NAS should become. For example, TrueNAS is built around ZFS. HexOS also leans on ZFS while trying to make the experience simpler. Those are valid choices, but they still point the builder toward a specific storage model from the start.
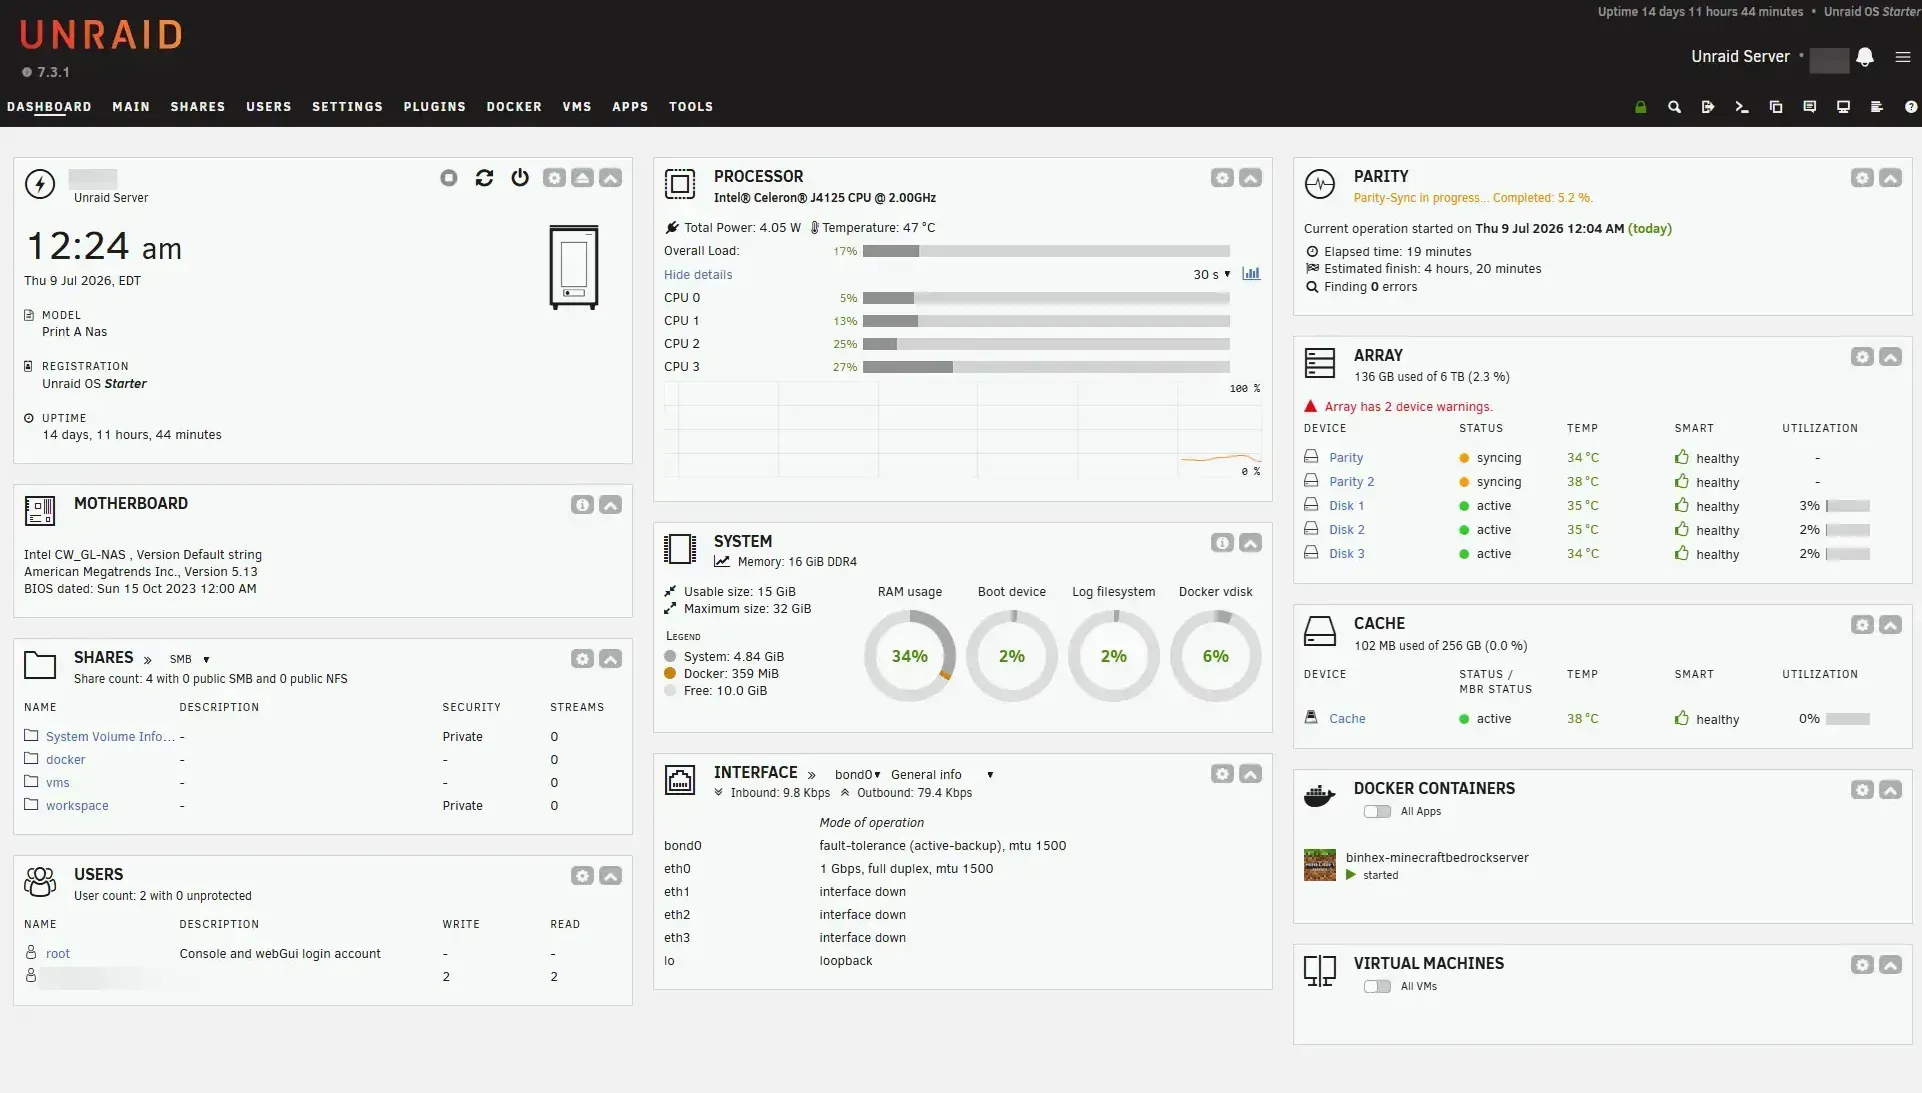
UnRAID was interesting for the same reason the ModCase MASS enclosure was interesting. It started with the idea of building a NAS, but left more room to decide what kind of NAS it would become. By default, UnRAID provide storage using a strategy unlike traditional RAID (hence the name) but also allows for ZFS and Btrfs pools. This makes it possible to choose between disk-level flexibility, pooled storage, or a mix of both approaches.
Understanding UnRAID’s Storage Model
UnRAID’s classic storage model is easiest to understand by comparing it to the usual RAID mindset. In a traditional RAID setup, several disks are combined into one storage volume. The system presents that combined volume to the user, and the array decides how the data is distributed underneath. Unraid approaches the problem differently. The storage disks remain individually formatted, and Unraid simply write to files using strategic round-robin order. In addition, one or more parity disks provide protection if a drive fails.
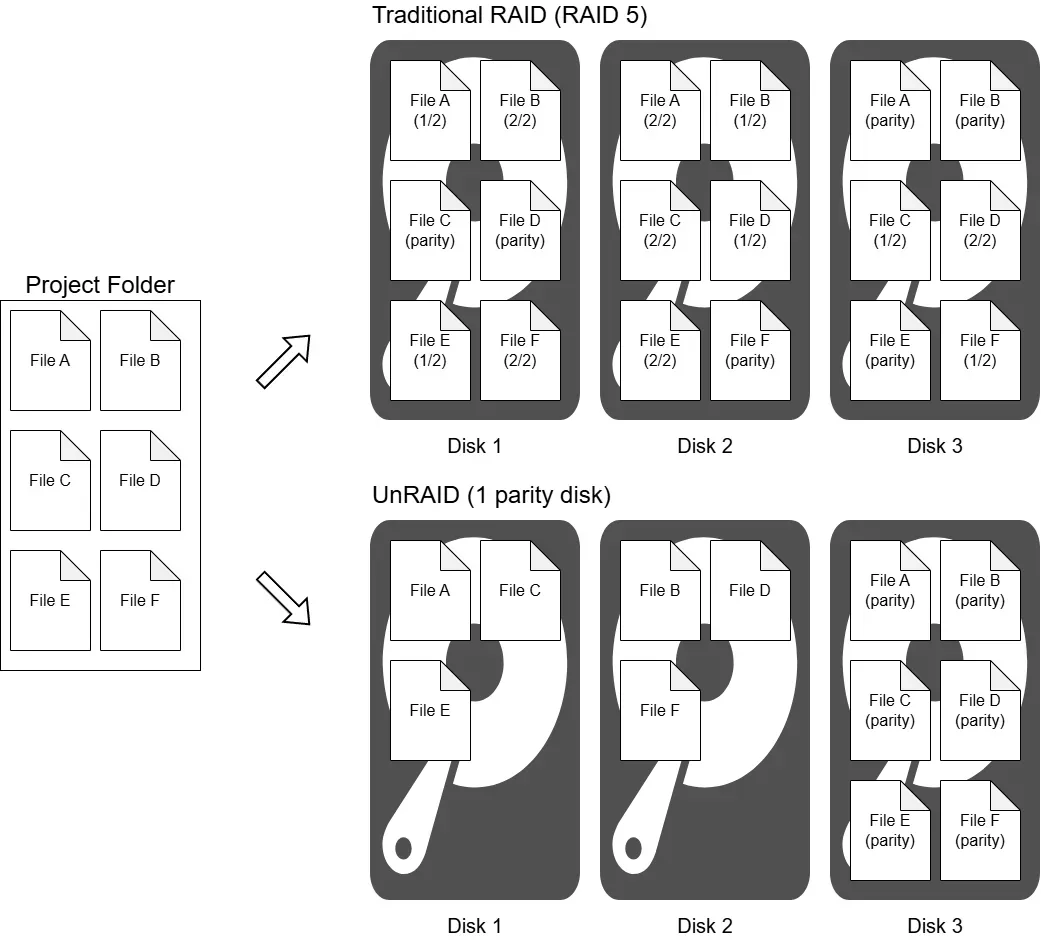
That design is the reason UnRAID has stayed appealing to a certain kind of home NAS builder. The files are not locked inside a striped array that only makes sense when every disk, controller, and configuration detail is present. A data disk can still be read as a normal filesystem outside the array. For anyone who remembers hardware RAID controllers, proprietary arrays, or the fear of data being trapped behind a failed storage setup, UnRAID is a meaningful design choice.
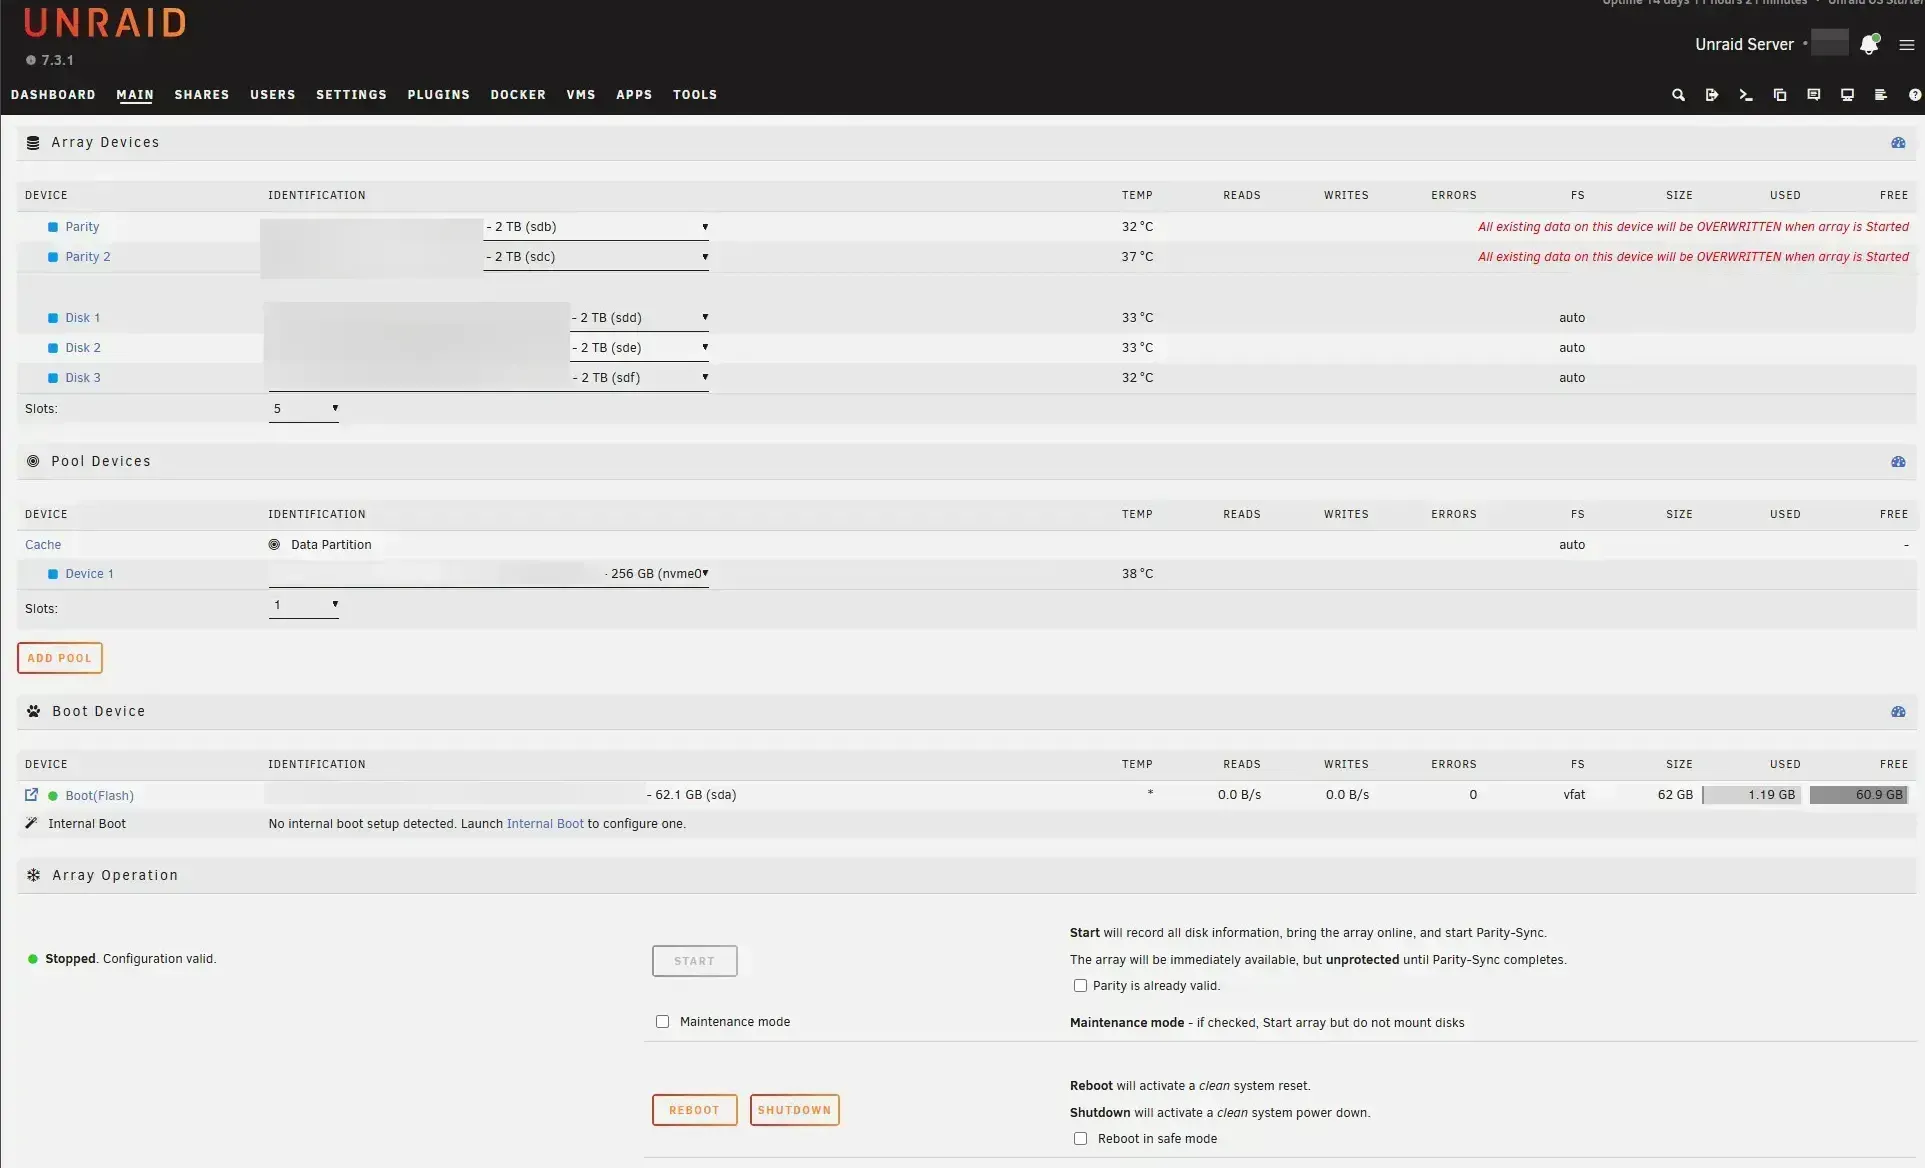
The terminology can still be confusing. In UnRAID, a share is not just a shared folder in the casual network sense. It behaves more like a storage volume from the user’s point of view, with its own rules for where data should live. A share can prefer certain disks, avoid others, use cache or pool storage, and follow allocation rules for how files are placed. That flexibility is useful, but it also means the share is part of the storage architecture, not just a folder being exposed on the network.
The Interface Is the Real Hurdle
The storage model is unusual, but it is not unreasonable. The application hosting subsystem is also useful, especially for a small NAS that may eventually run more than file shares. Installing apps was fairly straightforward once Docker was enabled and the storage location was checked. The problem was not capability but discoverability.
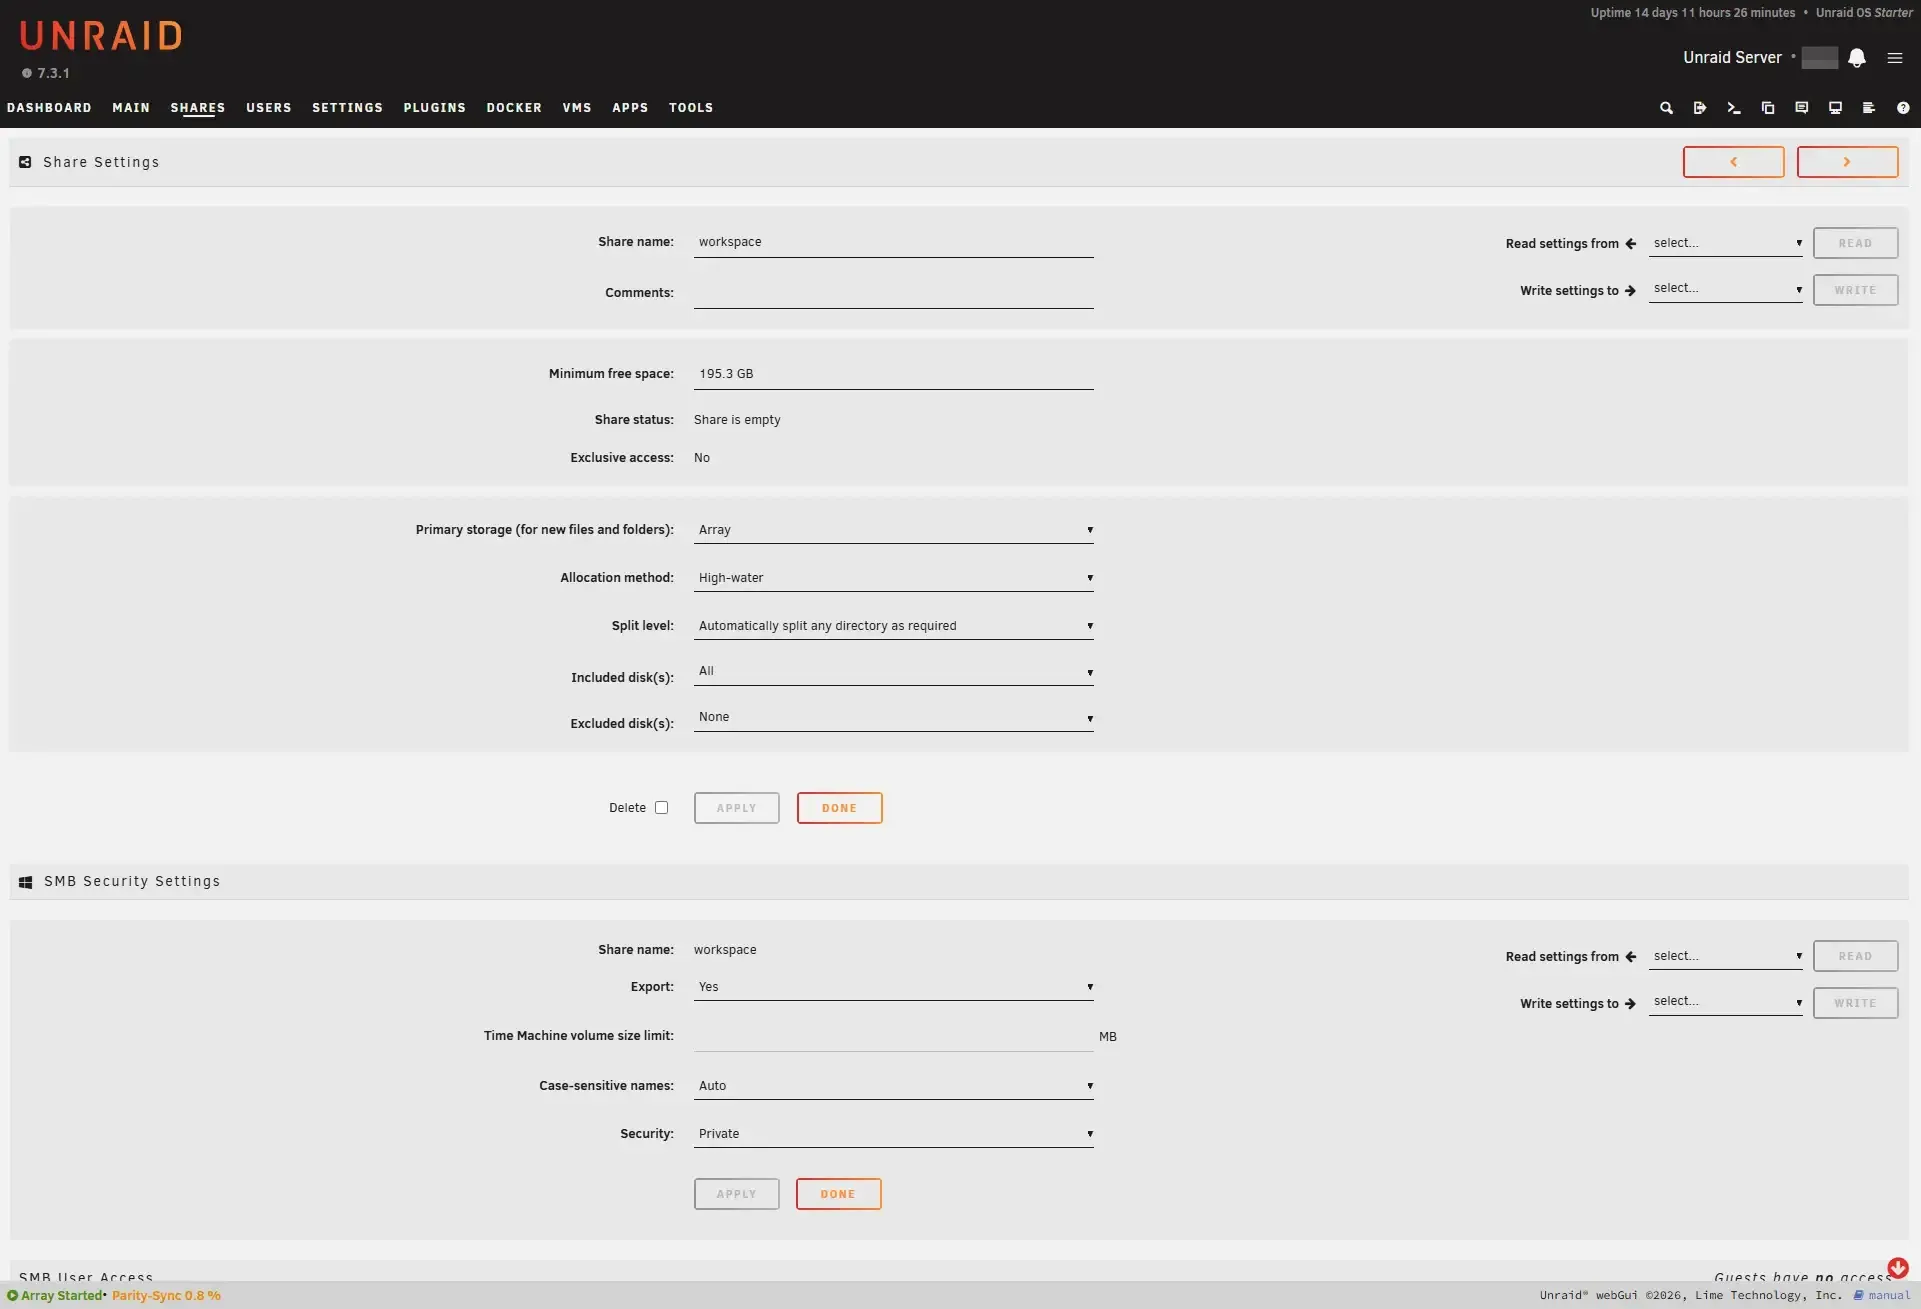
Several setup steps required knowing UnRAID’s conventions before the interface explained them. Trial activation did not work cleanly and required manually uploading the key. Changing the hostname required stopping the array, which felt unrelated from a new user’s point of view. Docker was not started by default, and its storage location needed to be changed before installing containers so application data would land in the right place. A brief ZFS experiment also showed the same pattern: the feature existed, but the workflow followed Unraid’s own storage model rather than the way the task would normally be approached elsewhere.
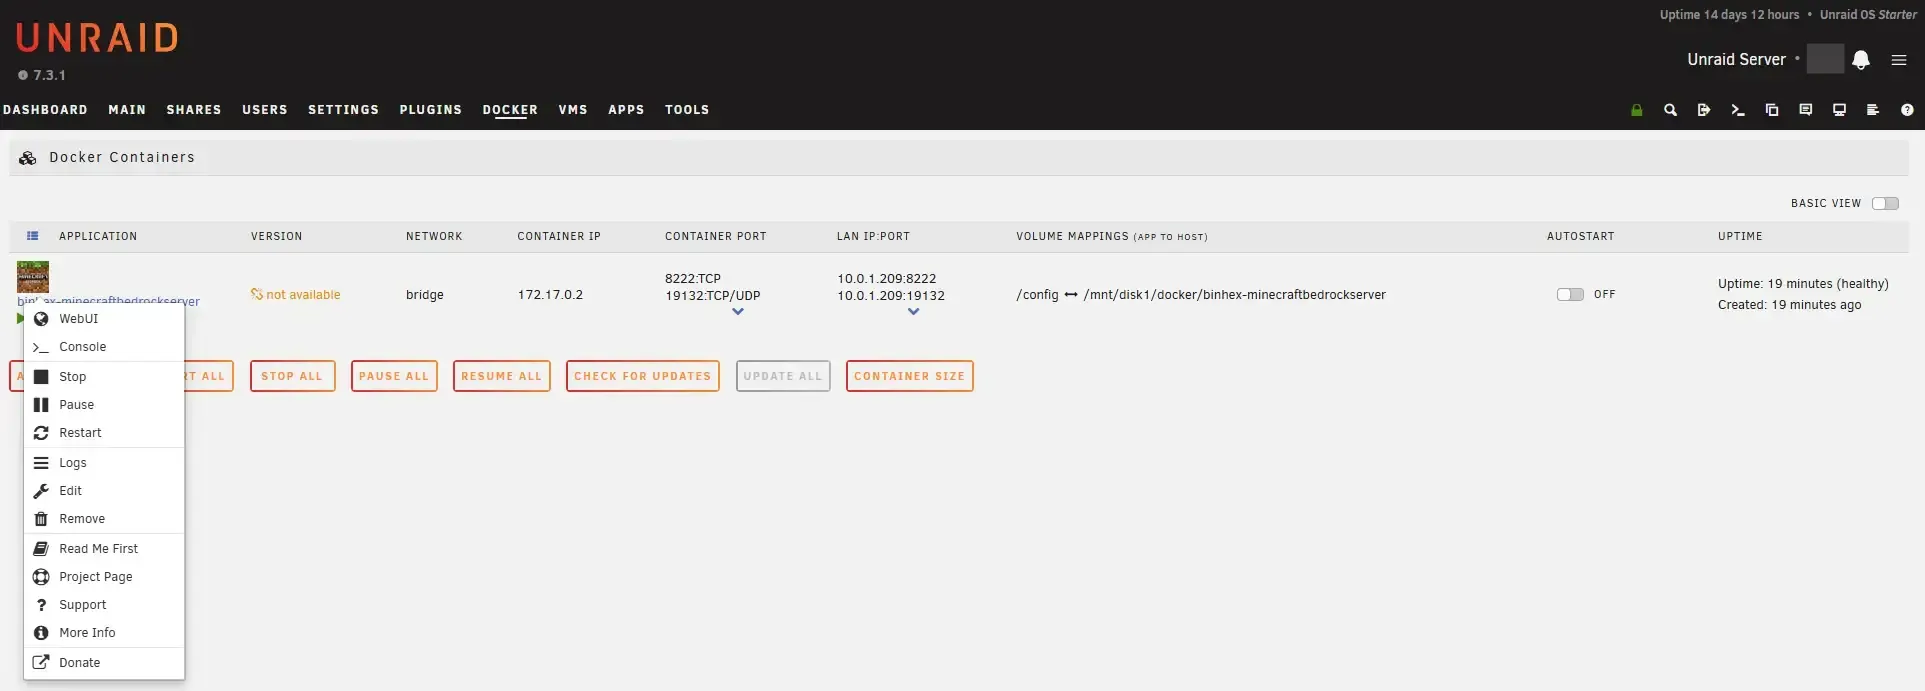
The clearest example was container management. Installing apps was easy enough, but managing a container afterward was not obvious. The controls were hidden behind a left-click on the container icon, which opened a context menu. That had to be found through a search engine, not through the interface itself. For a platform that otherwise has a lot going for it, this may be UnRAID’s biggest obstacle for new users: it can do the job, but it often expects the user to already know how UnRAID wants the job done.
Modern Retrospective: What This Build Says About DIY NAS Projects
A DIY NAS build three major choices: the hardware, the enclosure, and the software. This project explored all three with unconventional choices with tradeoffs. The AliExpress motherboard offered a configuration that would be hard to find through normal retail hardware, but it also brought the uncertainty of unclear manufacturing, limited documentation, and uneven firmware behavior.
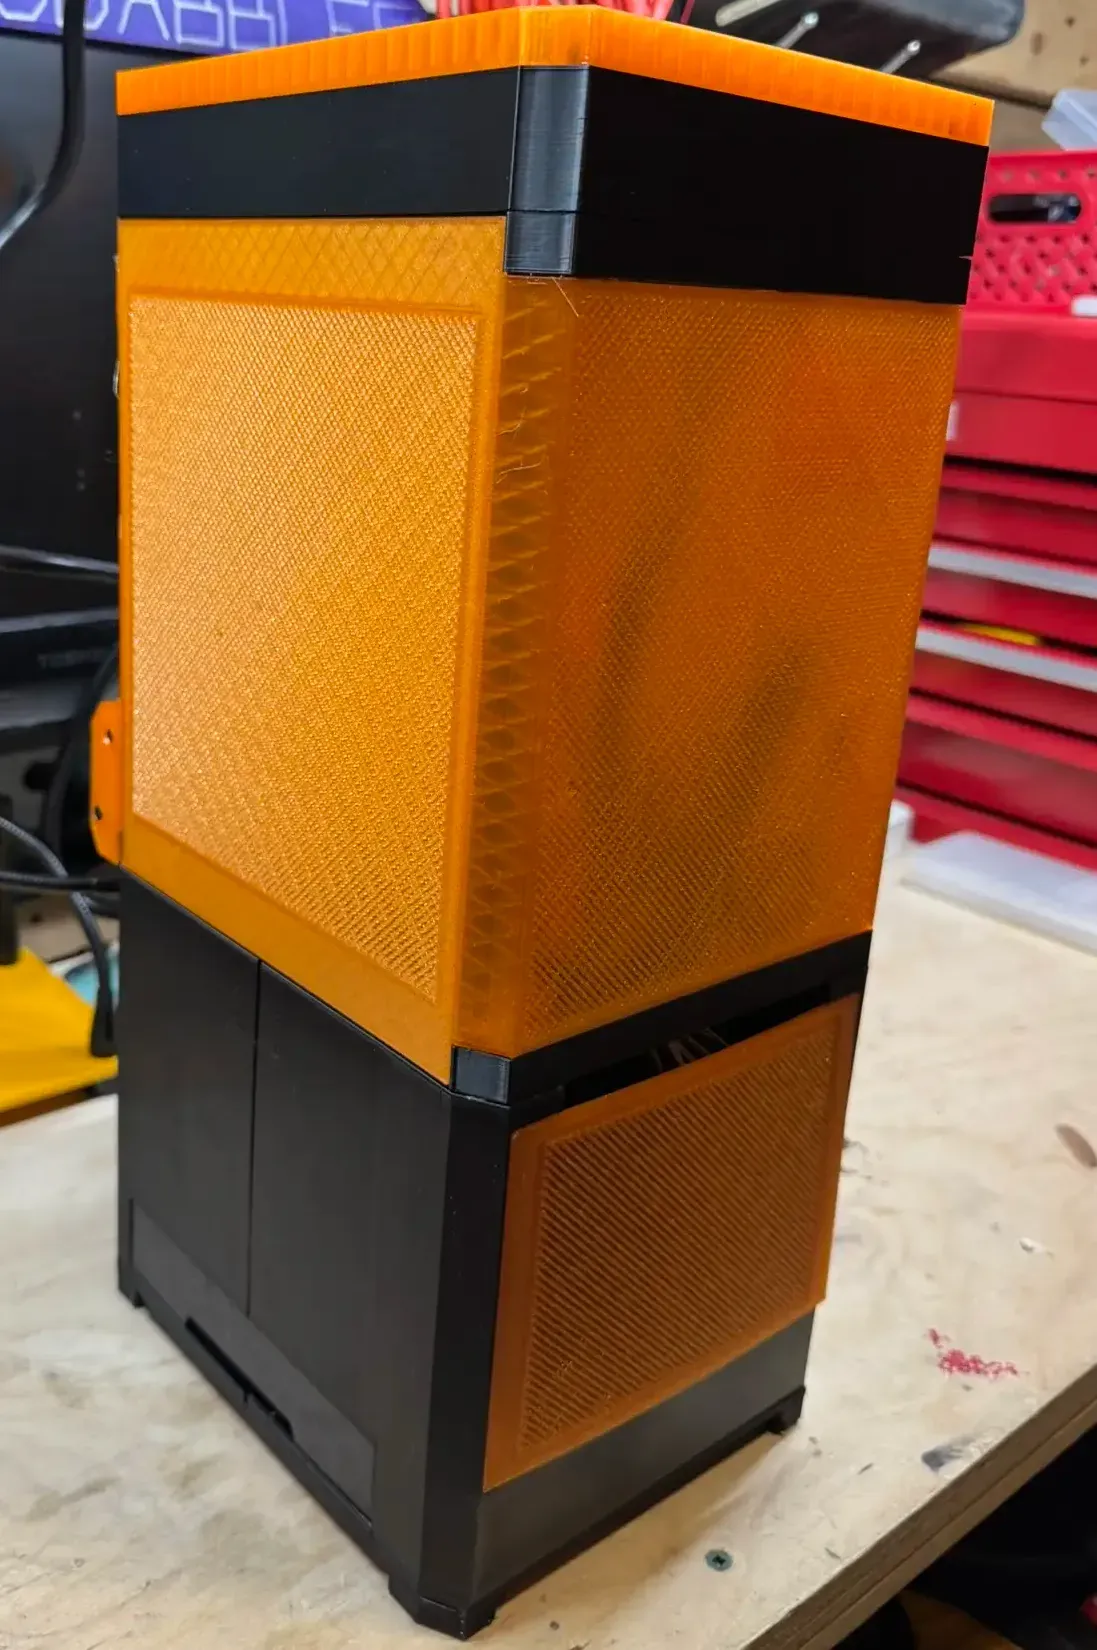
The printed case provided a similar conclusion: printing a NAS enclosure is viable, and the ModCase MASS design shows why it can be useful, but not in a cost effective way. Once material, failed prints, hardware, and time are included, a commercial case may be the more practical purchase.
UnRAID completed the pattern on the software side. It offered enough flexibility to experiment with storage, shares, Docker applications, and different filesystem approaches, but its interface often assumed prior knowledge. The useful lesson is that flexibility always has a cost. For a simple solution, buying a prebuilt NAS would be much easier. For a home lab project built around spare parts and experimentation, exploring those tradeoffs is part of the journey.
Have you built your own NAS, or are you still deciding what should go into it? Share what hardware and software you chose in the comments, then continue with the Ultimate Homelab Guide for a broader look at planning, building, and maintaining a practical home lab.