Can you Print a Vintage Toy?
With toy prices on the rise, is it worth turning to 3D printing to recreate vintage collectibles? A 48-piece GIJoe VAMP puts the question to the test.

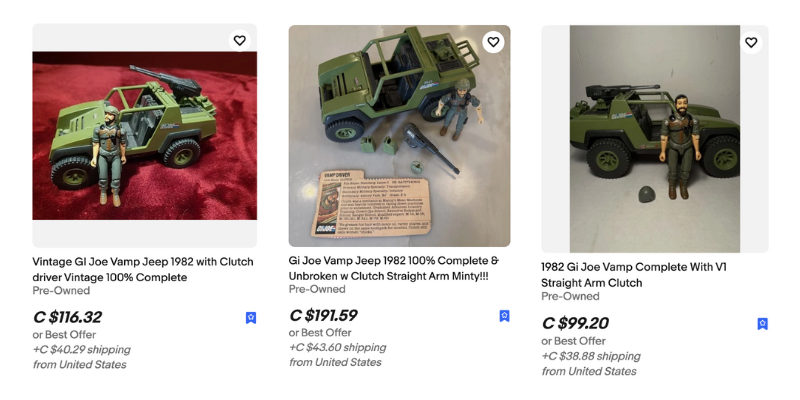
Vintage toys are only getting more expensive. A complete GIJoe VAMP, the iconic all-terrain vehicle from the 1980s, often sells for $85 or more on collector marketplaces. And modern reimaginings aren’t any more affordable: Hasbro’s Classified Series Snowcat, updated for 6-inch figures, retails at $325 USD.
For hobbyists and collectors, the price tags raise a fair question: is it better to print your own?
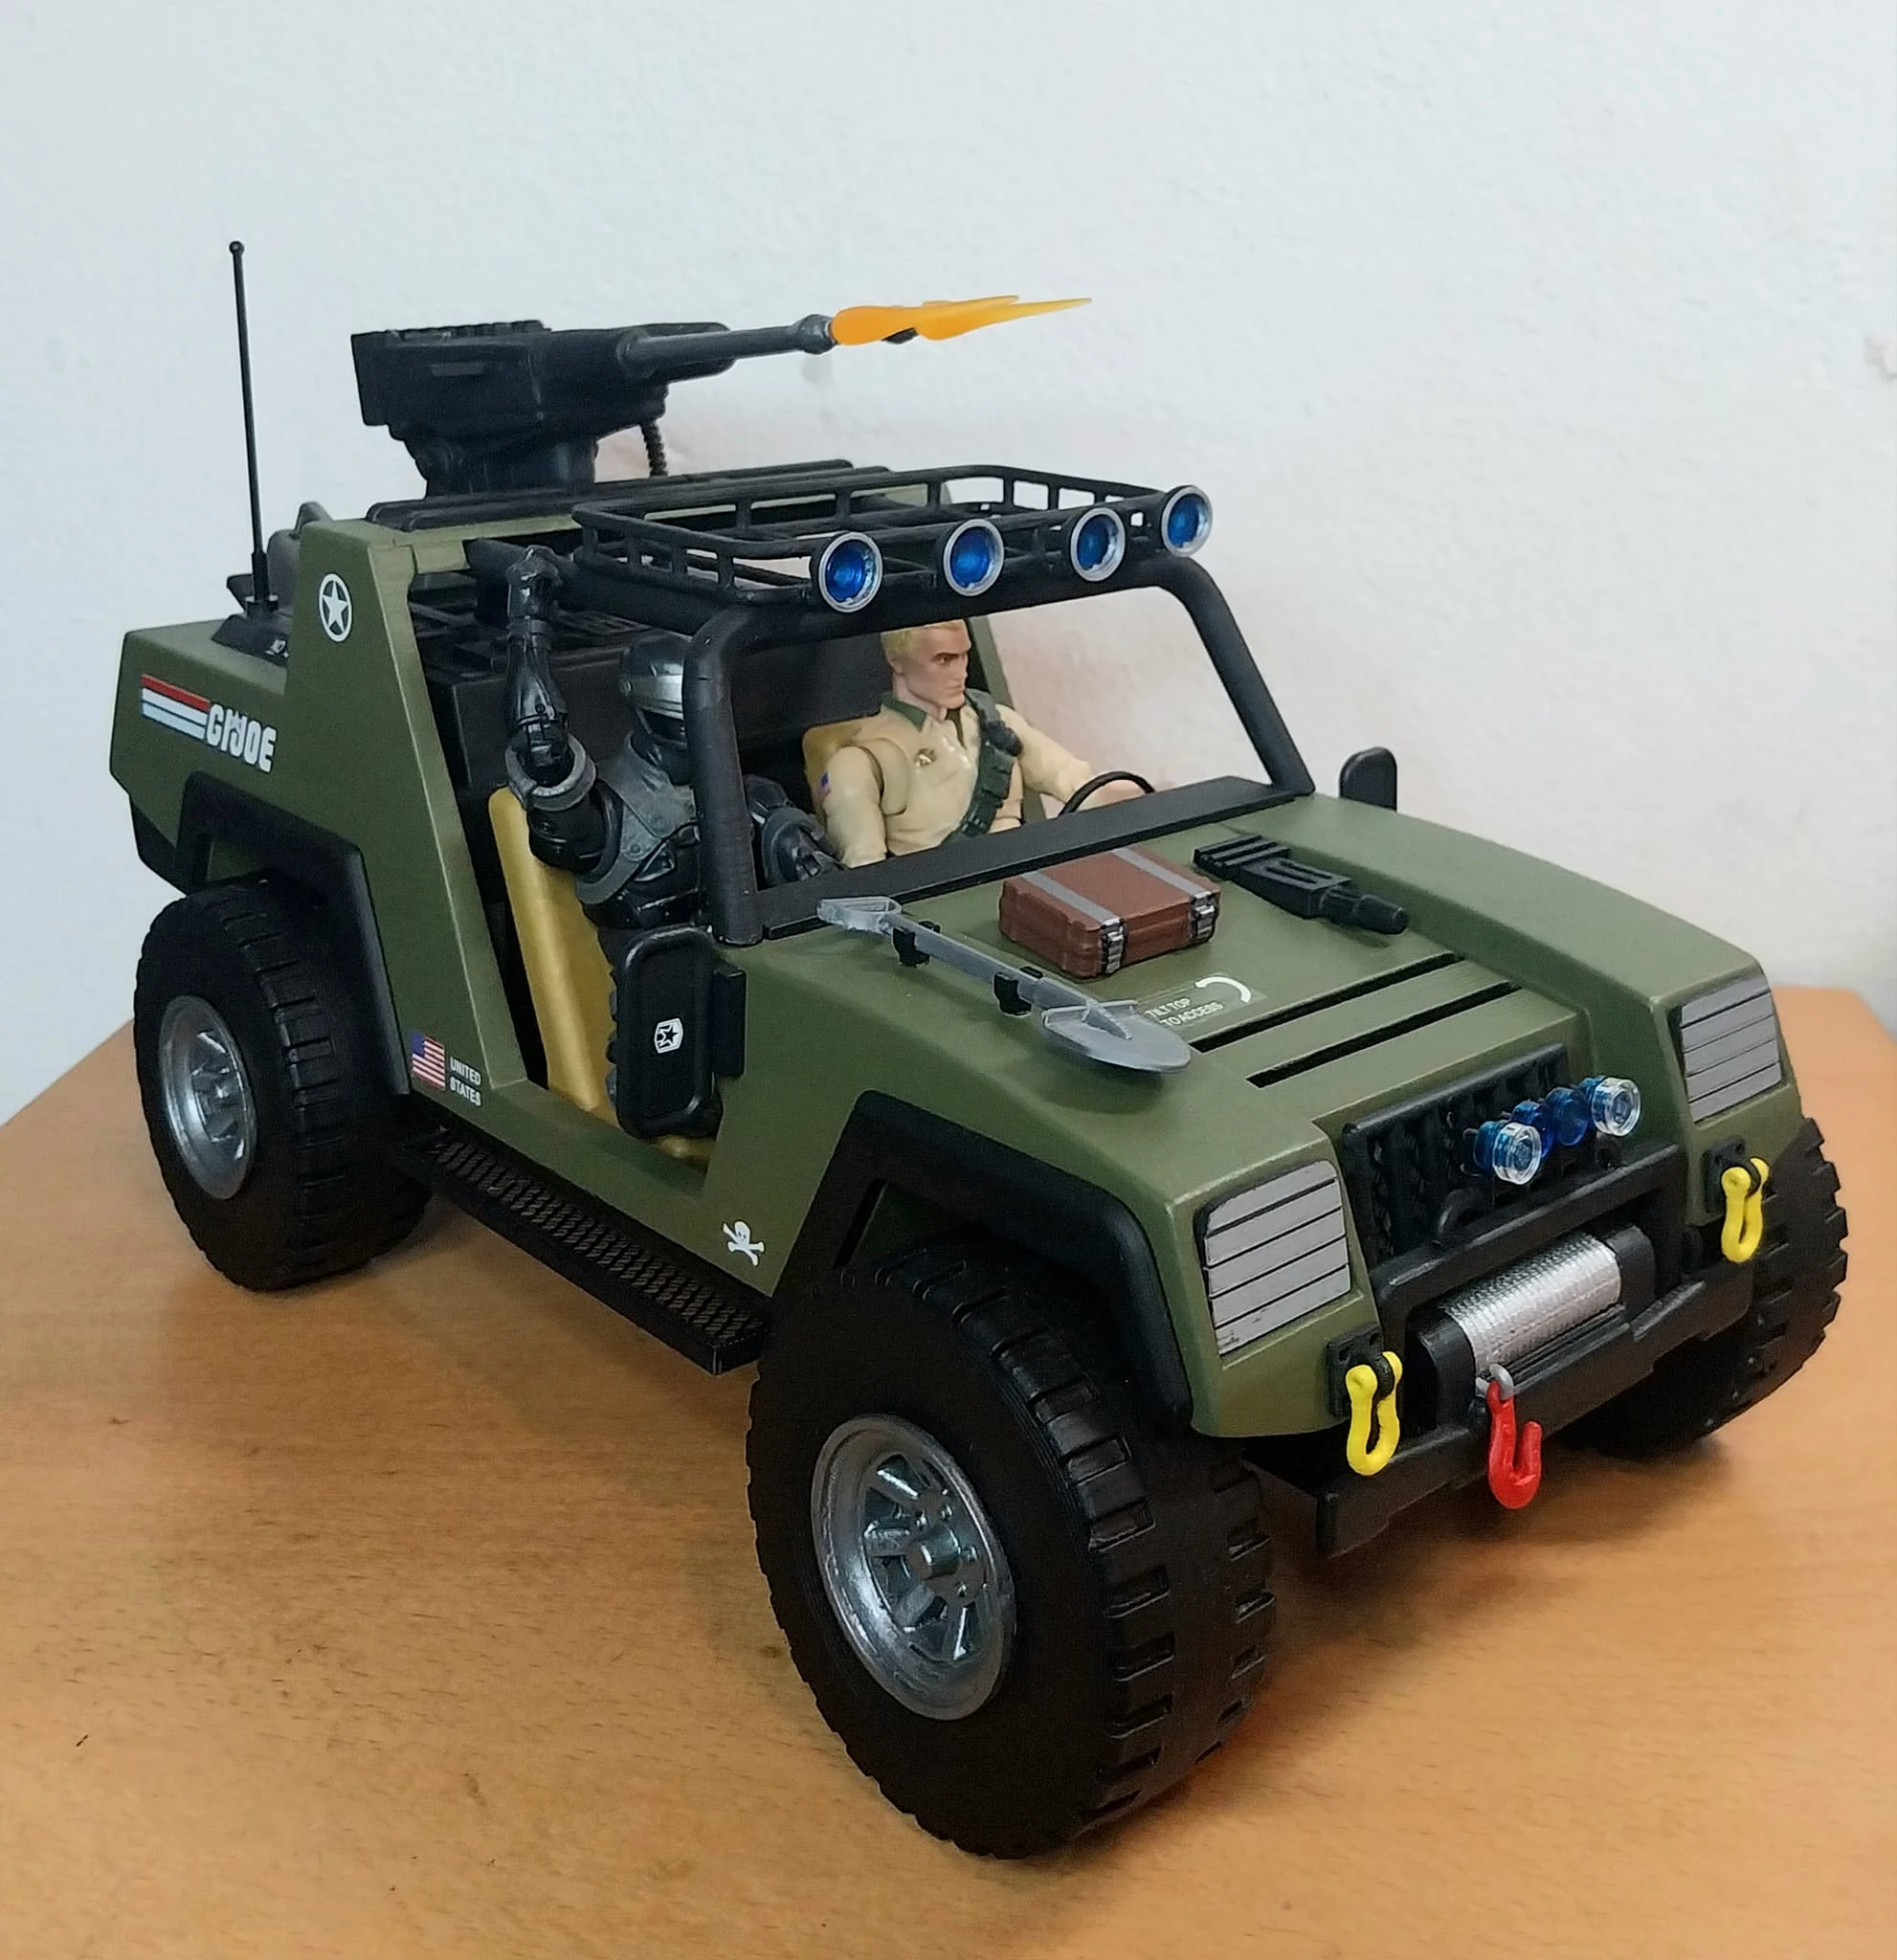
Thanks to the growing libraries on platforms like Thingiverse and Maker World, many classic GIJoe vehicles are now available as downloadable 3D models. Whether you’re after a Swampfire, SHARC, Skyhawk, Triple T, or the VAMP, the files are out there. But how easy are they to produce? And more importantly, are they worth the effort?
To find out, we tackled one of the most detailed and ambitious GIJoe models available on Thingverse: the GIJoe VAMP, recreated from over 48 3D-printed parts.
Printing the VAMP
The entire project was printed in PLA using just two filament colors: mistletoe green for the body and black for the interior and mechanical parts. While some versions of the VAMP model on Maker World are organized into ready-to-print plates with color grouping and support orientations, the original Thingverse model comes as a loose collection of files.
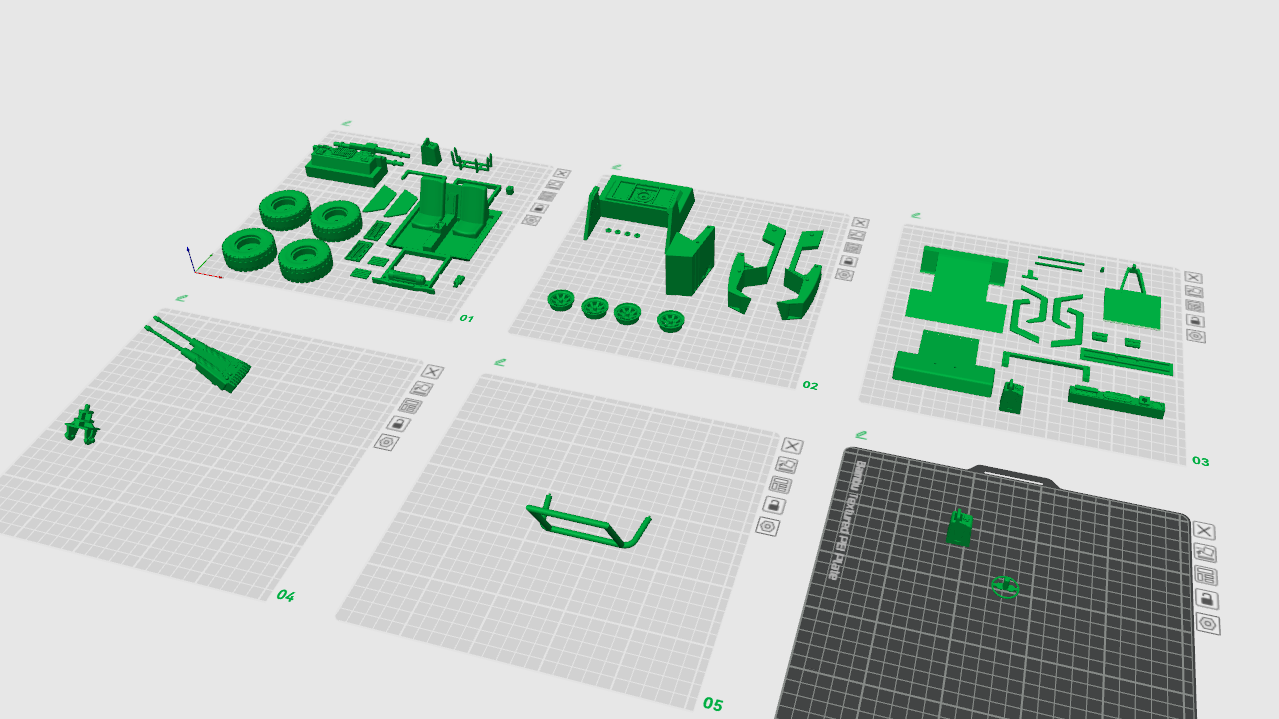
This meant assembling our own print plates, grouping components by color, and optimizing layouts for efficient filament use. Some parts also required special attention: a few had overhangs that demanded support structures, and certain delicate components (like the steering wheel) had limited contact with the print bed. That part in particular was problematic: despite multiple tries, it never printed cleanly. We eventually settled on a “good enough” workaround to complete the build.
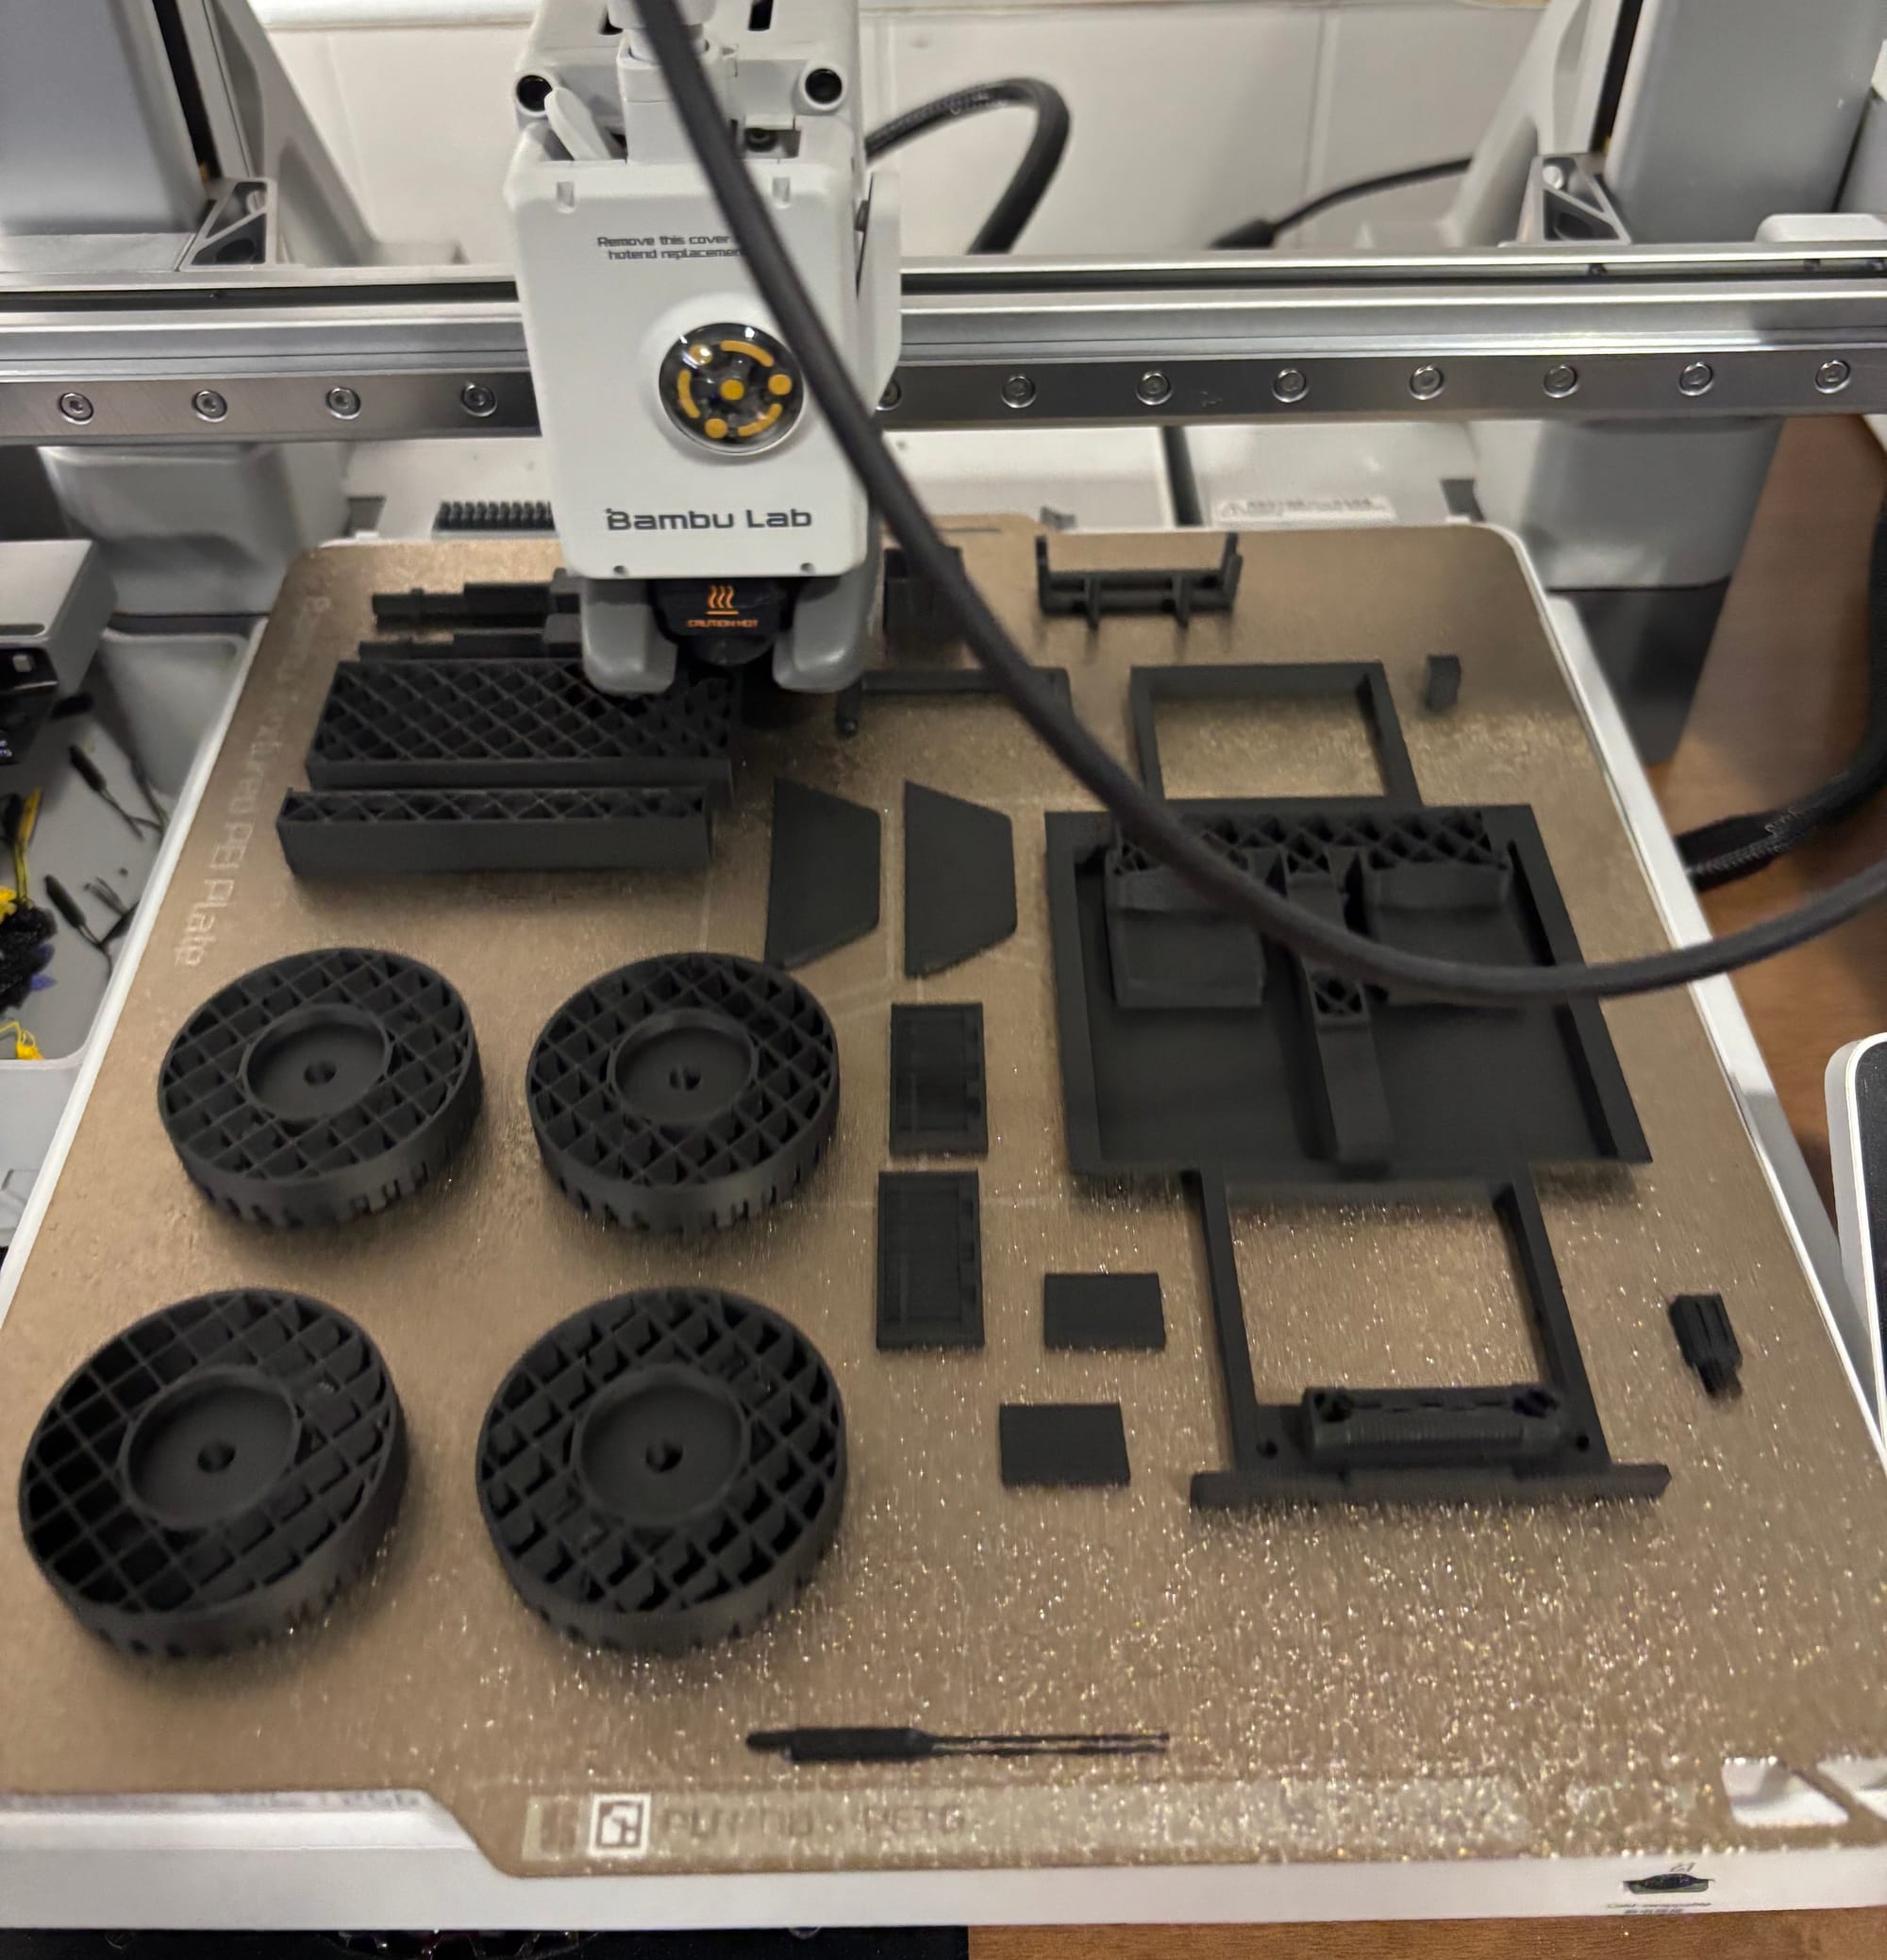
Still, most parts printed reliably, and the multi-plate approach made it easier to batch process the project over several days.
Assembly Without Instructions
Unlike commercial kits or LEGO sets, many 3D printable toy models do not include assembly guides.
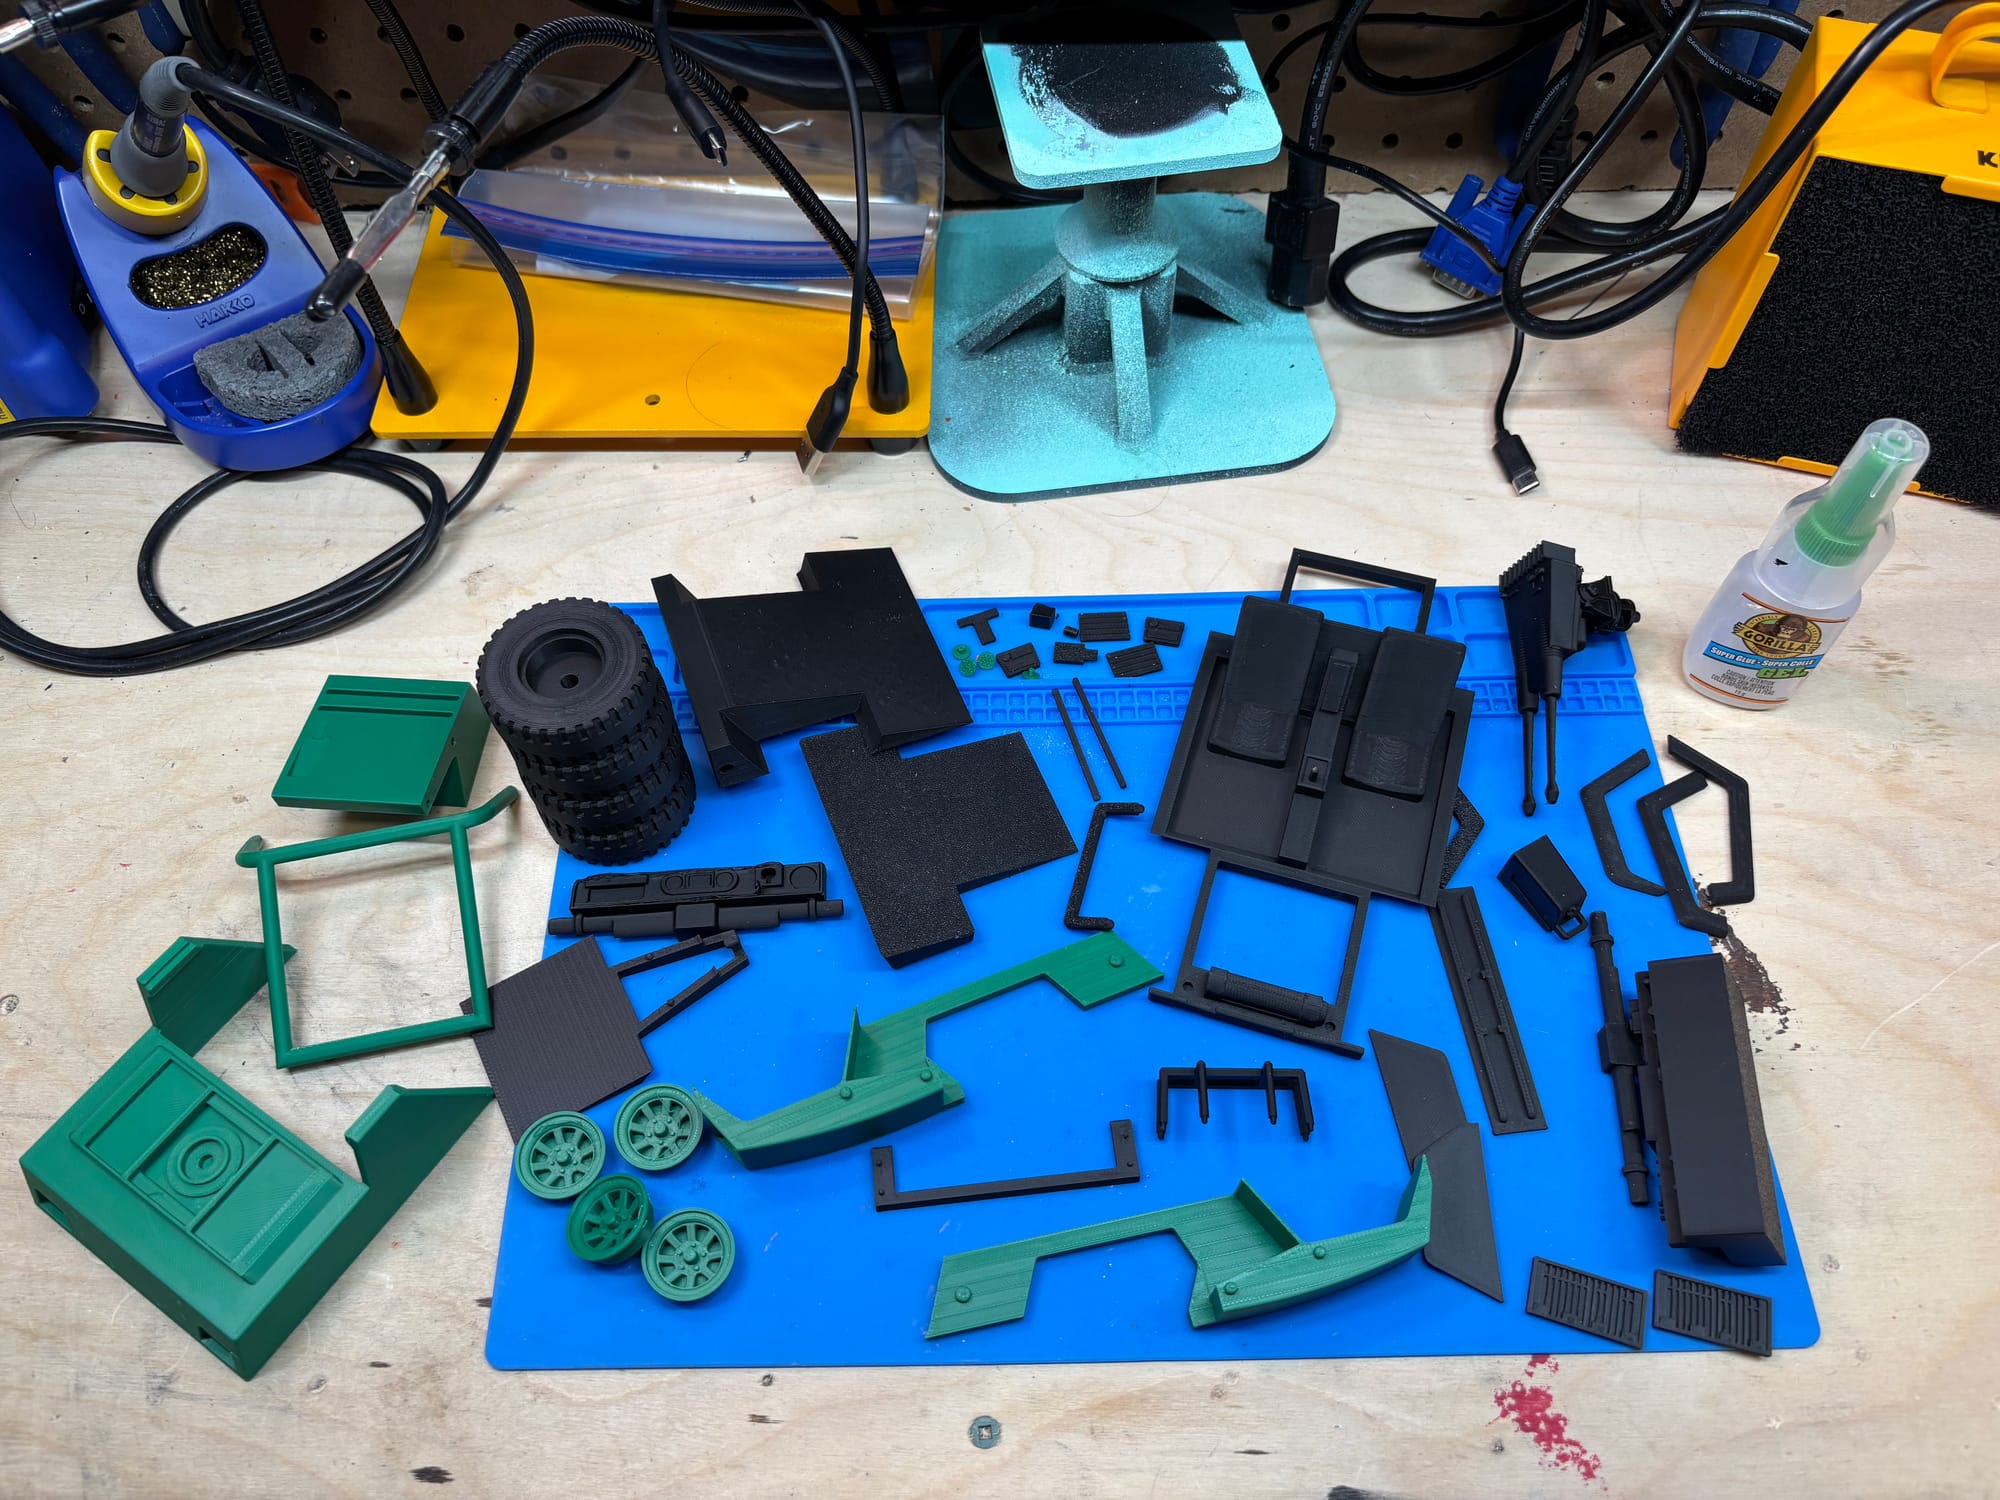
Assembling the VAMP required methodical trial and error. A bit of dry fitting, some online reference photos, and a good understanding of the original vehicle helped clarify part placement. The challenge was more time-consuming than difficult, but expect to make a few mistakes.
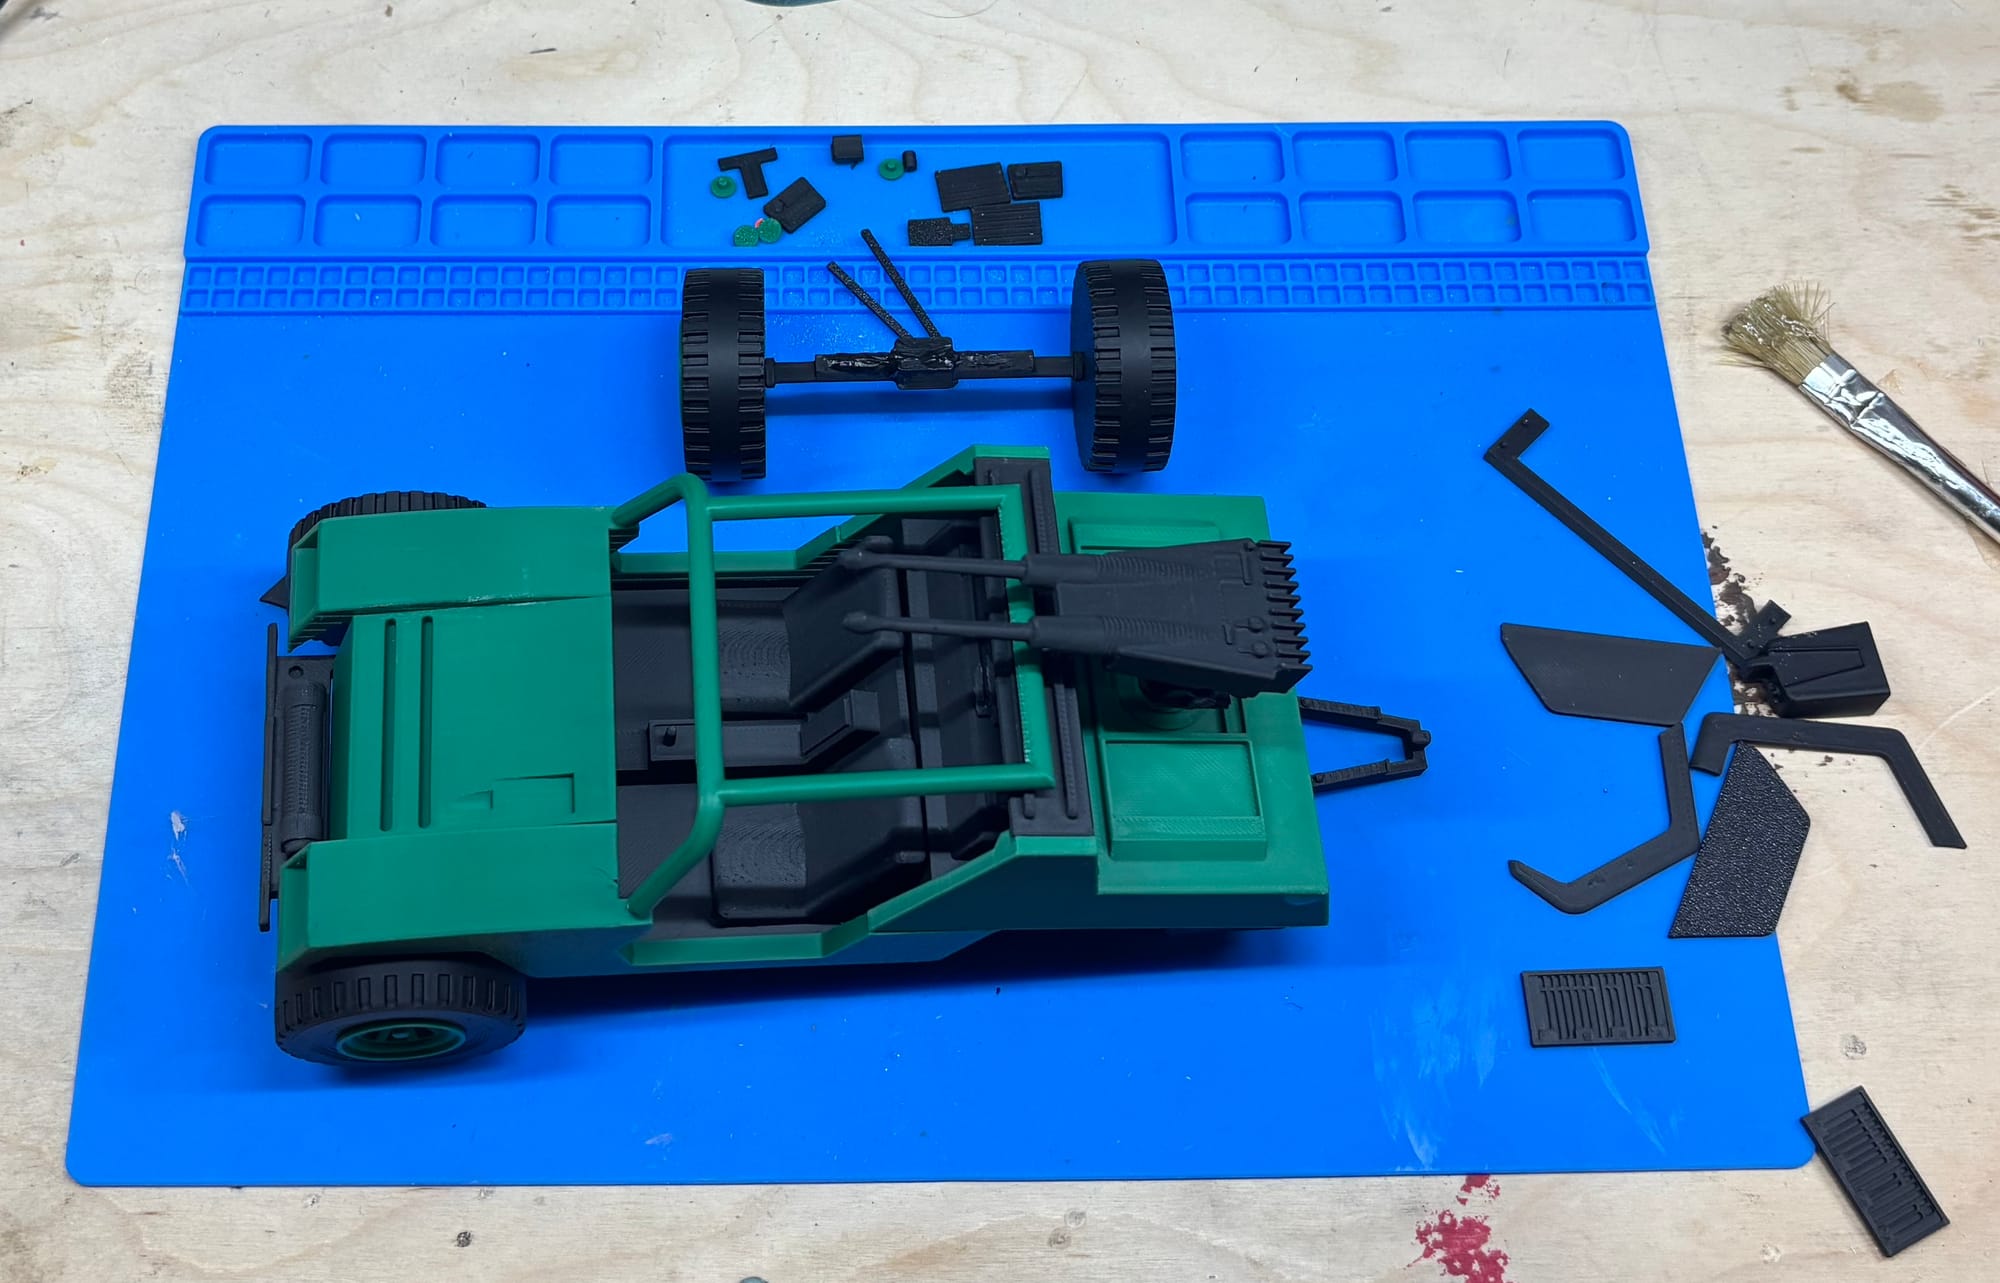
Because the model lacks interlocking parts or snap-fit joints, glue is required throughout the process. Every major connection, from body panels to axle mounts, depends on adhesive to stay together. This makes for a solid display model, but limits its durability and functionality. The wheels do not spin, and while the turret is present, it doesn’t rotate in any meaningful way.
Display-Ready, Not Play-Ready
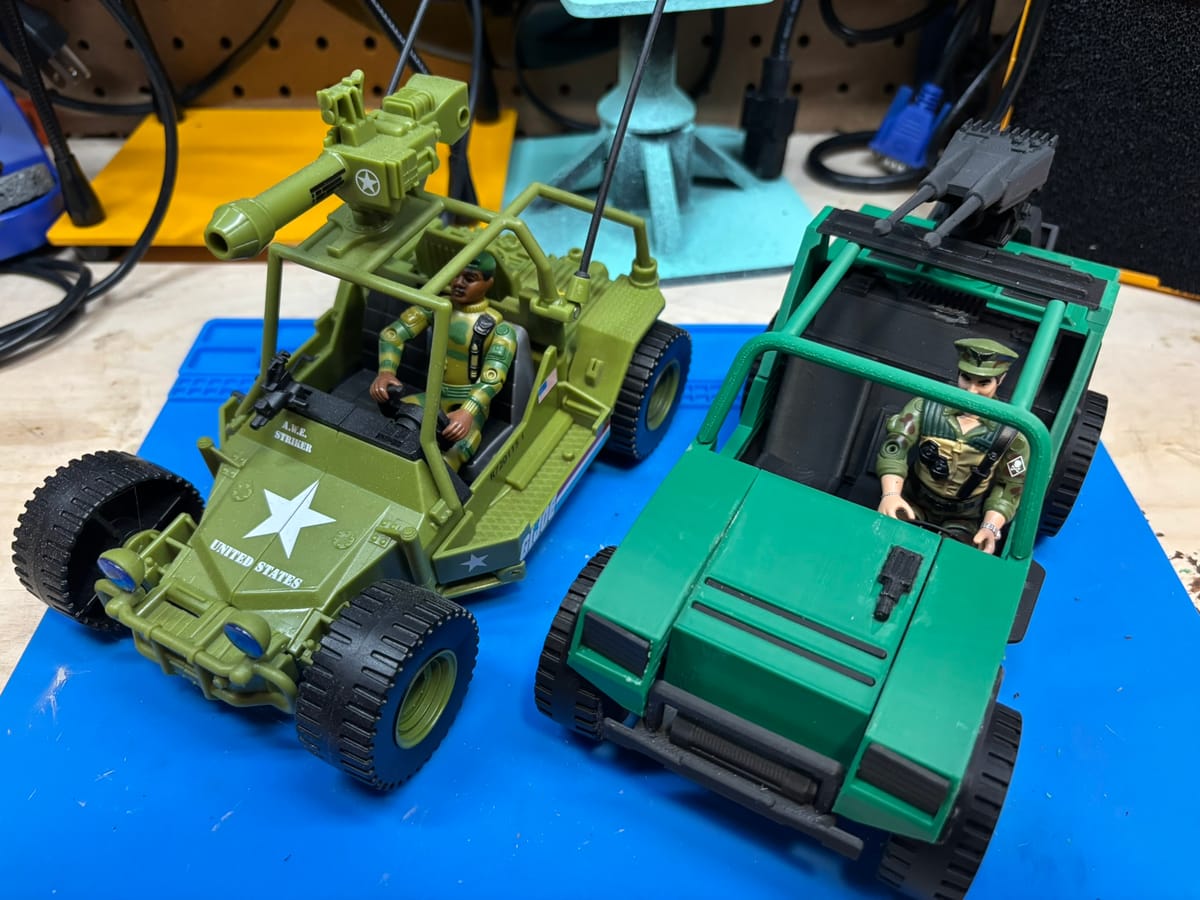
The final result is immediately recognizable as a GIJoe VAMP, and it looks fantastic on a shelf. But while it captures the shape and spirit of the original, it doesn’t quite replicate the full experience.
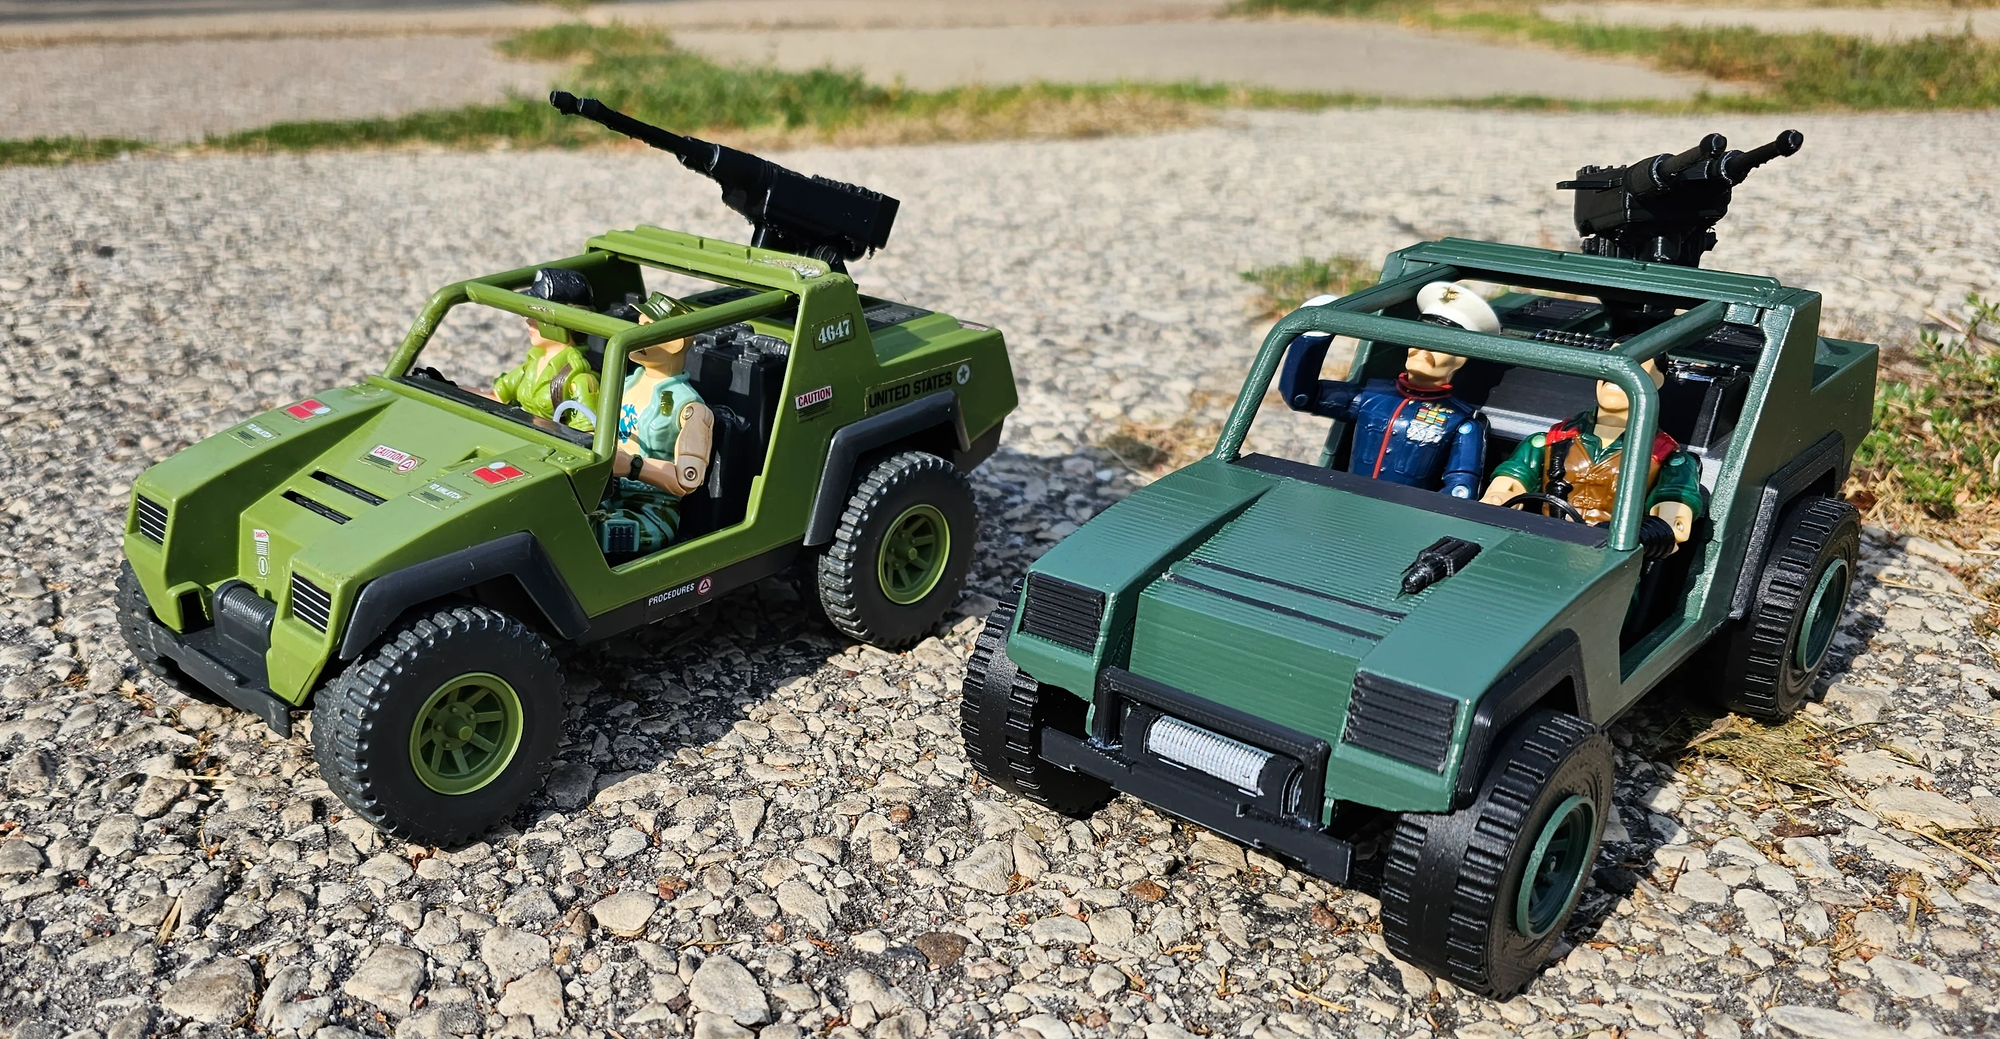
Classic GIJoe vehicles were injection-molded in ABS, a plastic known for its strength and tactile finish. PLA, by comparison, feels lighter and less refined. The printed version lacks the weight and surface texture of the original toy. It also omits details like stickers and rubber tires, which gave the vintage models their finishing touches.
Functionality is another tradeoff. This model isn’t meant to be played with. It’s a static piece, held together by glue, with limited articulation. You won’t fool anyone into thinking it’s an original—but you will turn heads.
Is It Worth Printing?
If your goal is to recapture the feel of the original toy, printing may fall short. But if you want something that’s “close enough” for display—and enjoy the satisfaction of making it yourself—this model delivers.
Even more compelling is the potential for customization. Because every piece is printable and modifiable, hobbyists can tweak the design, add mounts, incorporate LEDs, or upscale parts for other figure sizes. With a bit of effort, it’s possible to produce something even more striking than the factory version.
Update : August 2025 - Stickered
The finishing touch came from a set of reproduction decals sourced from Toyhax, a company well-known among collectors for their high-quality sticker sheets. Designed for the original GIJoe VAMP, the set includes faction logos, hazard warnings, dashboard indicators, and other fine details. The 3D printed model is not an exact match for the original, so some improvisation was required. Stickers were placed in their approximate locations, adjusted where necessary to fit the printed surfaces.
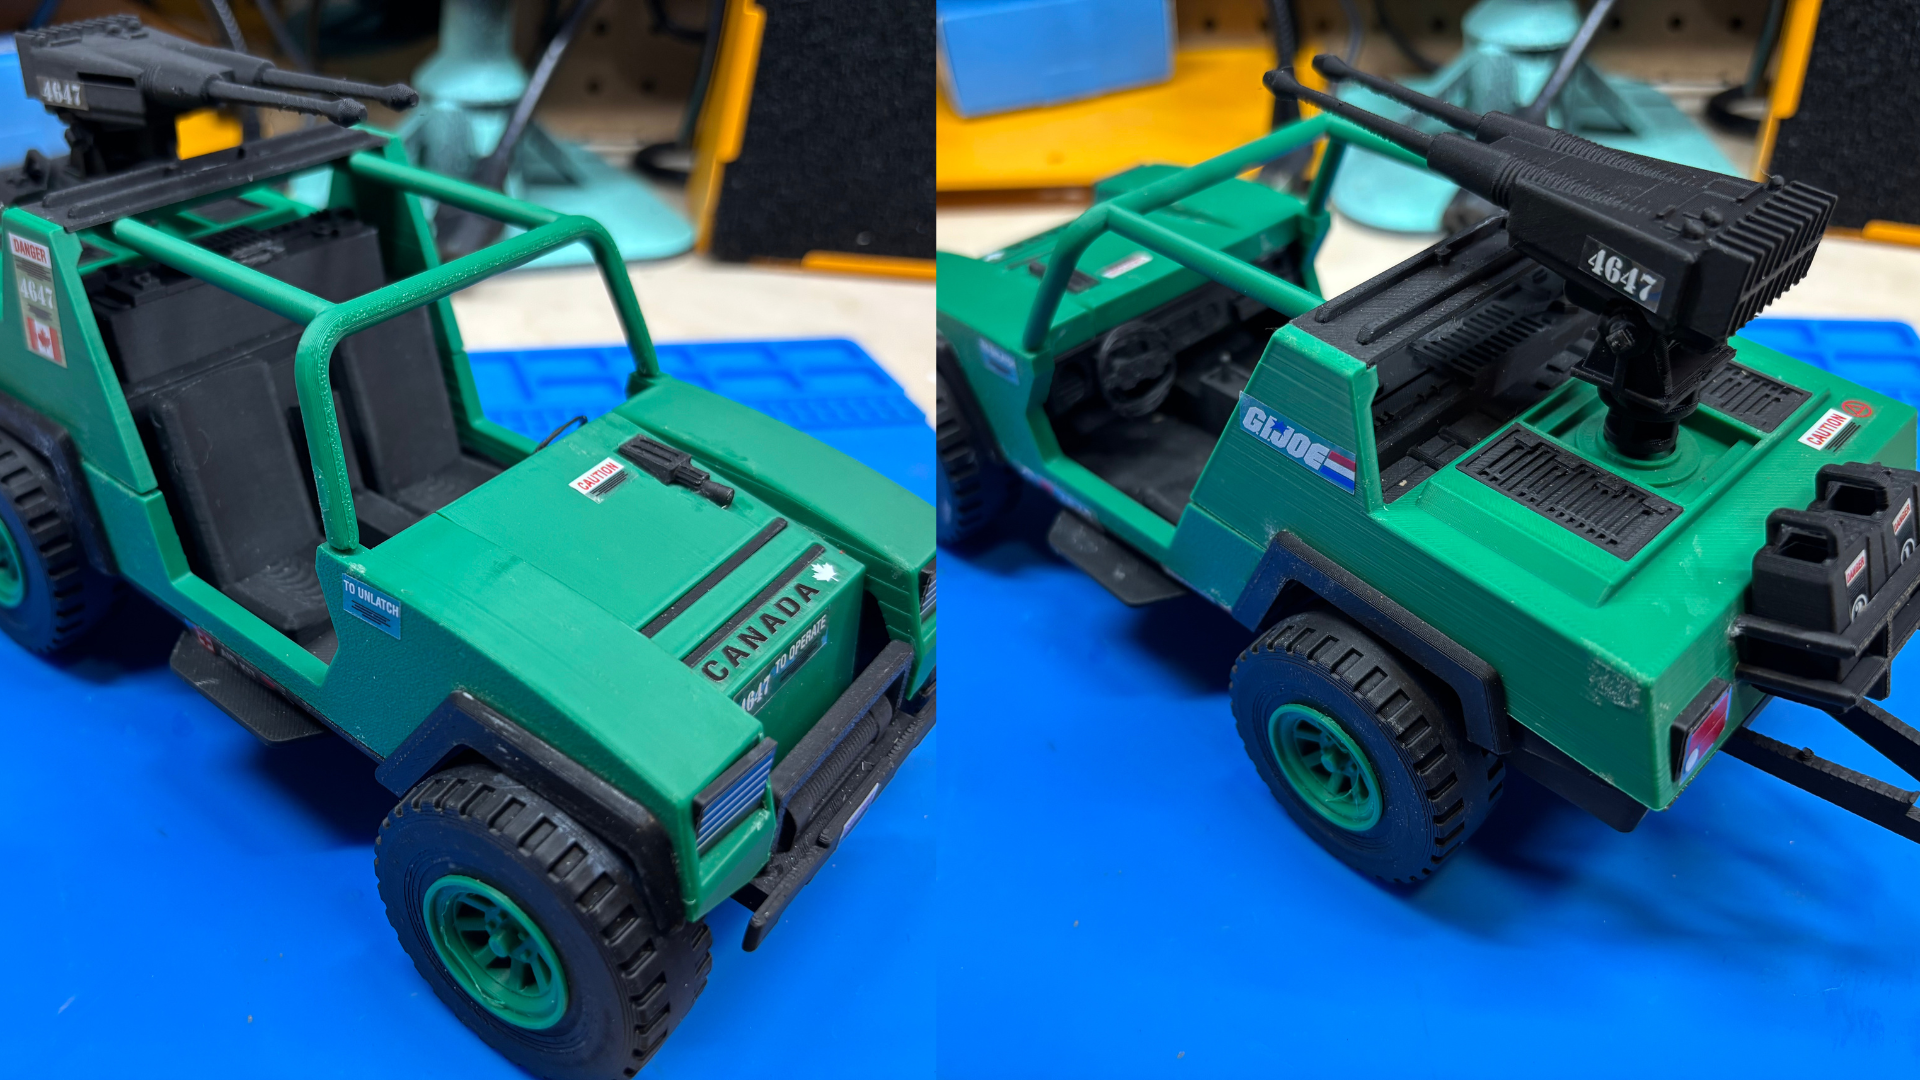
One detail that stands out is Toyhax’s inclusion of both the original US markings and Canadian variants. This allowed the model to be finished with a unique regional tone, giving it a bit of personal identity while still honoring the original design. The hazard labels on the turret, the “Canada” hood markings, and the custom license plates bring the build to life. While the VAMP remains a display piece rather than a playable toy, the addition of these decals makes it far more convincing on a shelf, proving how small details can bridge the gap between a 3D print and a collector-grade display model.