How to Build Your Own DIY Arcade Cabinet?
Build your DIY arcade cabinet! Our guide offers design tips and essential components for your ultimate retro gaming experience.

About 20 years ago, I built an Arcade Cabinet with my father. I published an article that same year a the project, but removed it a couple of years latter, as I was receiving too many emails on cabinet construction. A lot of time has passed and the cabinet was disassembled many year ago. However, I think it's time to bring back the project to the Internet.
The Goal
I’ve always wanted an arcade cabinet. It’s one of those “just-to-cool” things to have in your living room. In addition, I’m a big fan of fighting games. However, the true way to play these games is with an arcade stick. I was looking for a cool project to do with my father, so I decided to build my cabinet.
The Research
The first step in any large project is information gathering. I spent about a month reading up on other people’s custom cabinet. A lot of people had interesting ideas, but I also found a lot of contradicting information. So I decided to get another source of information. At the time, the best (and only) book on this topic was : Project Arcade. A second edition of the book was released in 2011.
This book had all the information I needed to build my arcade. Although I was not a fan of the writing style, Project Arcade gave complete and clear information on every topic related to building an Arcade Cabinet. In addition, the book came with the Ultimate Arcade II building plans, by CyberTech Design. These plans were very impressive, but the machine was physically too big for my needs. I built my arcade using an altered version of these plans, removing 6 inch of the height, width and depth of the cabinet.
Supplies
A lot of the building supplies needed for this project were easy to obtain. However, Montreal has few stores with arcade supplies and all of them are expensive. One store offered me used push buttons for 5 CAD (about 4 USD) each. This is expensive considering new push buttons are worth 1 or 2 USD each. I ordered all my specialized arcade supplies from the Internet.
- Wood, screws, bathroom counter, lexan and other cabinet building materials : 193 CAD / 163 USD
- Electrical wiring supplies : 16 CAD / 13 USD
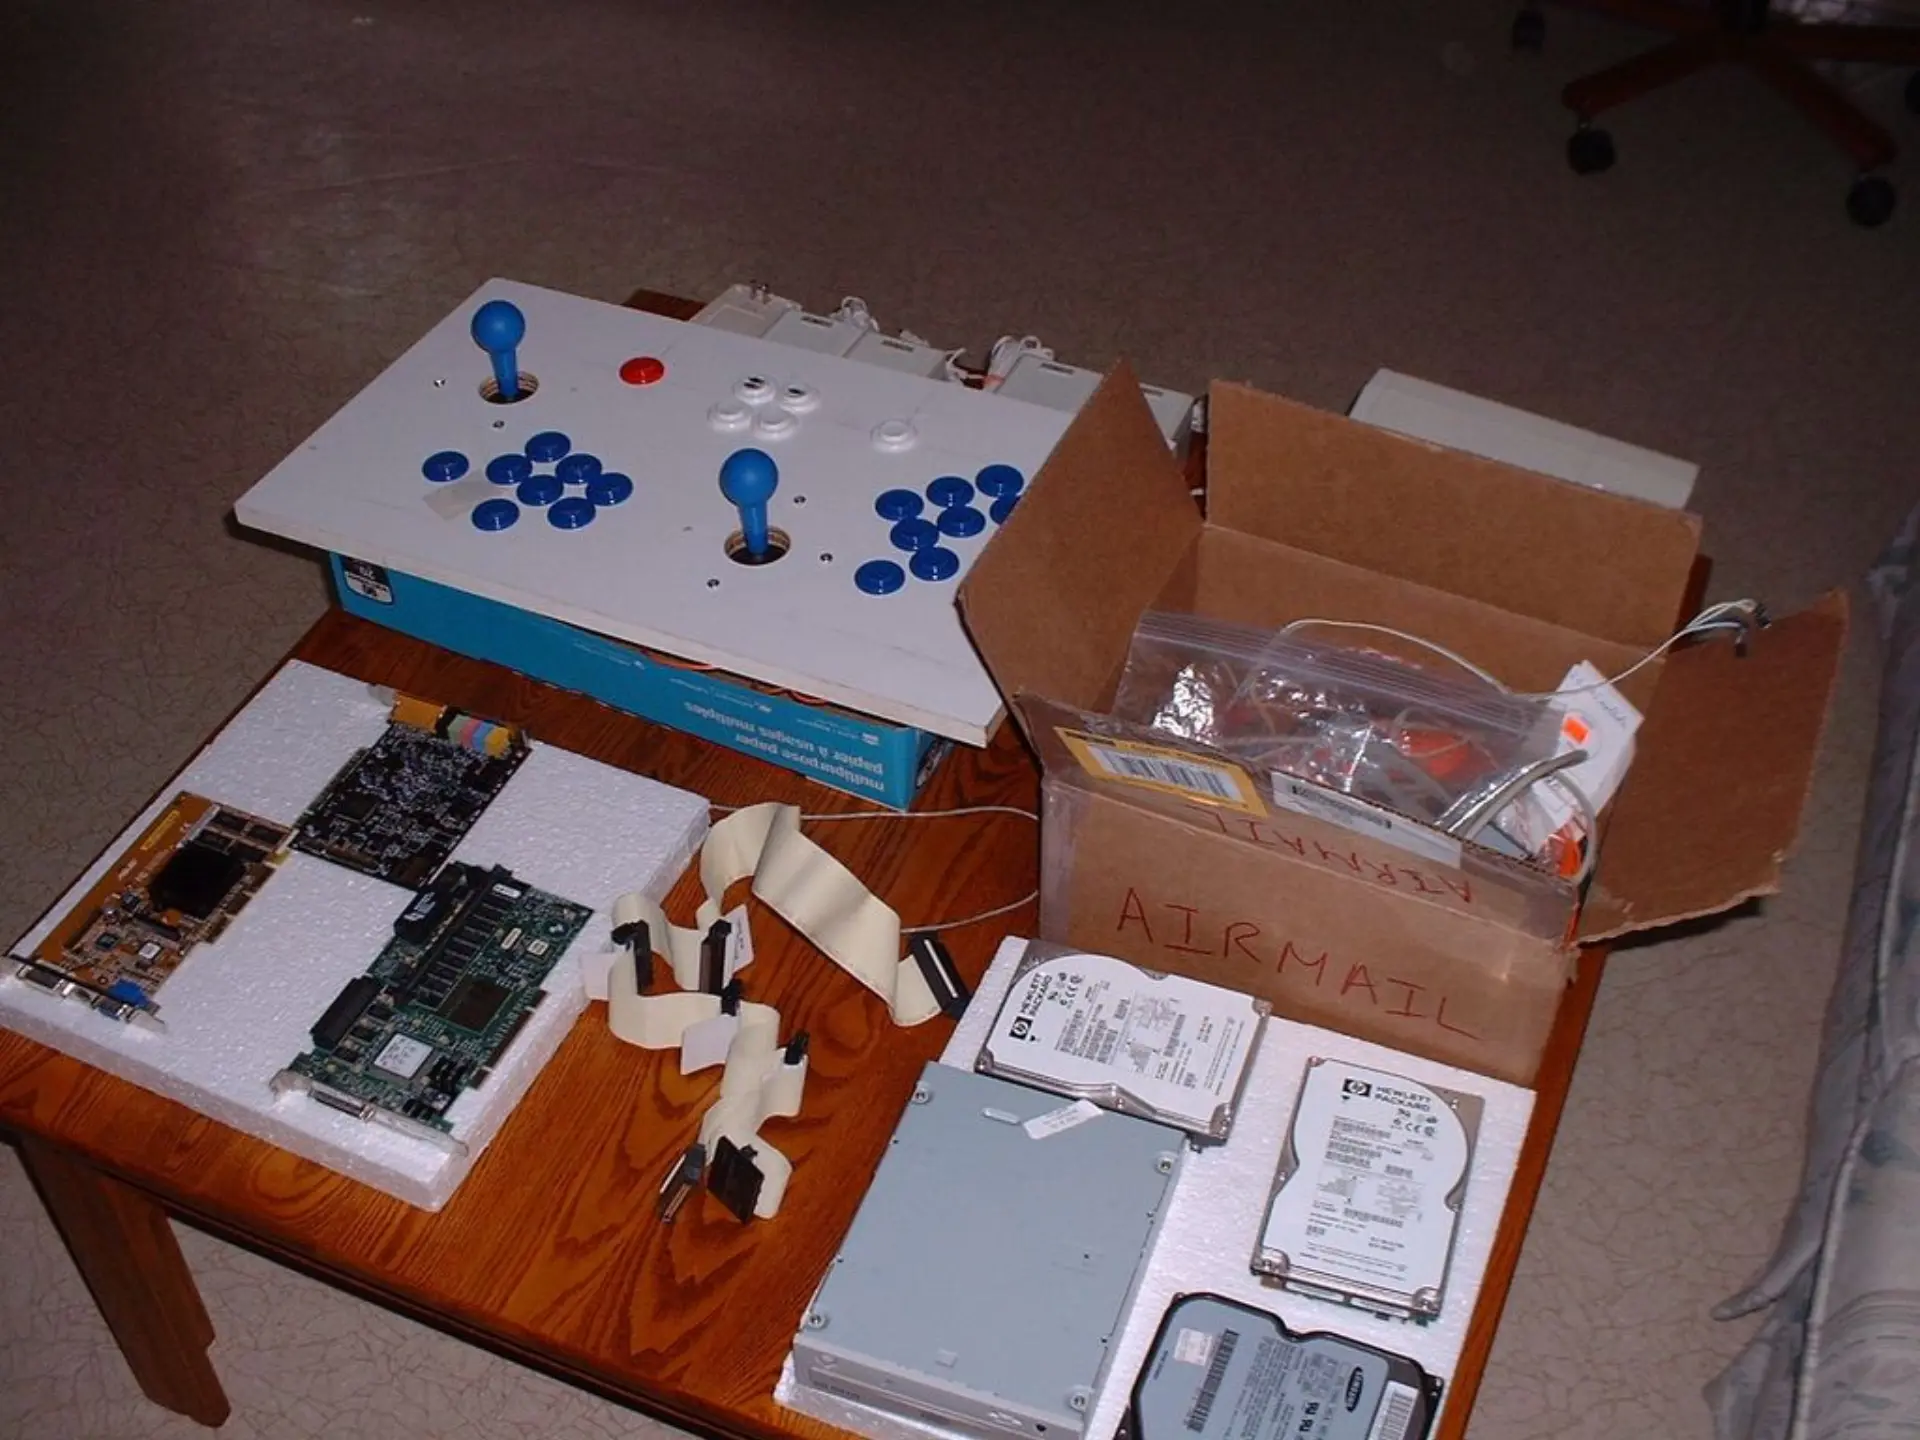
- Arcade Stick, Buttons, Keyboard Encoder : 181 CAD / 152 USD
- T-Molding for cabinet and Slot Cutter : 97 CAD / 77 USD
- HP Pentium 3 Computer : Free (spare I had)
- ADI Flat 19? Inch CRT Computer Monitor : Free (my old monitor)
- Creative Labs 4 Speakers + Sub Woofer Sound System : Free ( I recently upgraded to a Logitech system)
Total cost: 487 CAD / 403 USD
Internet Suppliers
Most veteran arcade builders buy their supplies from Happ Controls. However, I found Happs’ large catalogue a bit intimidating. I decided that I would buy my arcades sticks and buttons with the keyboard encoder. This way, I would be sure everything was compatible.
Keyboard Encoder and Arcade Supplies – Groovy Gamer
After reading up on many arcade encoder, my choice was split between two encoders, either Ultimarc’s I-Pac or Groovey Game’s Keywiz Max 1.5. Although both encoders were similar, Groovey Game’s had better prices for the arcade stick and the push buttons. I ordered the following supplies:
- 1 x KeyWiz Max 1.5
- 2 x OMNI-Stik BASIC Blue
- Several Pushbuttons
- and some wiring supplies.
T-Molding – T-Mold.com
T-Molding is a critical component of an arcade cabinet, especially if you are looking for that professional finish. However, not many store in Montreal sell T-molding. At least, I couldn’t find one. So I decided to order online. The Internet has no shortage of T-mold stores. However, one store caught my attention, T-Mold.com. Their prices were very competitive, they had a very large selection of T-Mold colors and sizes, and they also sold the slot cutter needed to install the T-mold. So I ordered two sizes of T-Molding and the slot cutter. Unfortunately, the store does not seem to exist anymore.
Assembling the Cabinet
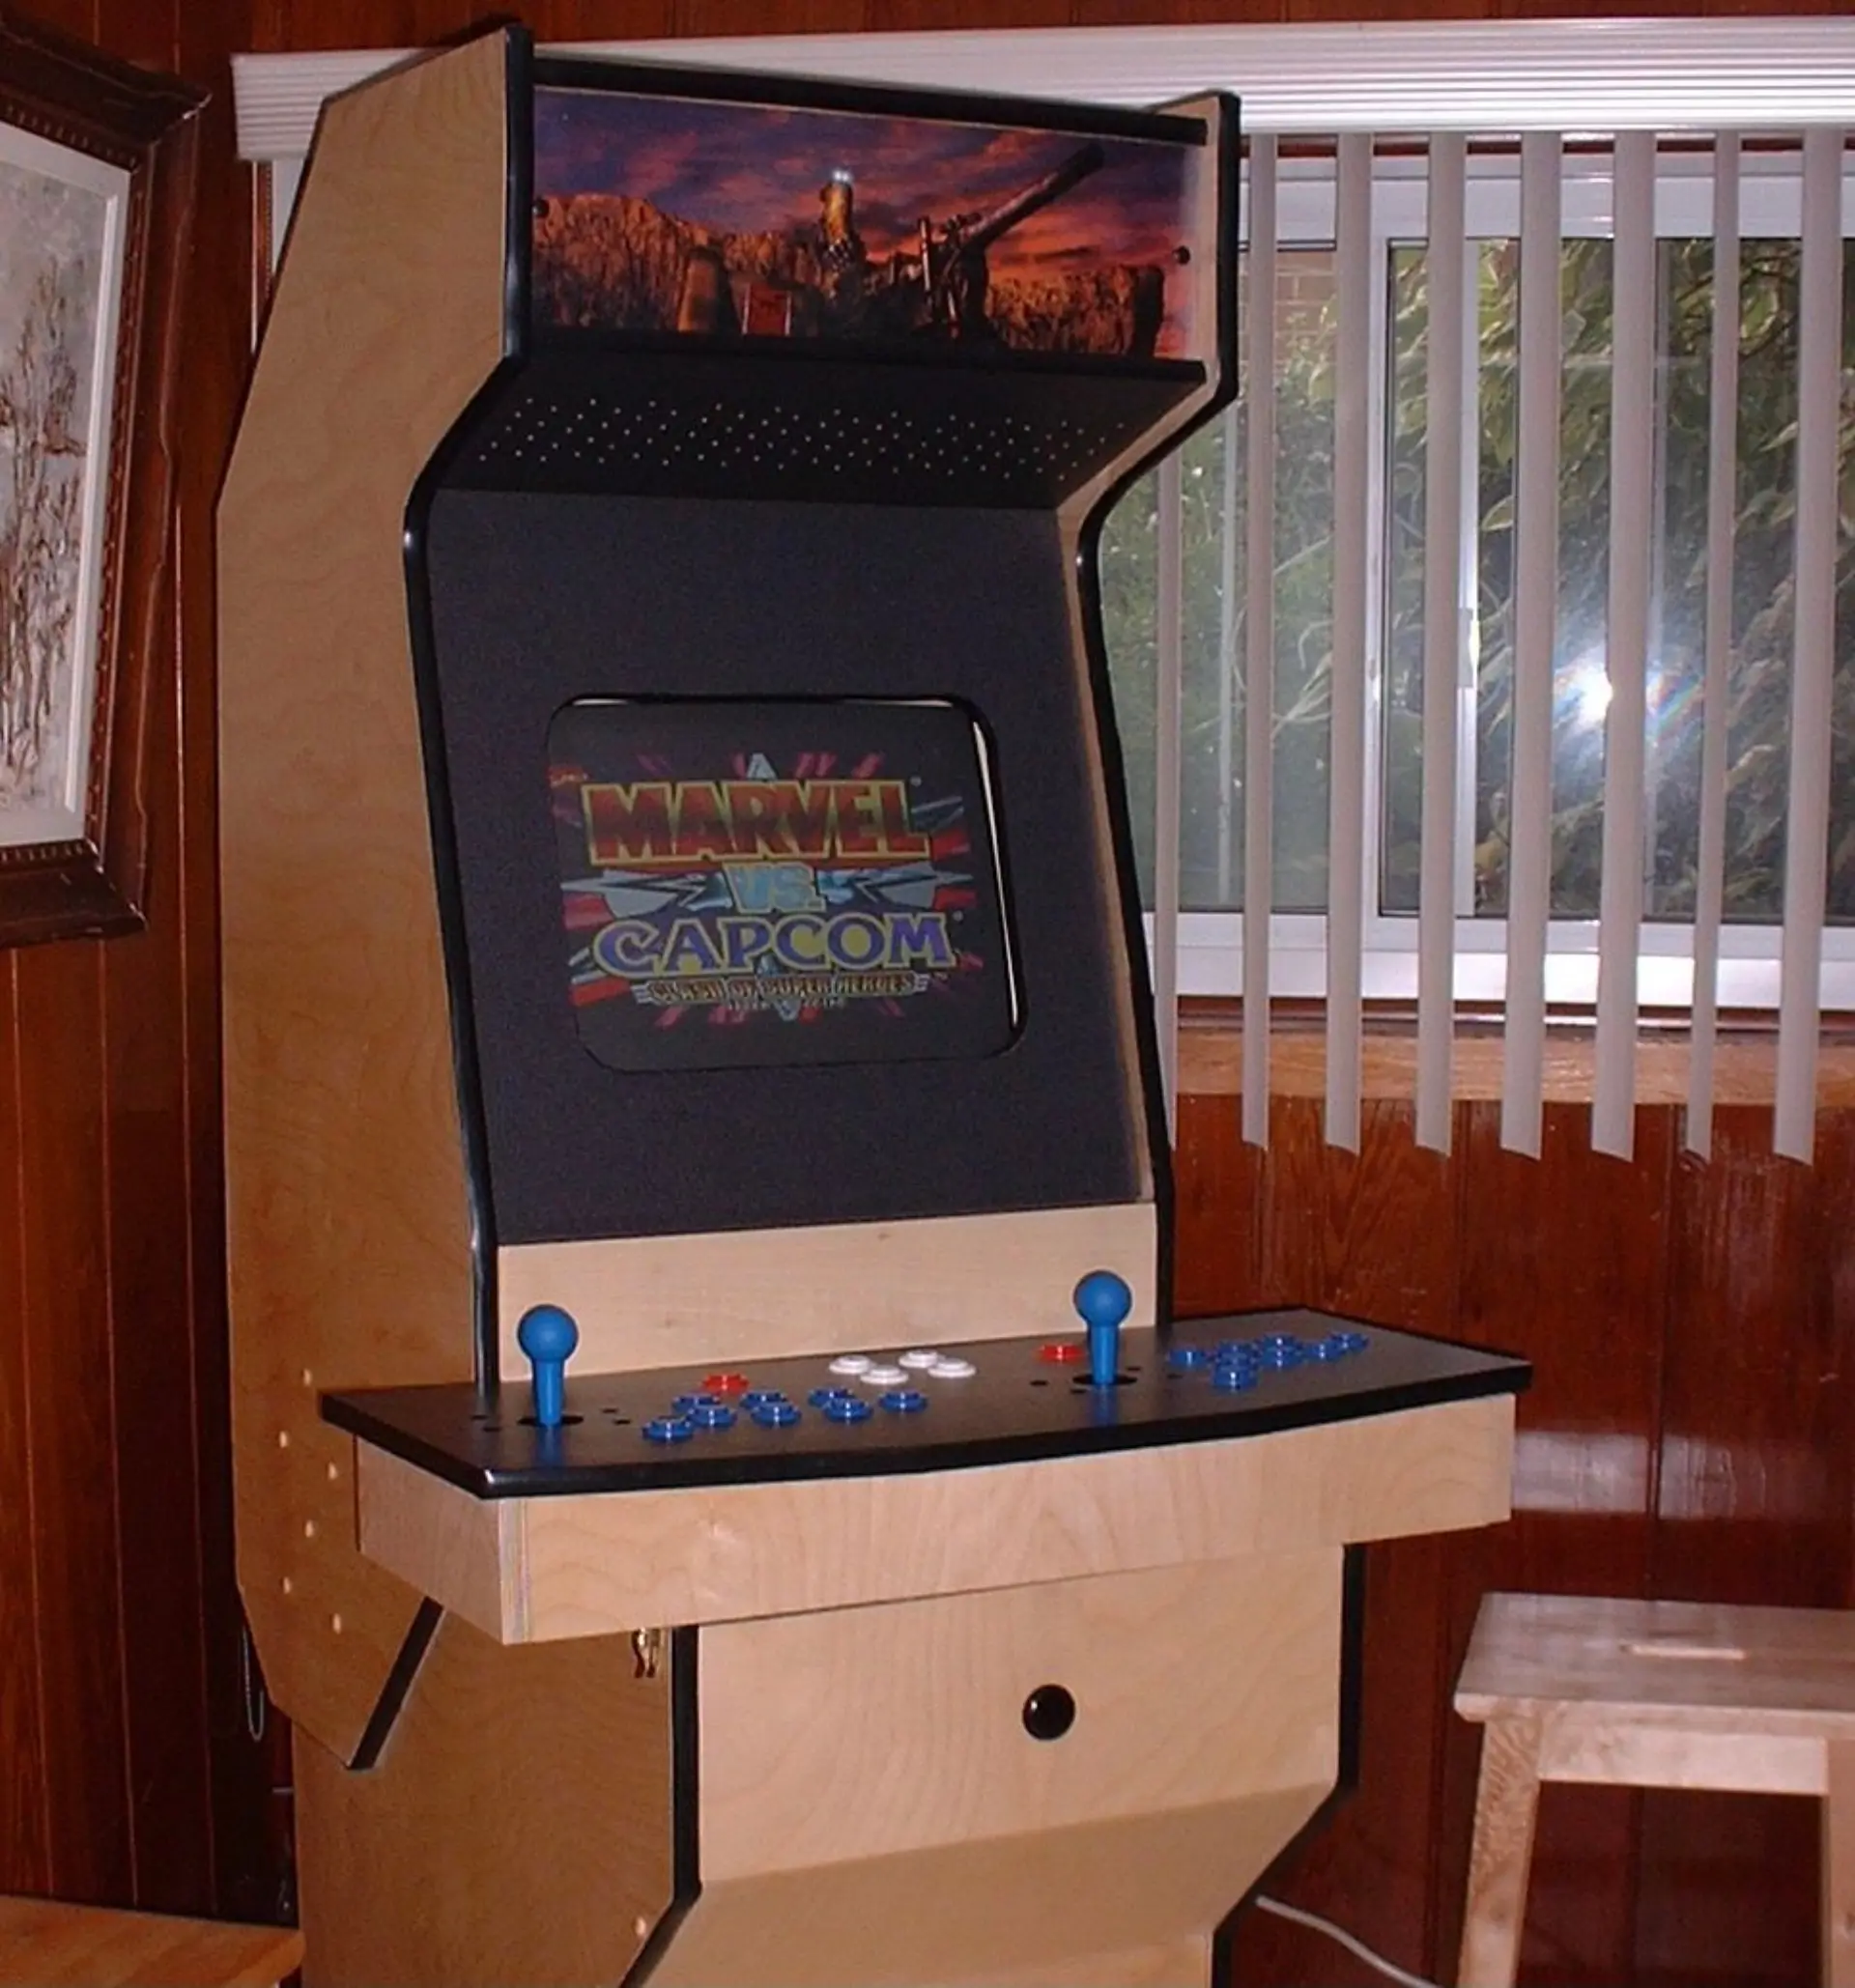
Most arcade cabinets are made out of MDF, a type of hardboard that is made from wood fibers glued together. Although the material is strong and inexpensive, it has an ugly finish.This is not a problem for most cabinet since they are painted (often black). However, I wanted my arcade to have a wood finish. So I chose 3/4 inch maple, a bit more expensive, but it has a really nice finish.
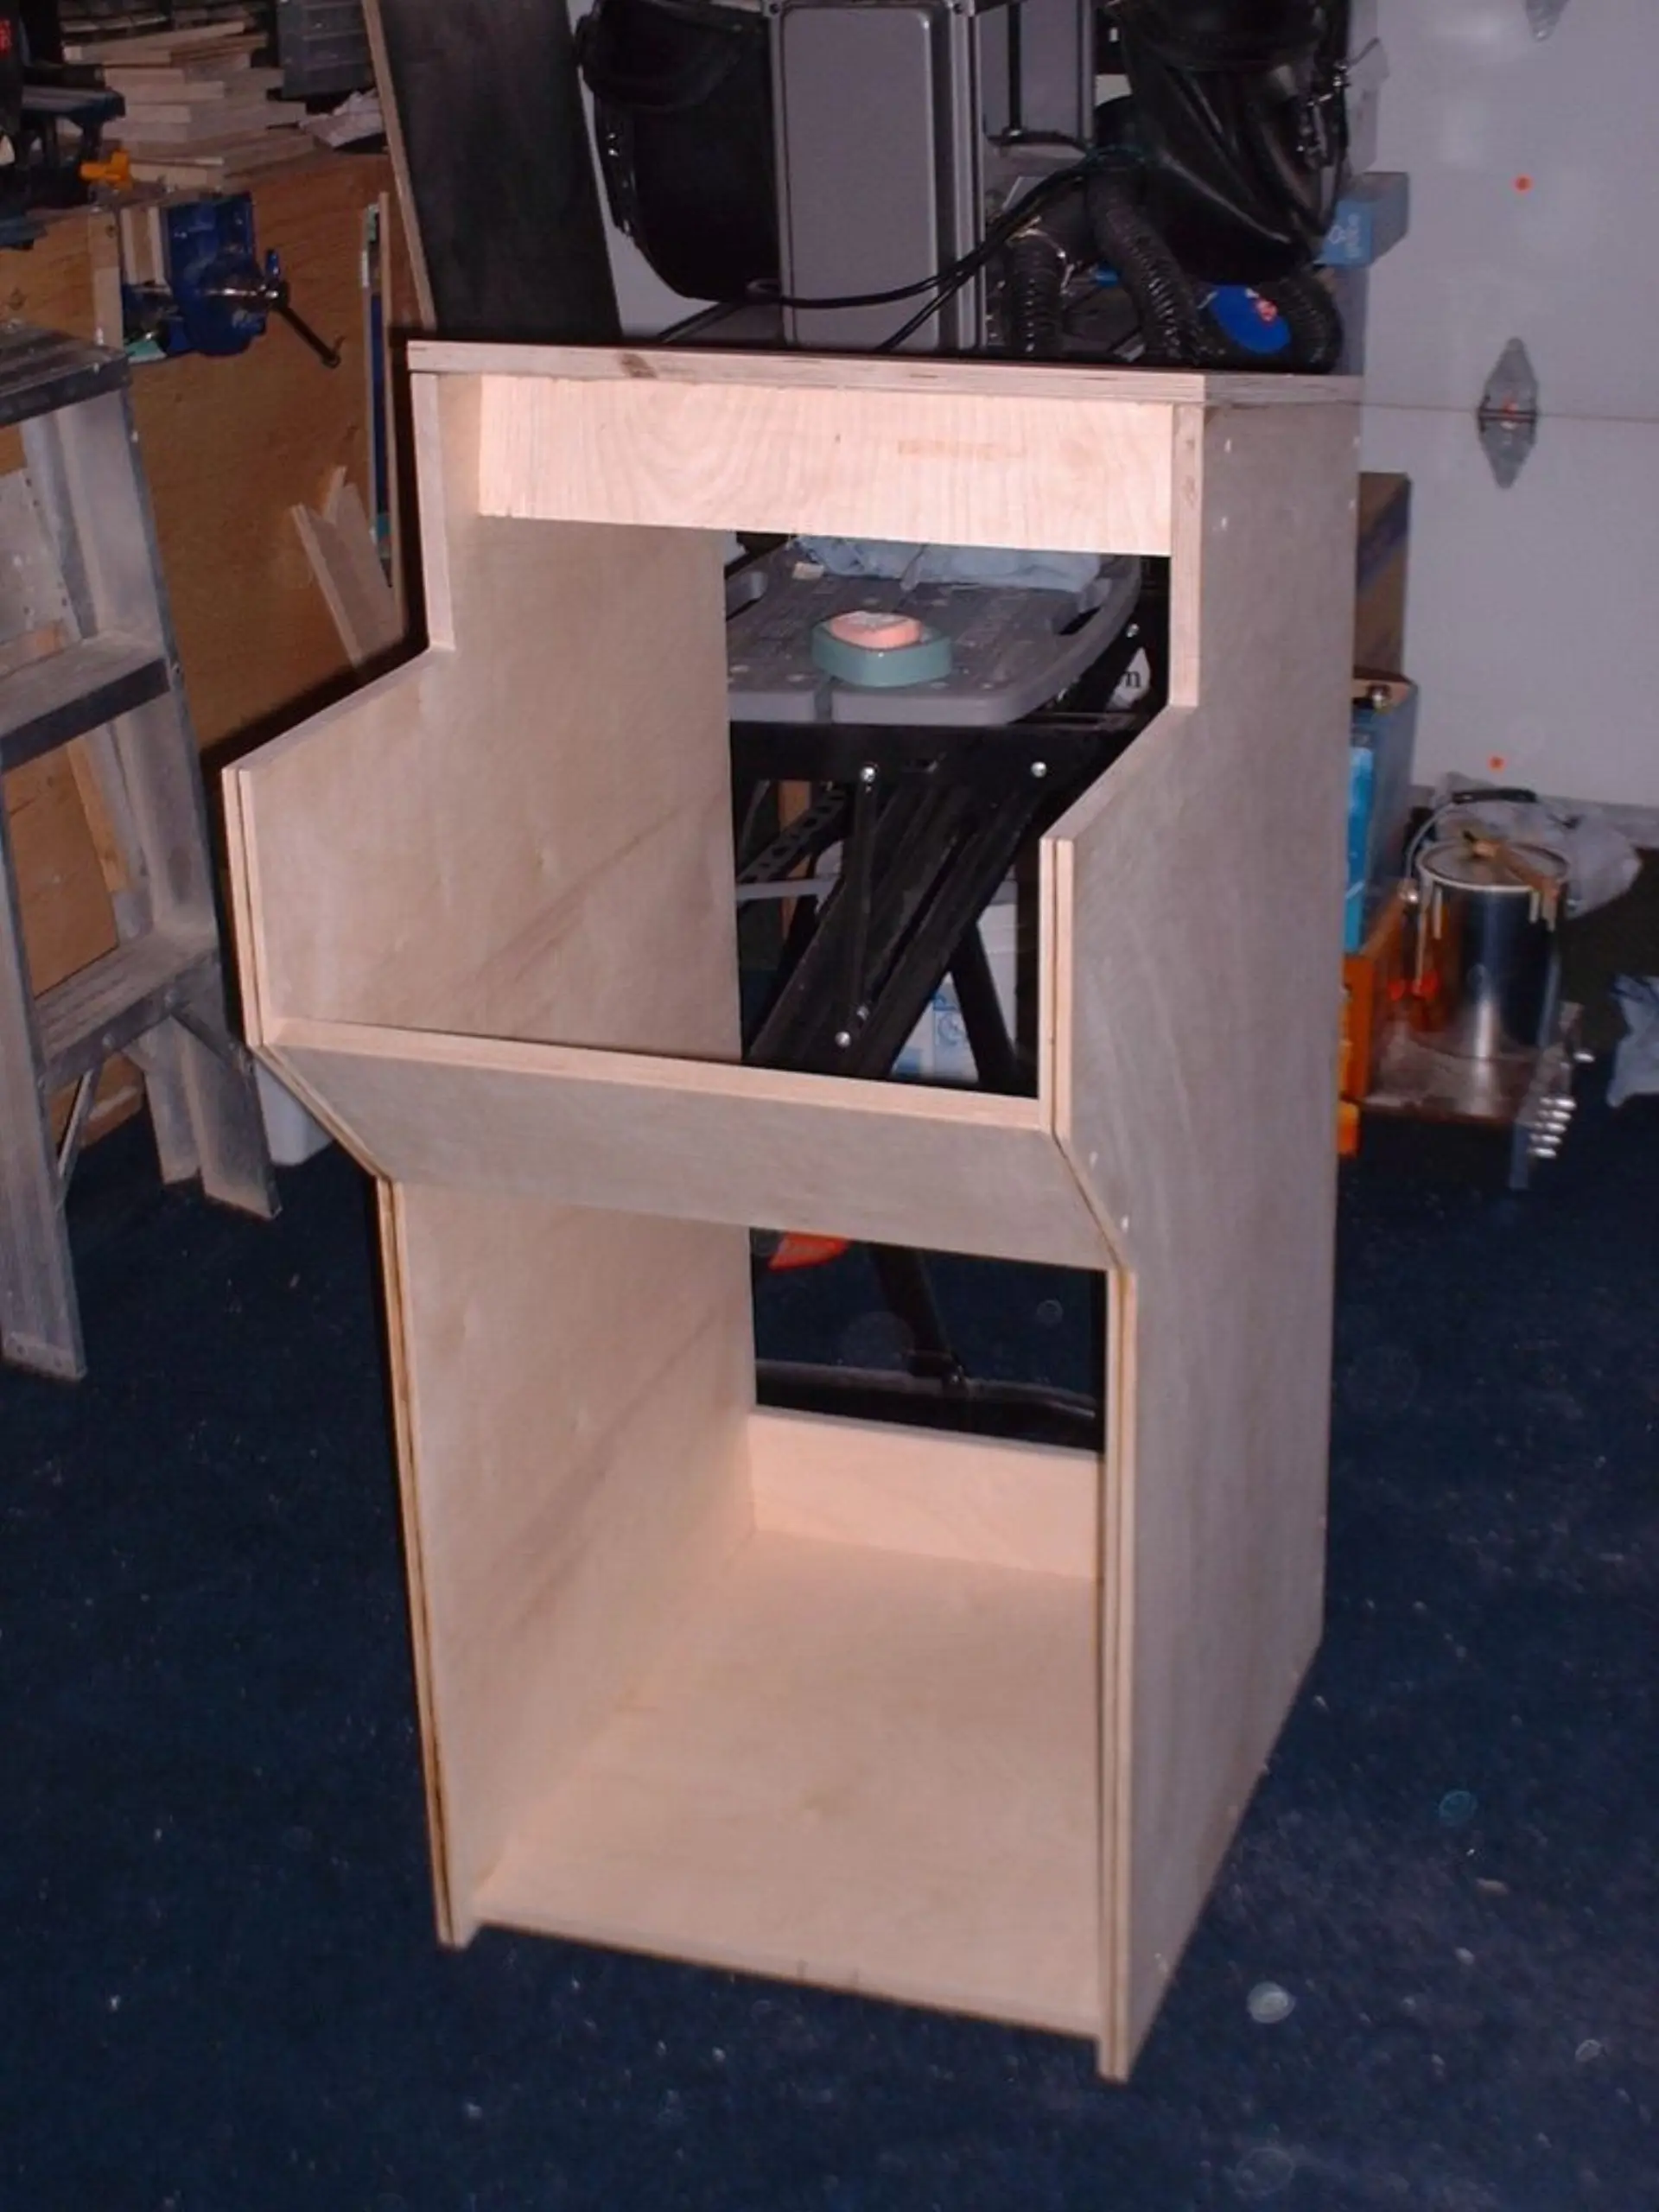
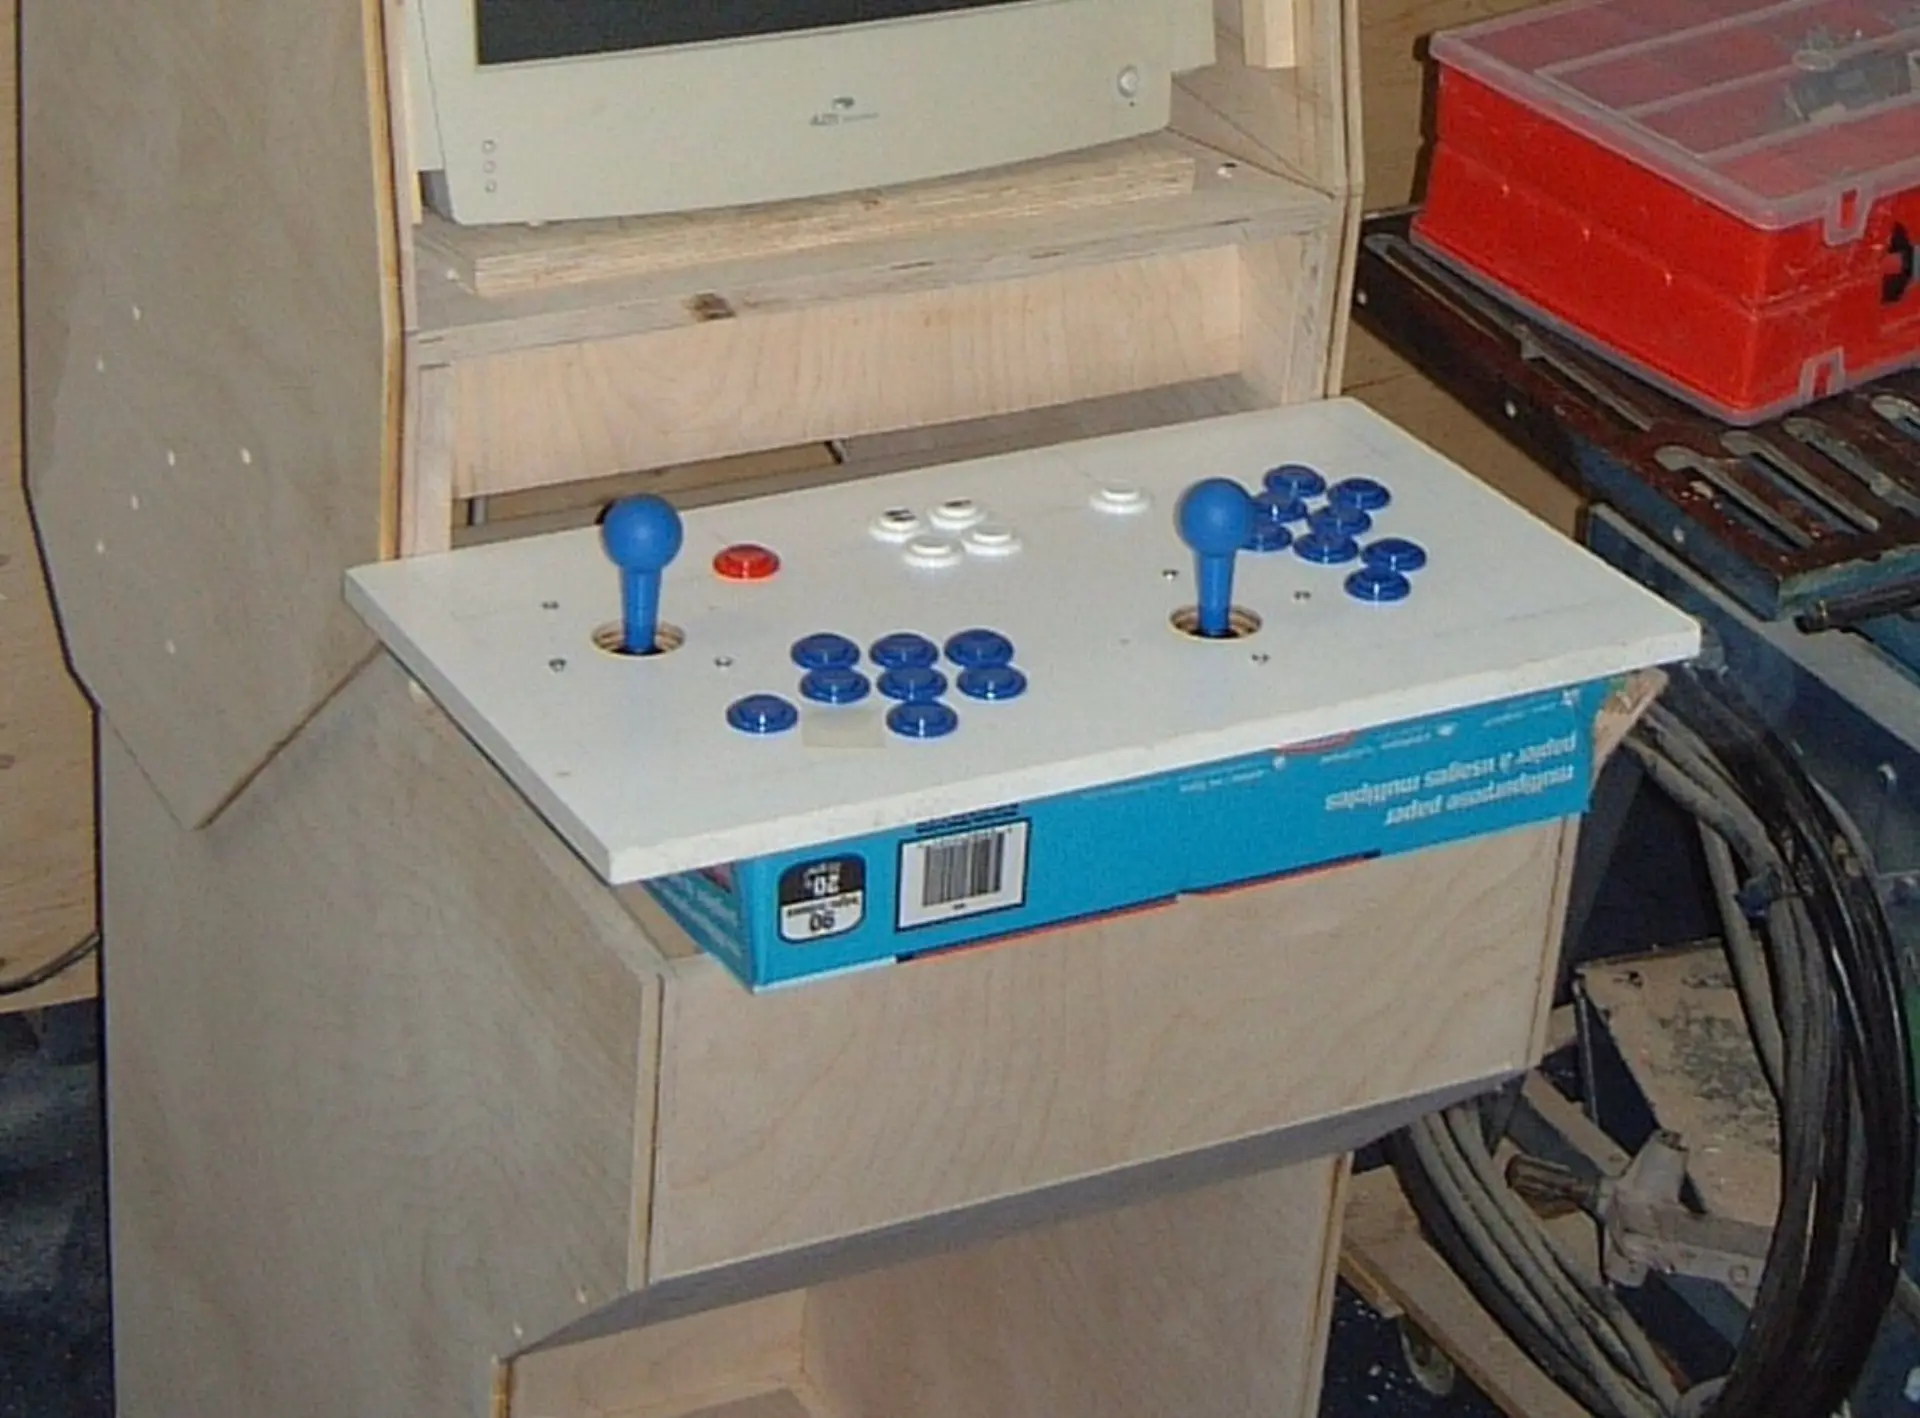
Building the cabinet itself is not very difficult. It’s mostly a matter of following the plans, measuring twice and being very meticulous. We built the base of the arcade first. It’s not until we finished the base that we realized how big this thing was going to be. I also built a prototype for the controls. This allowed me to test the joystick, the encoder and the buttons. In addition, most websites (and the book) recommend building a prototype control panel to test the button positioning.
The top part of the cabinet was pretty easy to assemble. The hardest part is making sure both left and right panels are properly aligned.
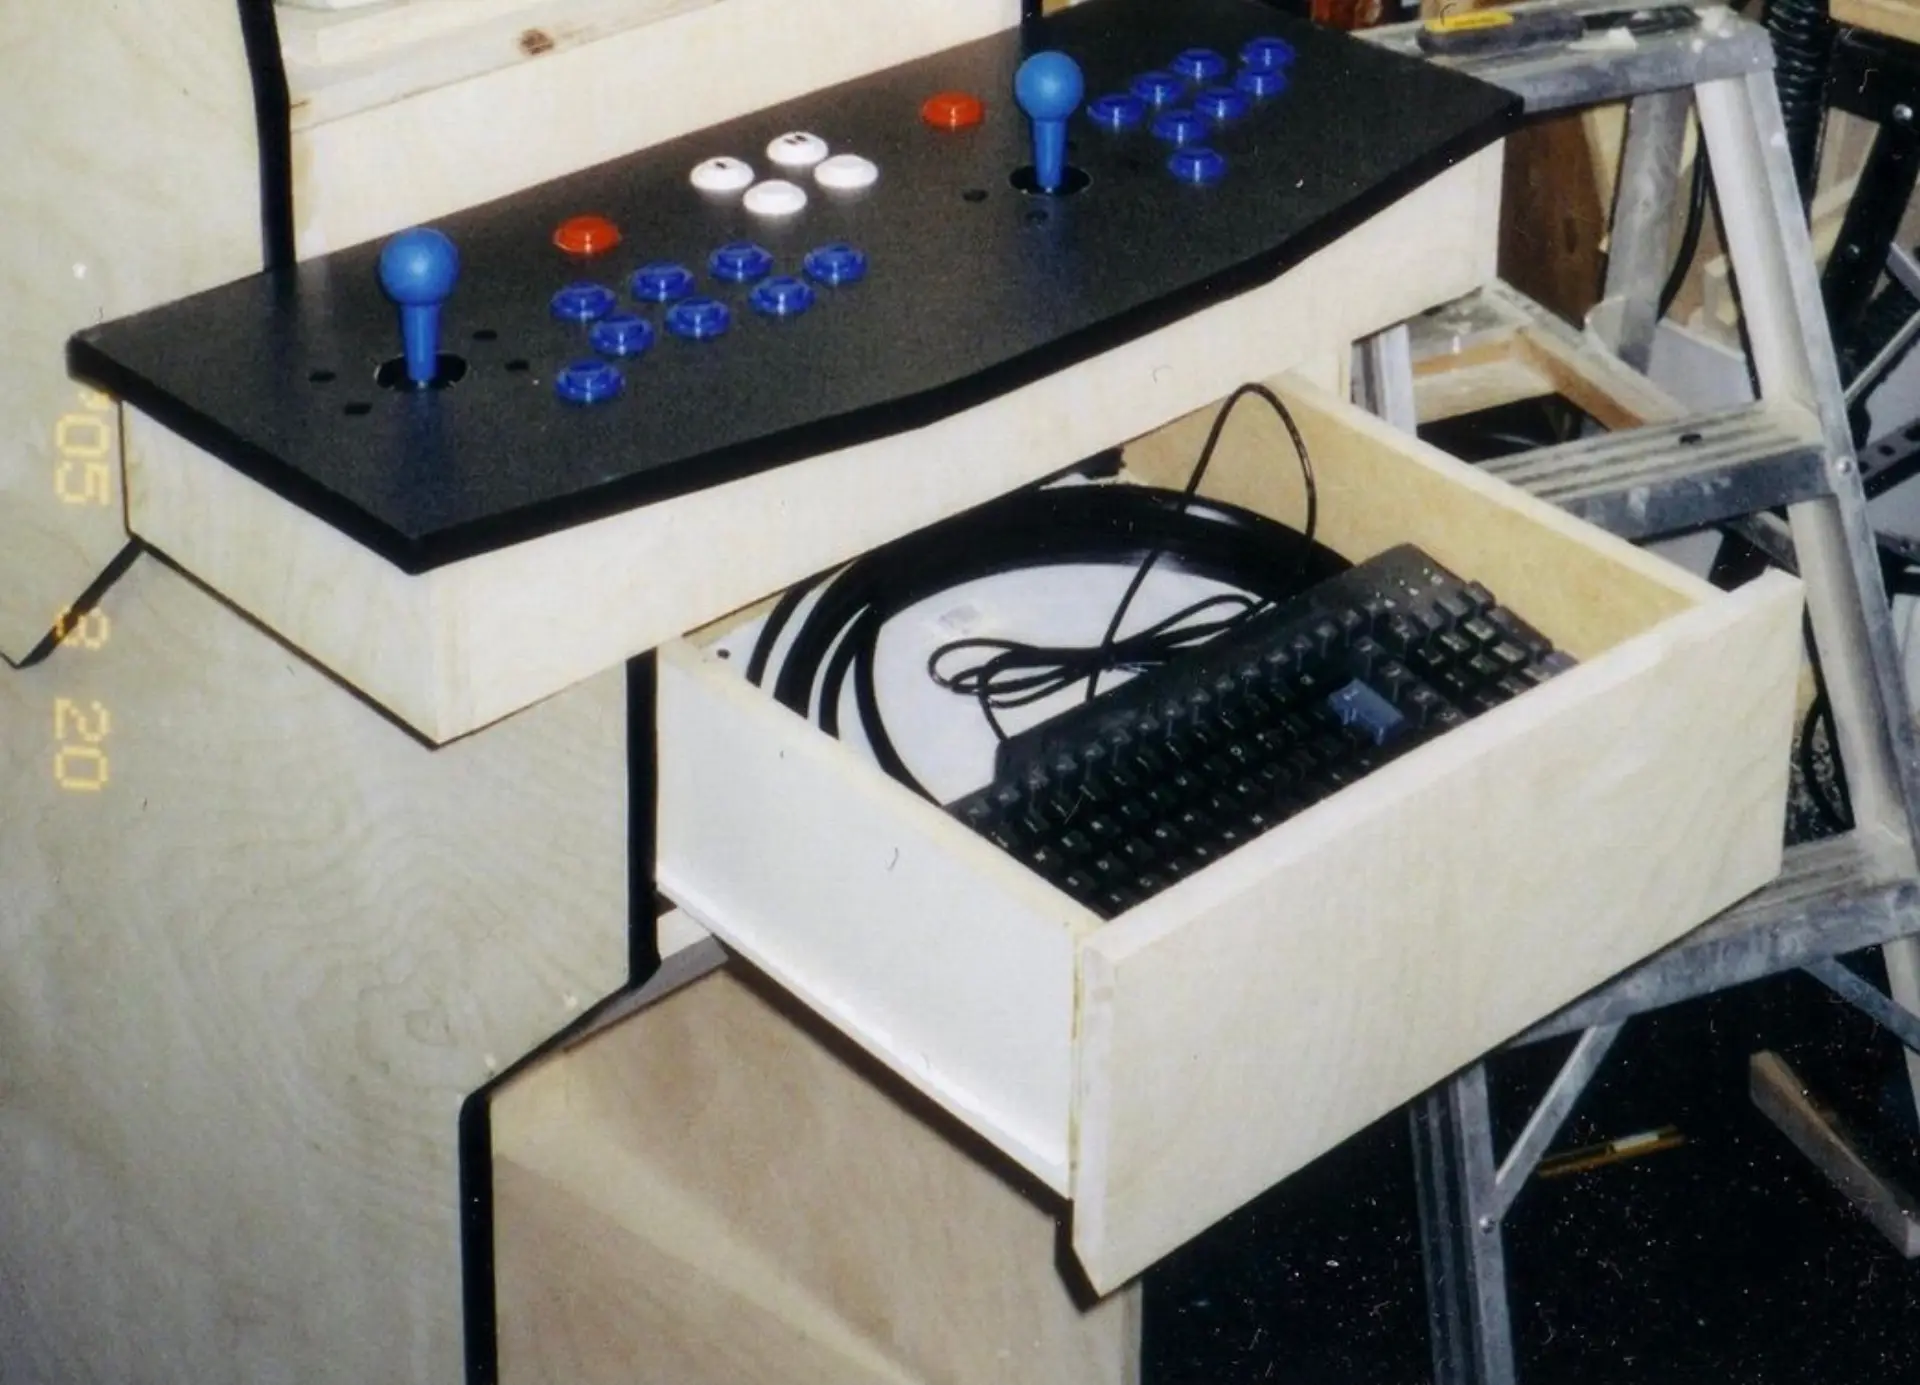
At this point, we made two small modifications to the plan. First, instead of closing of the front bottom of the cabinet, we added a door. This provides easy access to the computer and sub woofer stored in the base of the cabinet. We also added a drawer, so I could store a keyboard and a mouse for software maintenance.
One detail to keep in mind while building the cabinet is the T-Molding. Installing T-Mold requires you to cut a slot on the side of each board you want to T-Mold. This is done preferably before assembling the cabinet. Be warned that cutting the slots produces an insane amount of smoke, especially if the core of the board is made out of glued wooden fibers. I found that part of the project particularly difficult.
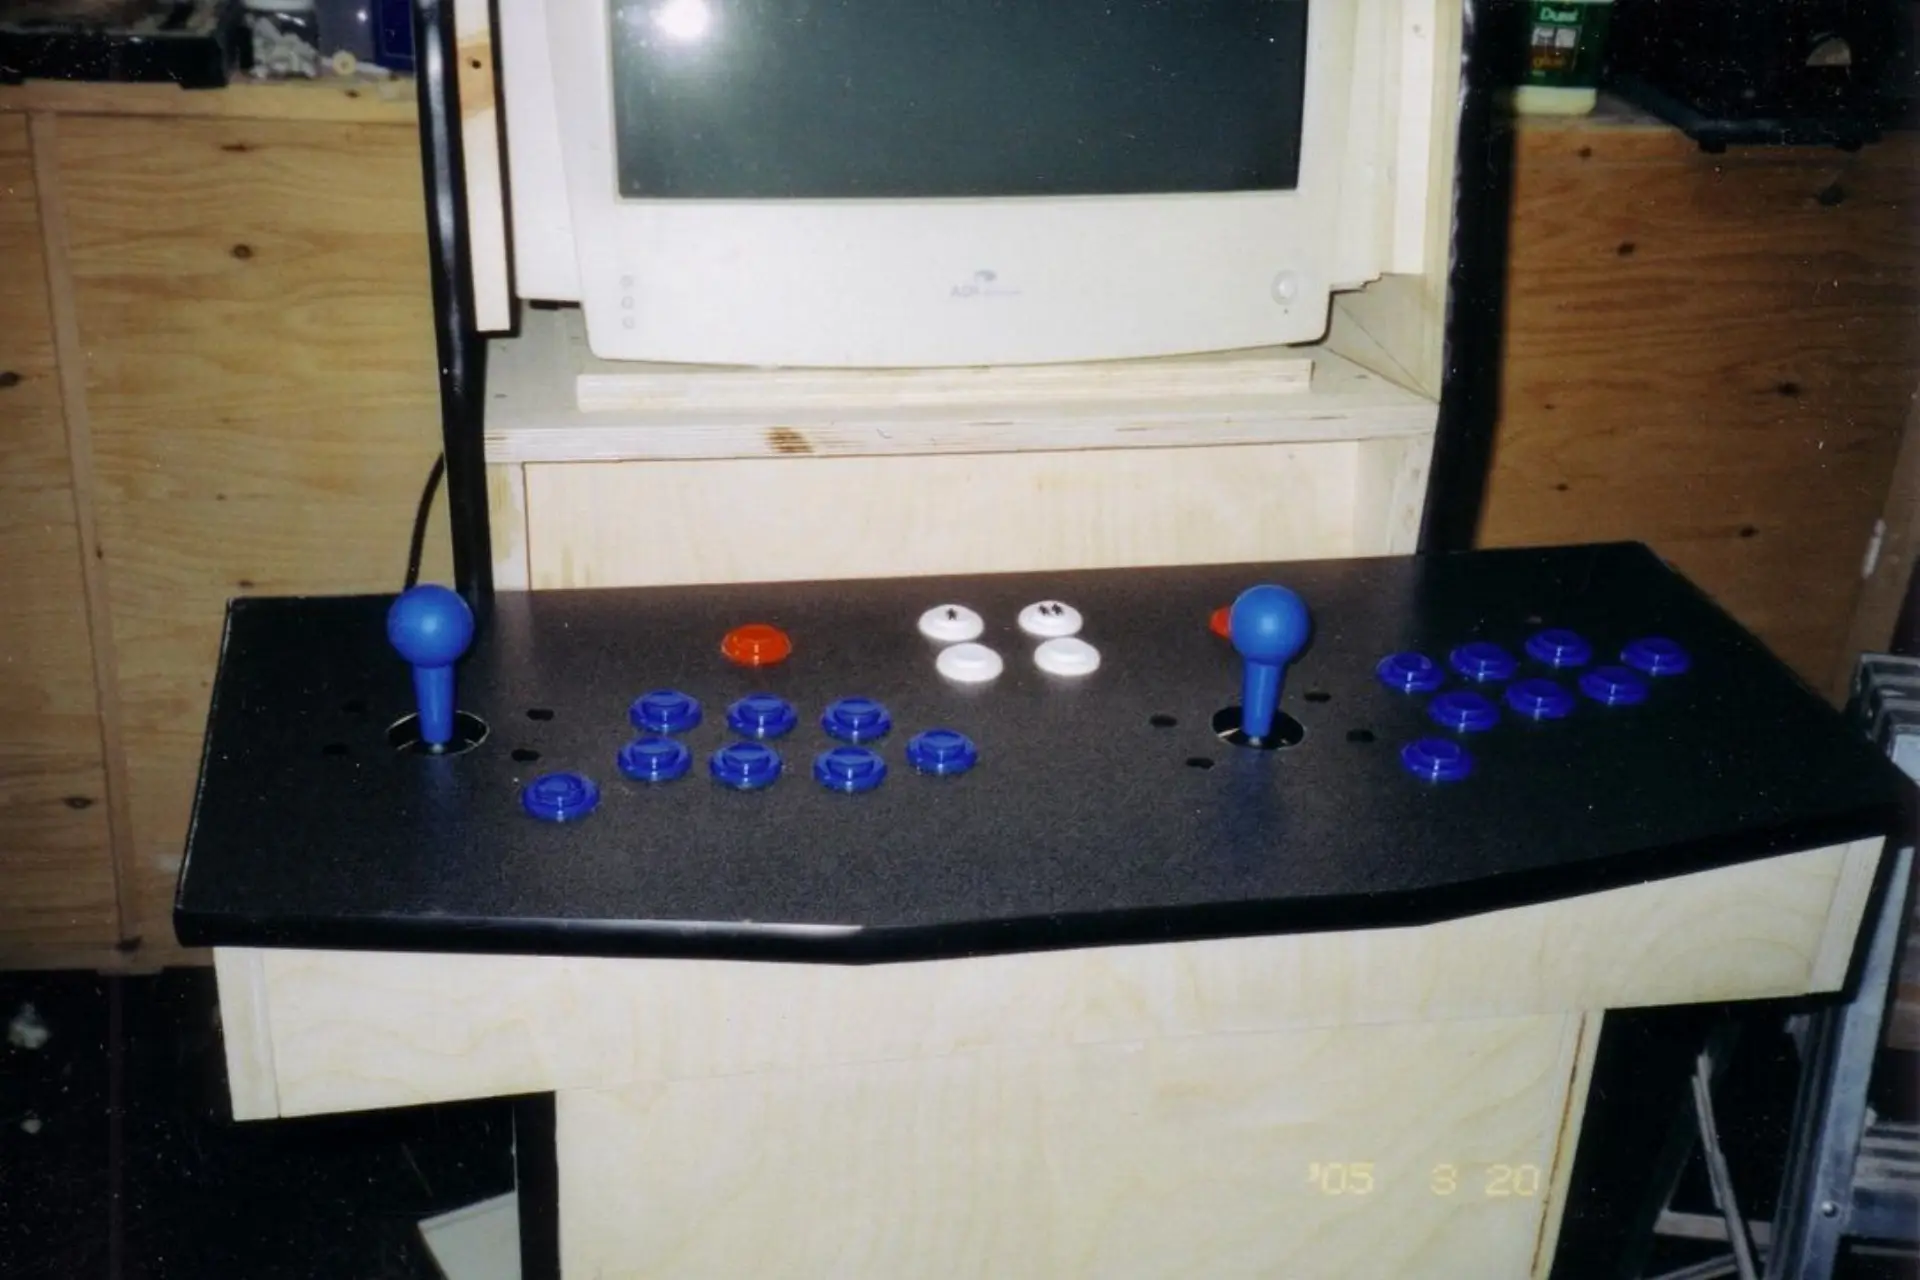
Building the control panel is another very difficult task. It is the component that receives the most abuse from players. For my cabinet, I decide to use a kitchen counter as the base for the control panel. My hardware store sells counters with small defects for a very good price. Kitchen counters are very solid surface, made to resist the worst abuse from a kitchen. Since my control panel is smaller than an average kitchen counter, I could easily cut out the panel and avoid the small defects. Extra pieces of counter were used for various pieces of the arcade, such as the front board and the board under the speakers.
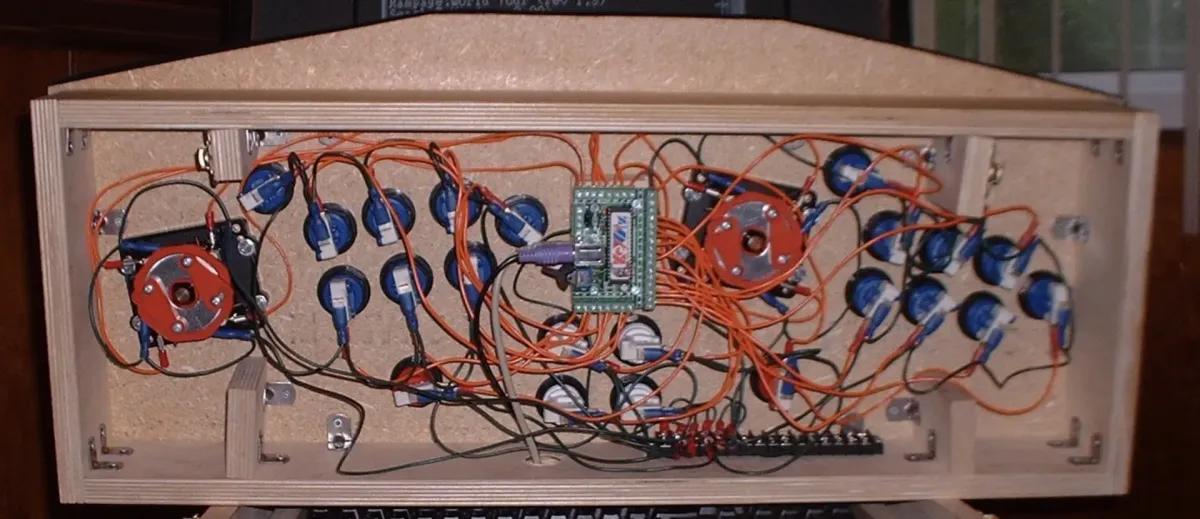
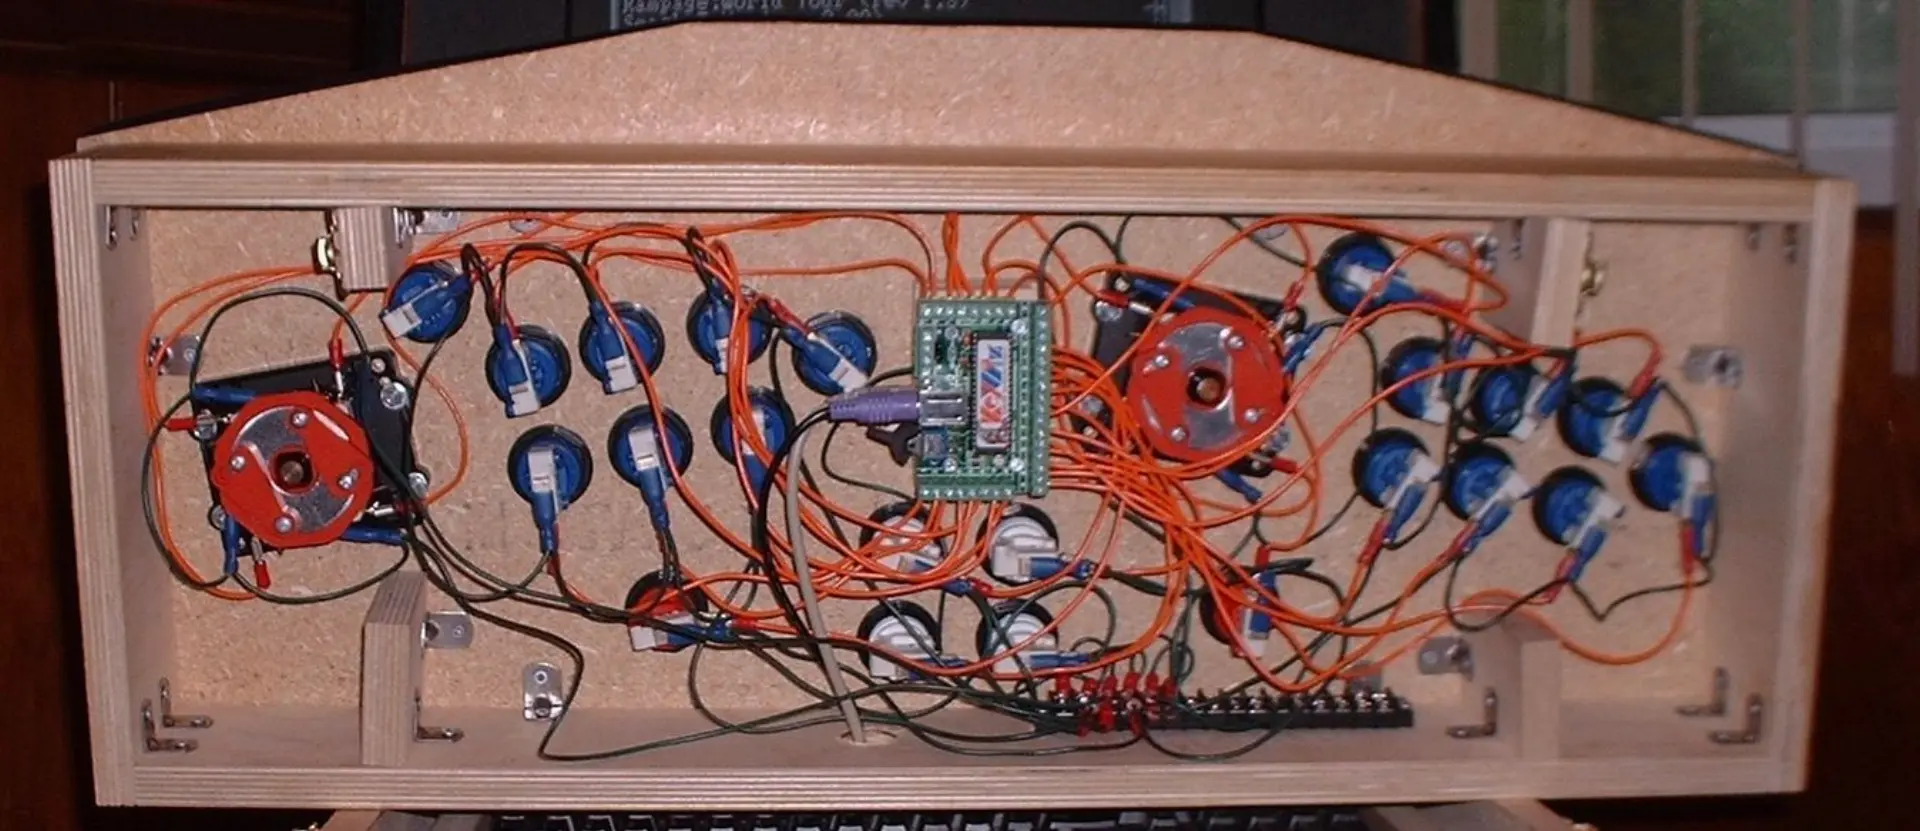
Wiring the arcade was not difficult, but I managed to make a mistake the two first times. Every switch in the system is connected to two wires, one connected to the KeyWiz and one connected to the ground. Since all the switches in the panel can share a common ground, you can save yourself a lot of grief by daisy-chaining the grounds and not using the KeyWiz itself as your central connection points for all your grounds.
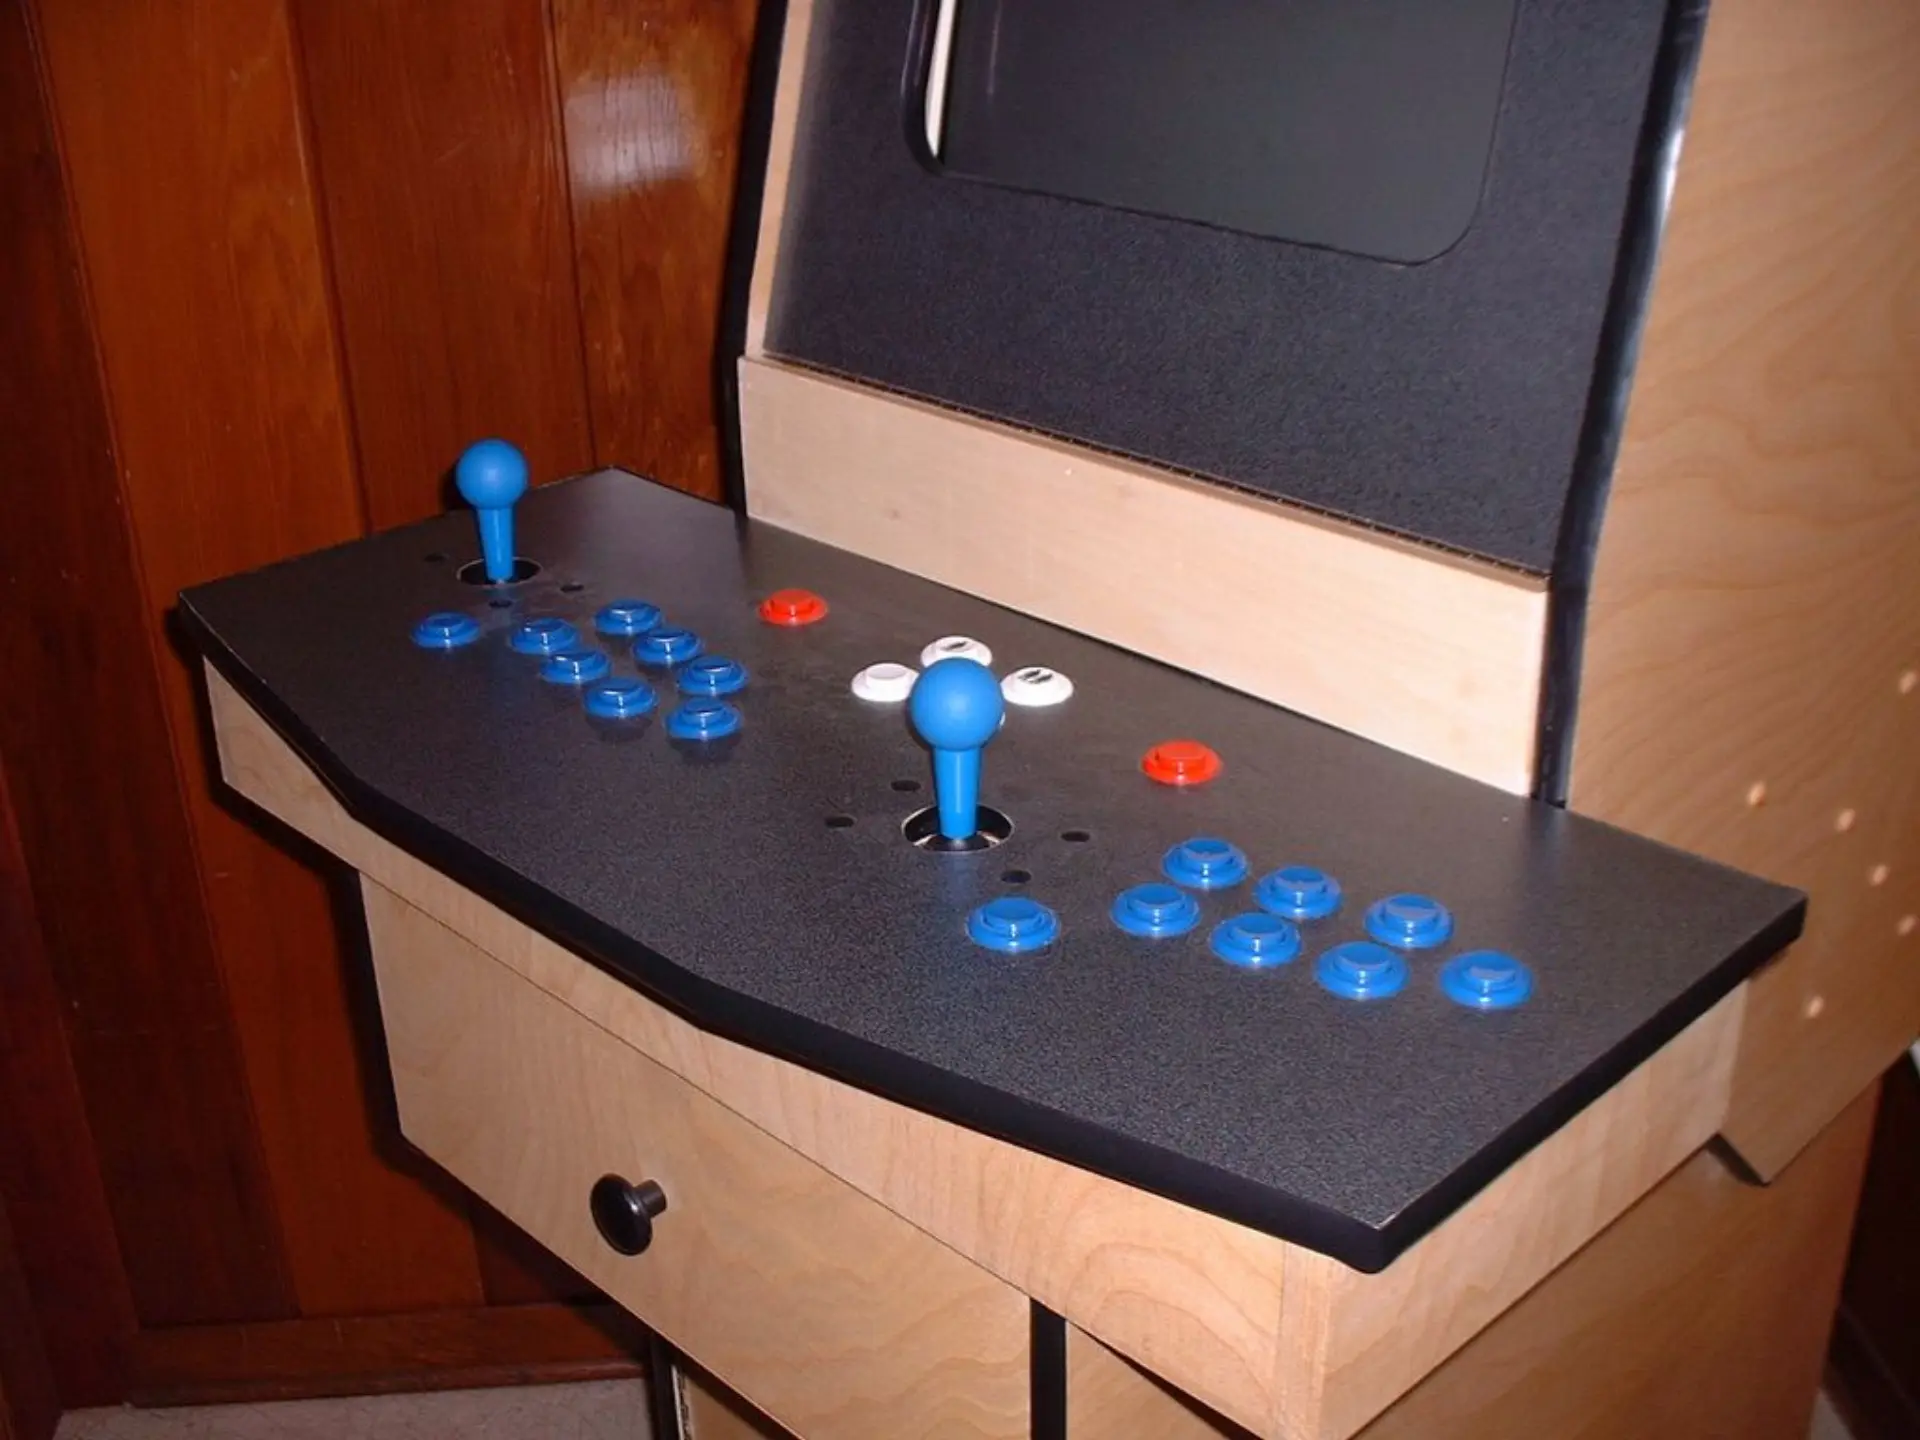
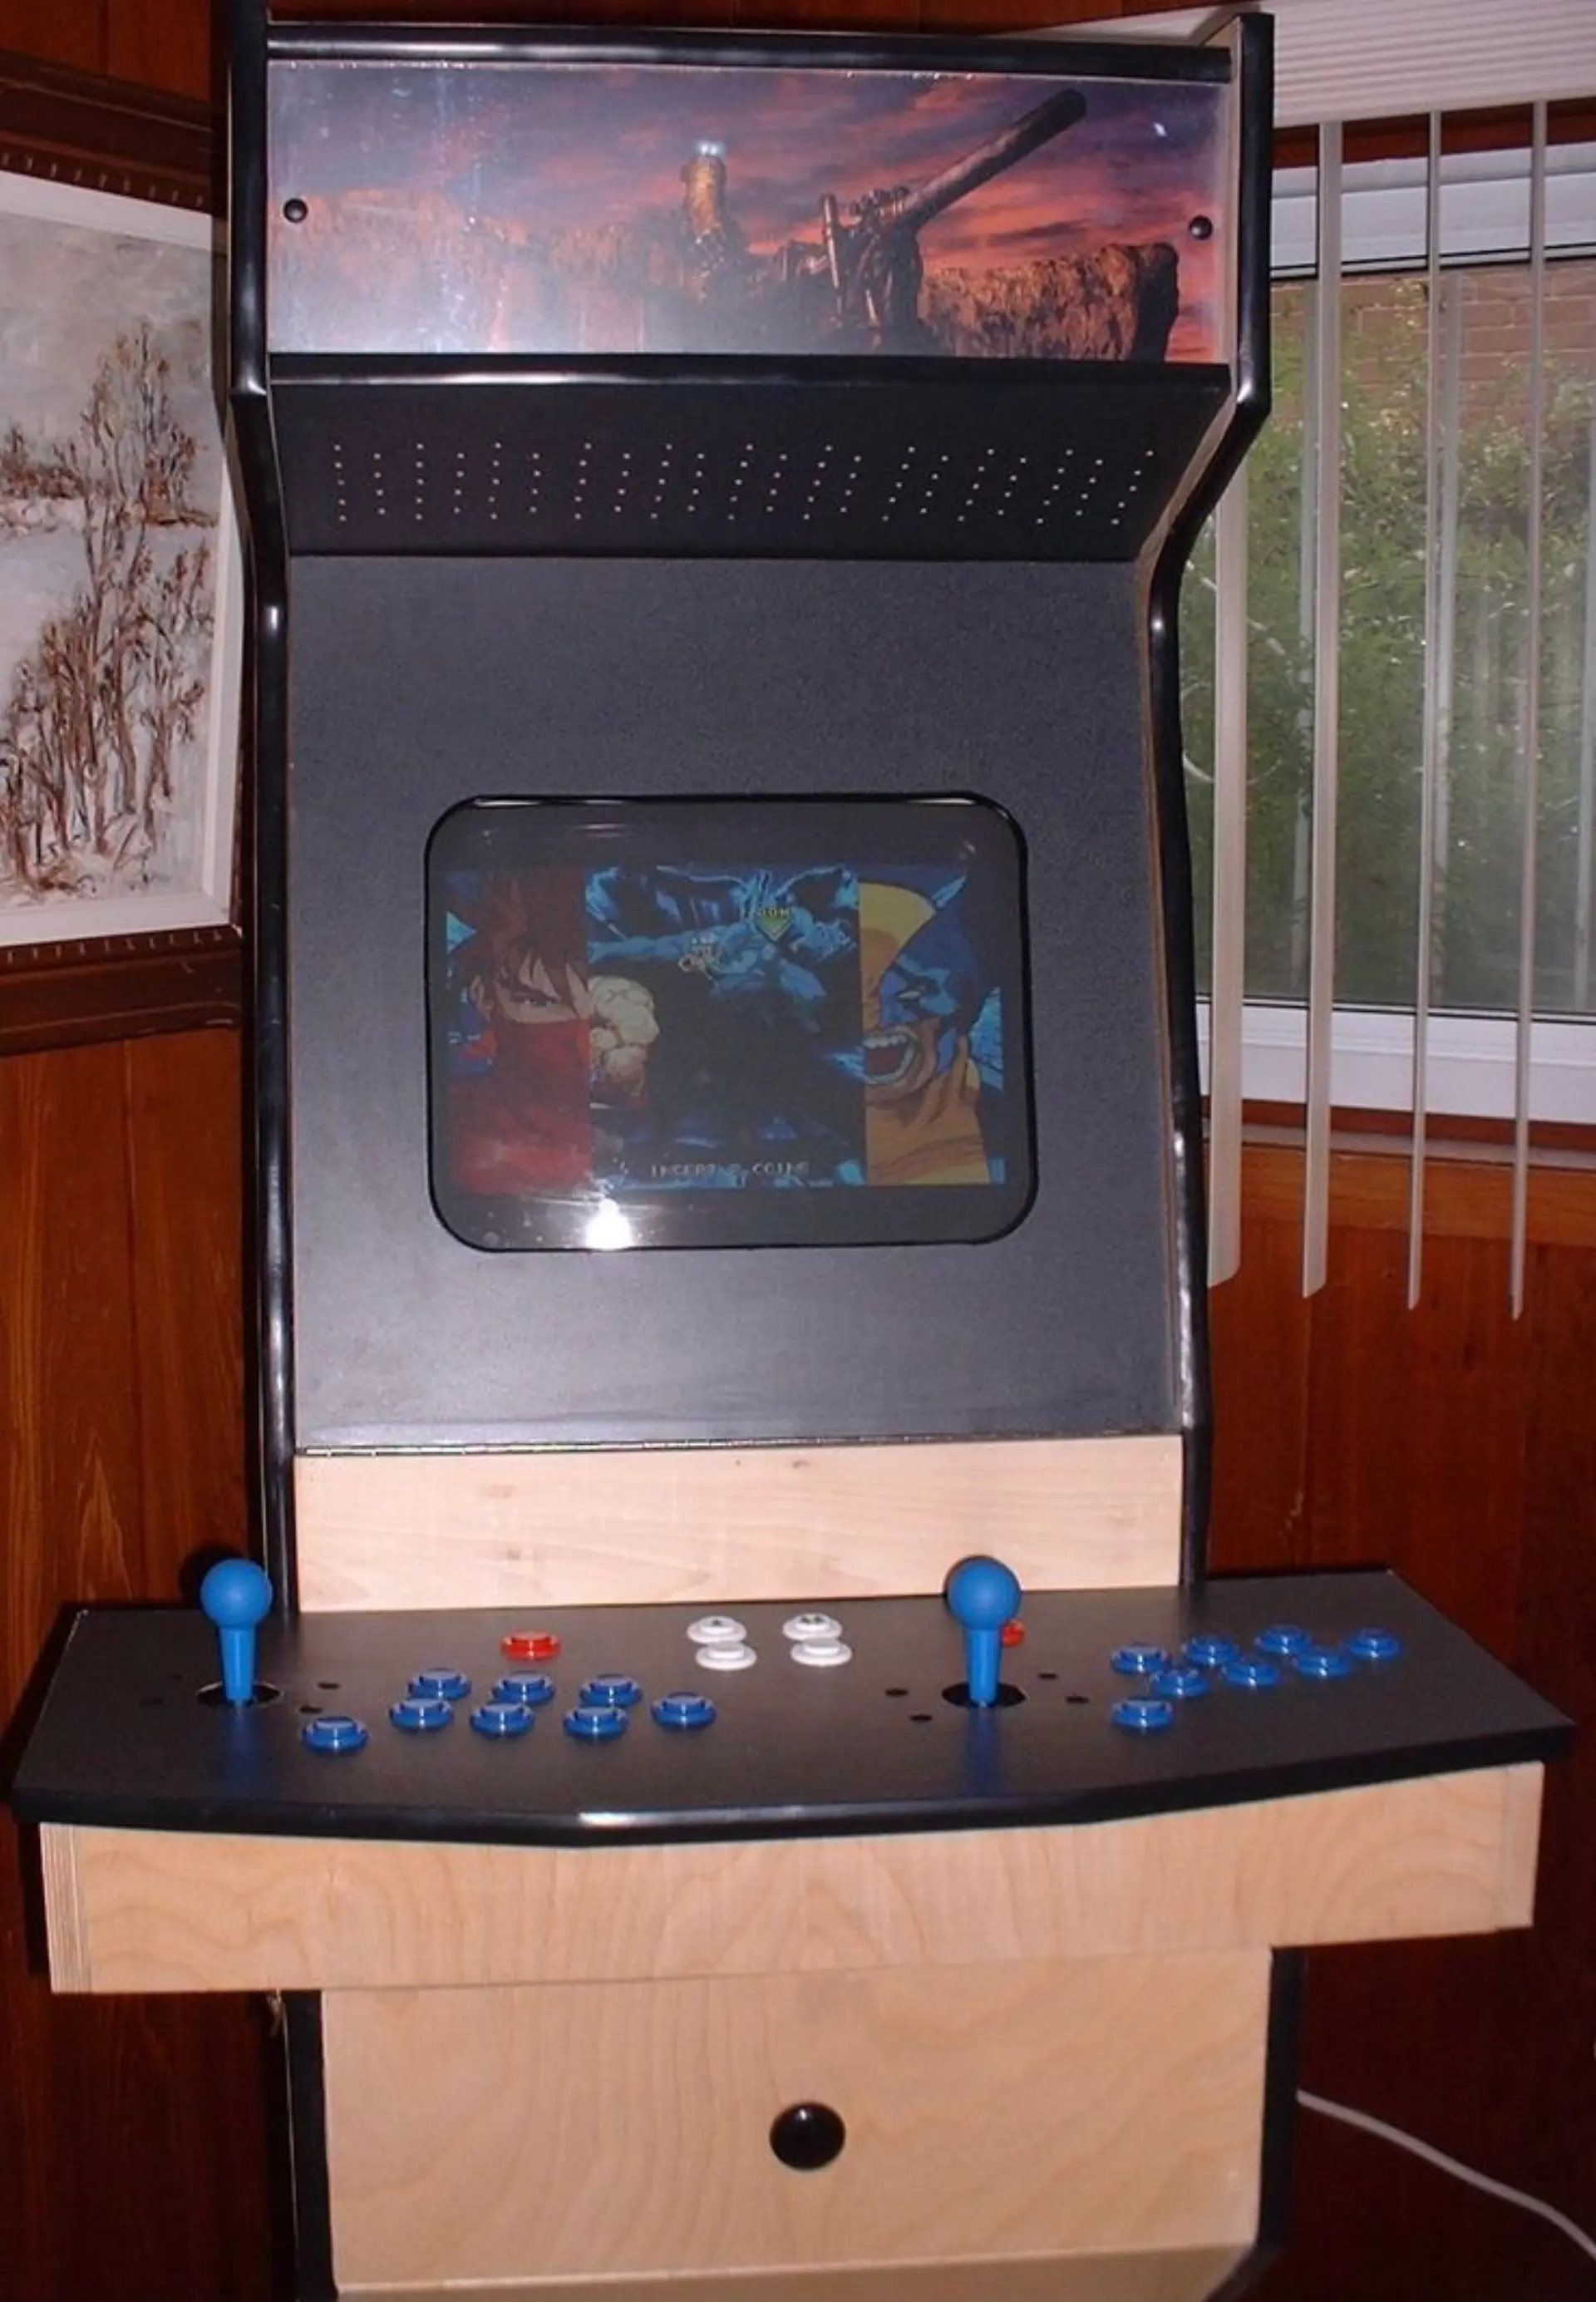
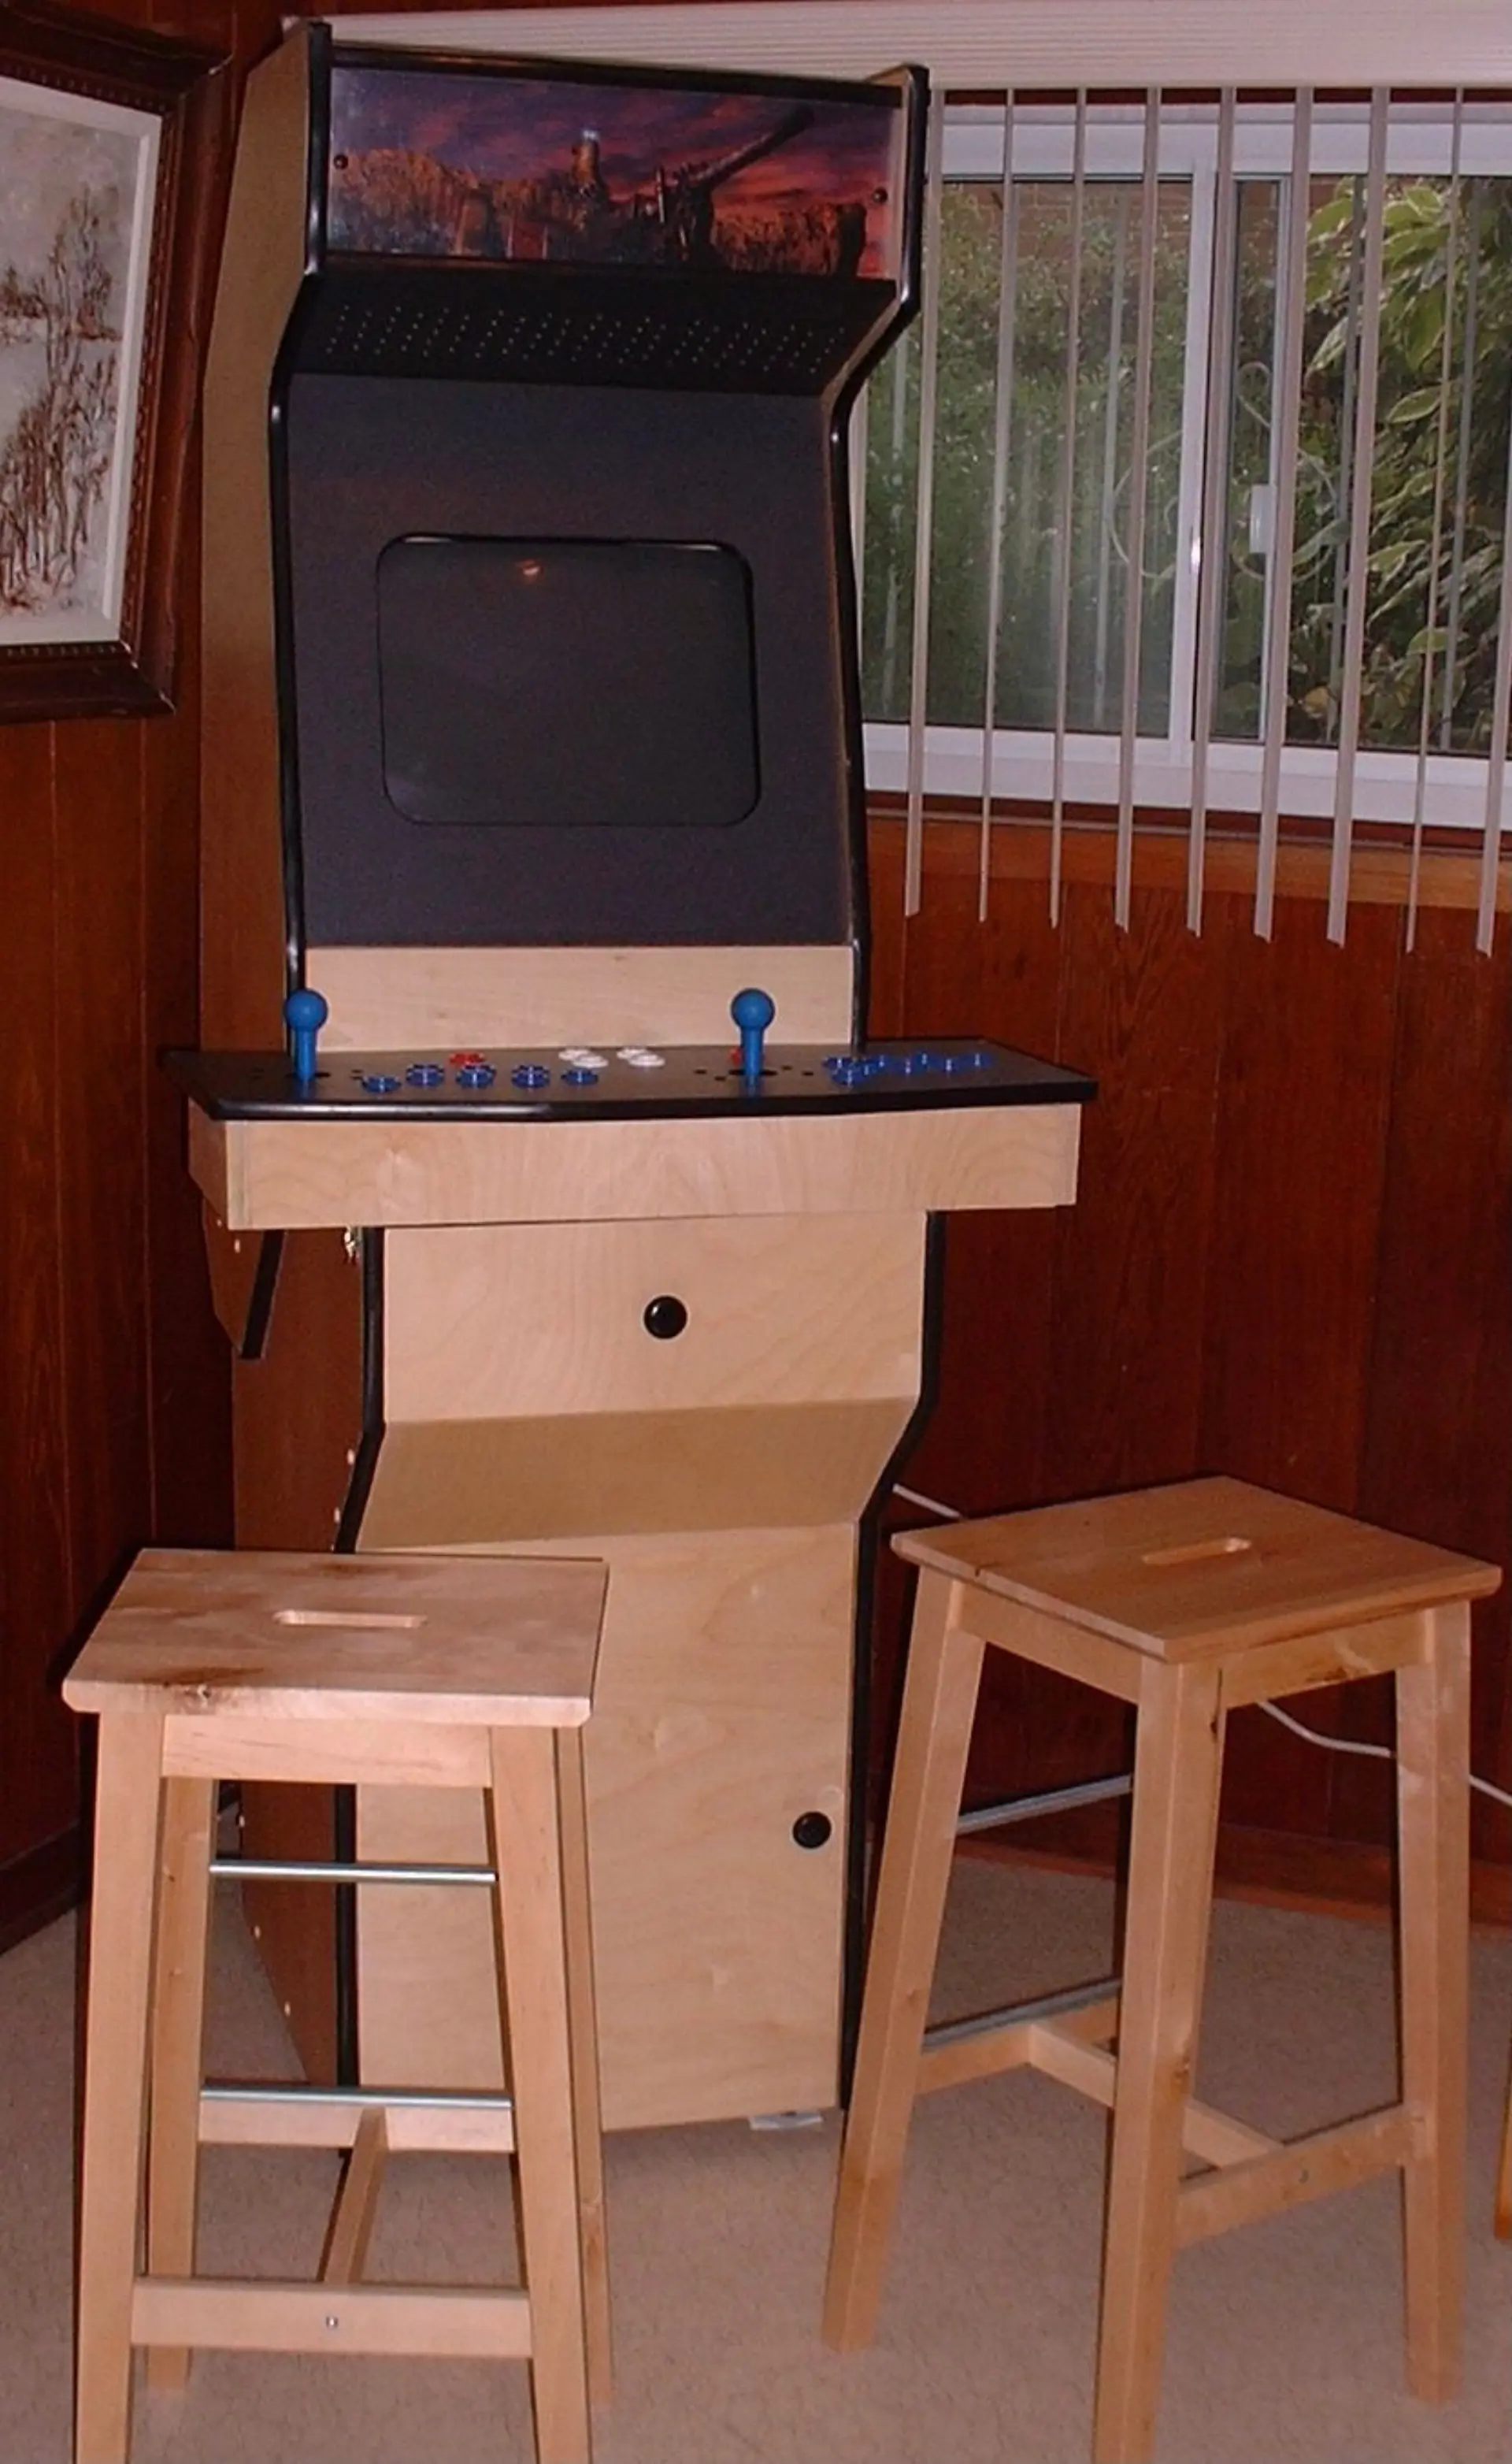
Once the cabinet was assembled, only two tasks remained : varnishing the cabinet and setting up the software. Like I previously mentioned, I wanted the cabinet to have a nice wood finish. Since varnishing with a brush produces an uneven finish, I decided to varnish the cabinet using a rag. The final result showed in the picture has 6 layers of varnish, with each layer being carefully sanded before applying another layer.
Choosing the right operating software for your arcade cabinet can be a very difficult decision. After reading up on the subject, I found that the decision revolves around three basic choices: Windows Xp, Linux or Dos. Being a big open-source fan (and not wanting to buy a new license for the computer), I tried using Ubuntu. Although I had no software or hardware problems, I found that the boot time for the arcade was too long. In addition, I found that Linux might be a bit too overkill considering I don’t need a fully multi-threaded operating system with multiple applications running in the background. Instead, I tried Dos. It was a little more difficult to set up since I didn’t install network support. However, the arcade boots very fast and the games are faster than under Linux (no slow-downs). Now, I only need to find a nice menu front end. I’m currently using ArcadeOs, but I’m having a few configuration issues with it.
So was the project worth it? Totally. Nothing can beat the feeling of trashing your friend at Street Fighter using real arcade sticks (the feel of victory is so much sweeter.
However, I would warn anybody planning such a project that an arcade cabinet is very big, and requires large amounts of space in your living room. As a next project, I might try out an arcade cabinet using an LCD screen.